This project is a subset of my idea of an Interactive Wallpiece .. so this is an interactive wall-piece..
What does it do ? Mine is a touch activated light display.
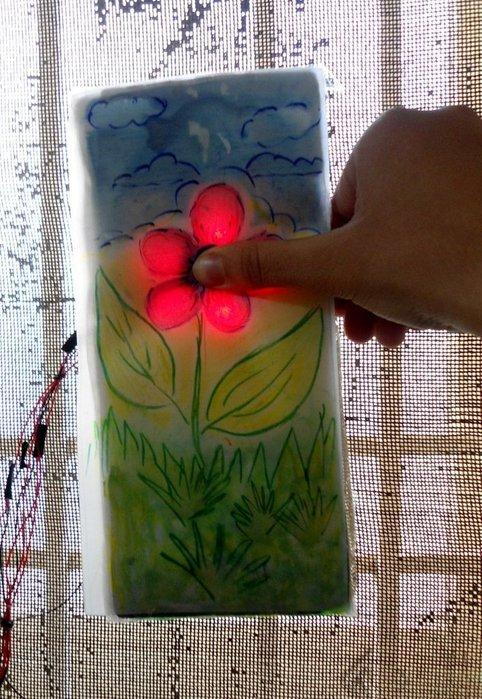

How does it work? It is controlled by an Arduino UNO which senses the inputs and turns on the respective outputs.
Lets watch it in action!
[mom_video id=’jFX63NzfbQg’]n here’s a more recent interactive art that we built during a workshop. Have a look..
[mom_video id=’DLXsjj1pLg8′]Alright, so lets go about building one..
Step 1: Building the Touch Sensor
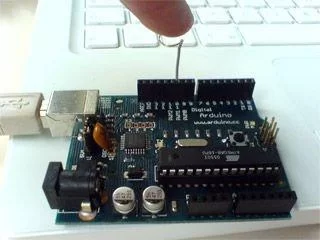
If u have an Arduino board, building a touch sensor is a cakewalk..
U dont need ny external hardware to get the sensing functionality.
All u need to do is upload the following code on ur board, turn on ur serial monitor and then touch the metallic wire to see the change in the value. 🙂
What does the code do? It returns the time that the pin takes to discharge. When it is touched, it takes more time to discharge. U need to adjust the threshold to currectly identify a touch.
Even If u cant understand the function which calculates the value of the pin, it is perfectly ok.. There are only 2 modifications needed according to ur design.
1) The number of touch sensing u want
2) Threshold setting
Here’s a lil shaky video about how u can see the difference in the capacitance value of a pin when u touch it. <my camera wasn able to focus well so>
Lemme explain what happens in the video. When the pin is not touched, I get the value 1 at the pin [as can b seen on the serial monitor]. When the pin is touched, the value goes higher than one, depending on how much u press the wire. Again when released, the pin value goes back to one.
Once the sensing goes well, we build the whole contraption!
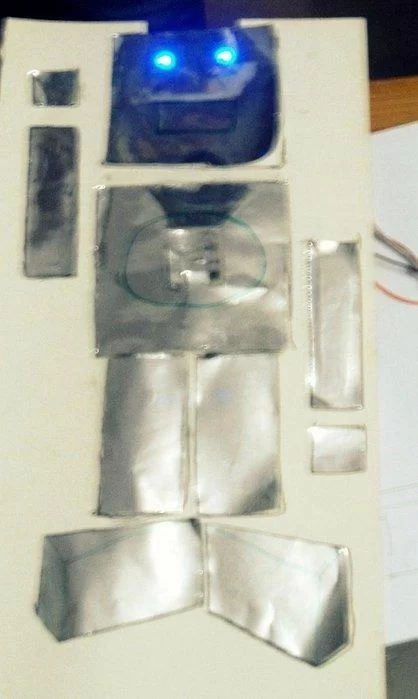
We shall first see the simpler one, which is the steel colored Robo.
Function : Touch anywhere on the face and the eyes glow.
Touch anywhere on its shield and see the ‘A’ glow.
For building the Robo, I used thin metallic sheets of silver color.
The connections are simple. Just connect a thin metal wire from the sensor areas [2 in this case: face and shield] to any of Arduino digital pins 8 to 12. [They say even 13 works but my trials found it wasnt as reliable as other pins]
Connect the 2 blue LEDs together [for the eyes] and connect the ground to the common Arduino Ground and the Positive supply wire to other Arduino digital pins [3 through 7 were the pins where I connected the outputs and 8 through 12 were the input pins]
Sorry got no pics of the robo while it was built..
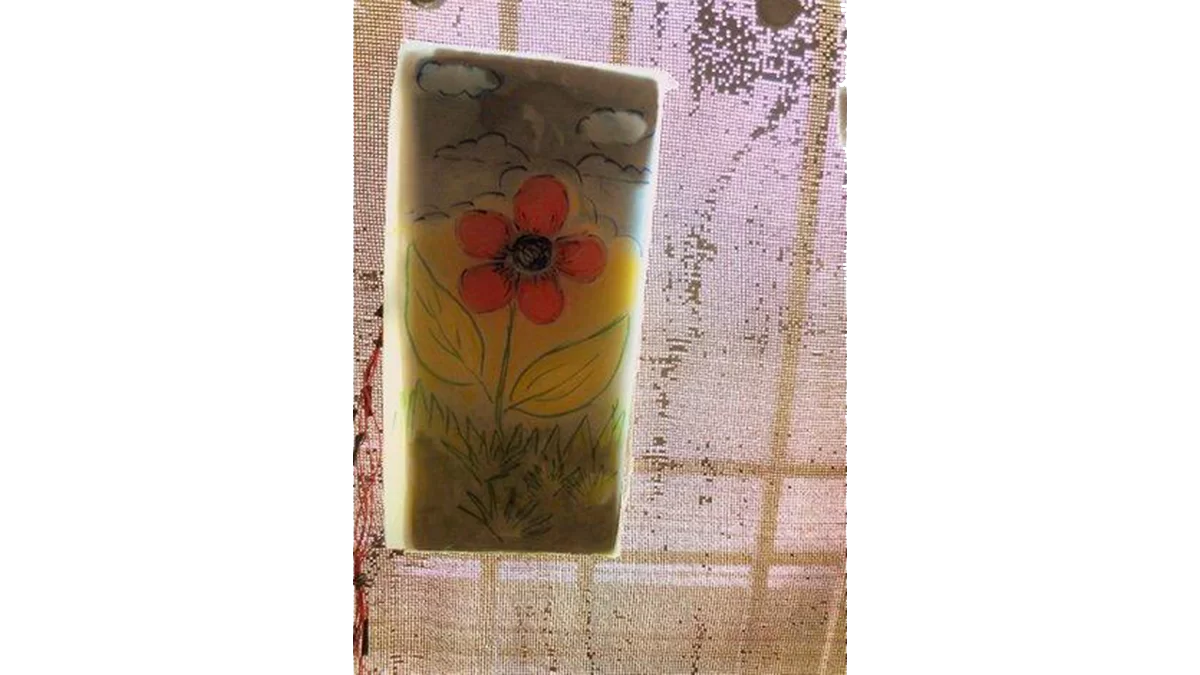
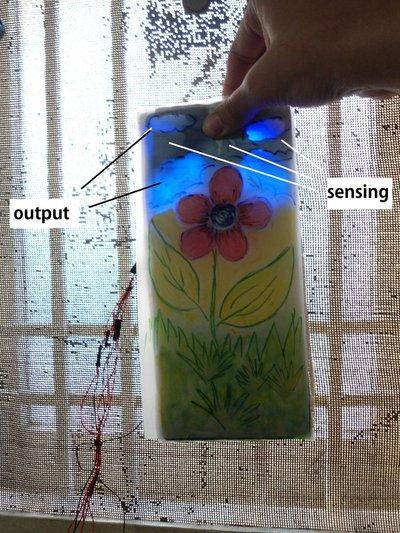
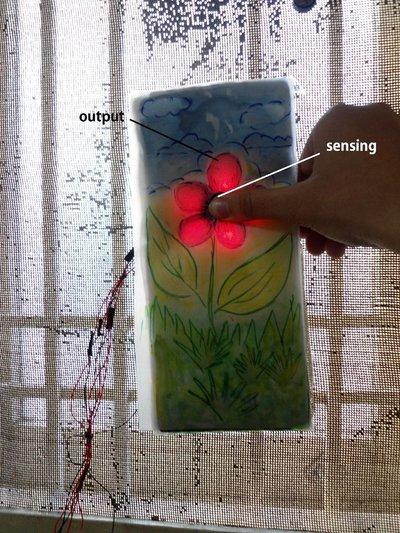
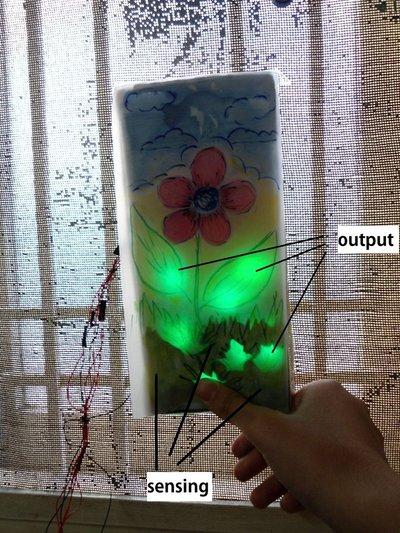
Now we go through the building of the flower piece contraption. Its a lil tricky!
Step 3:
Here s something that u need to consider while making ur design.
U cannot get the sensing and the light output at the same location.
The reason being that wherever u include touch sensing, u would b adding aluminium foil or some other thin metal sheet either on the surface or beneath. The foil/sheet wont allow the LED light to pass through!!
It didnt matter much in case of the Robot design <until We would want to touch the Eyes itself to get them glowing >
Follow the pics below to see where did I place the sensing and the outputs. [The darker areas are those which have the foil beneath and are capable of sensing]
Try to make the whole thing work more intuitively by putting some time for designing it.
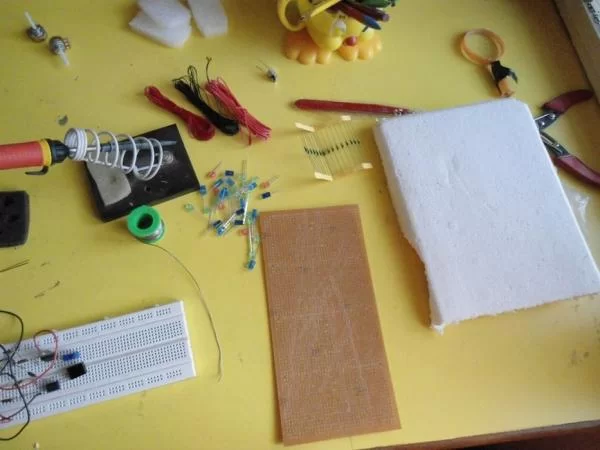
Step 4: Construct the LED Circuit
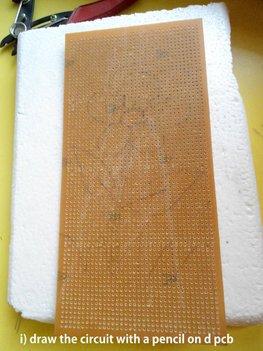
This is quite simple.
i) draw a rough sketch on the PCB.
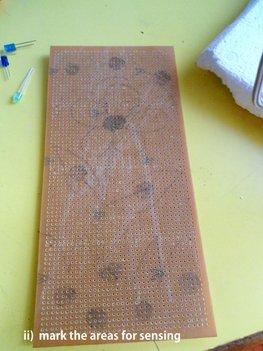
ii) Mark the sensing areas
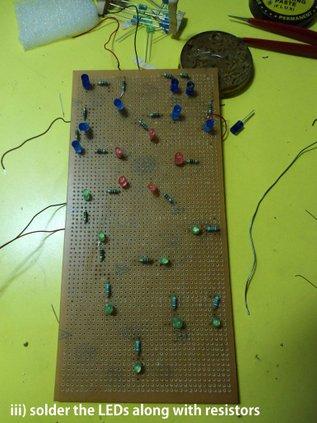
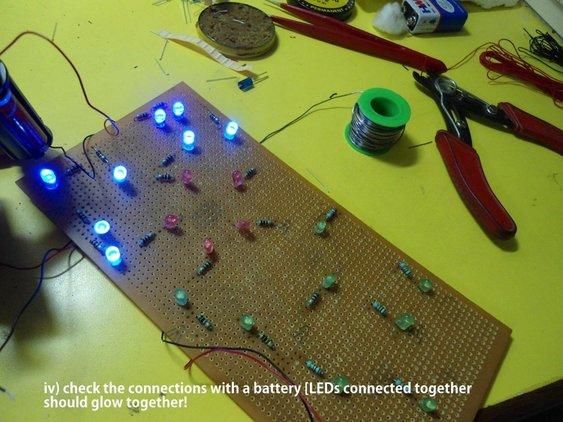
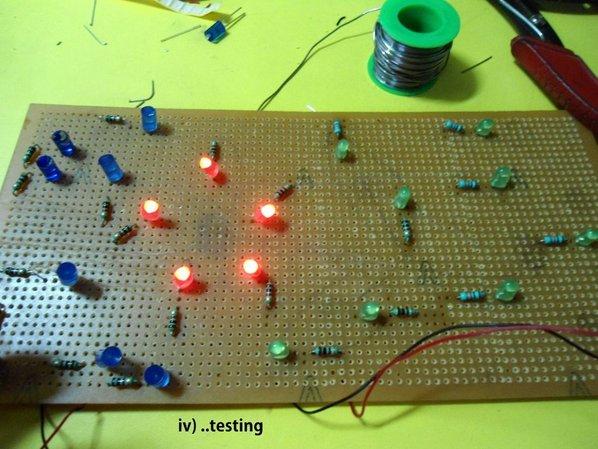
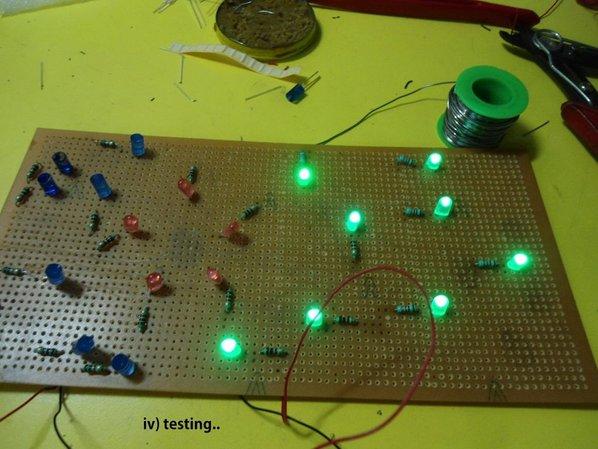
iii) Solder the leds along with resistors.
The leds which u want to glow simultaneously, connect them together.
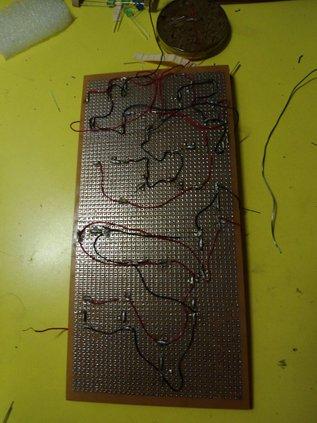
iv) Test the connections using a battery. Fix any errors.
Once its done, we construct the sensors.
Step 5: Construct the Sensors -part 1
For this step, u need
i) Aluminium foil
ii) some thermocol sheet
iii) scissors, gum
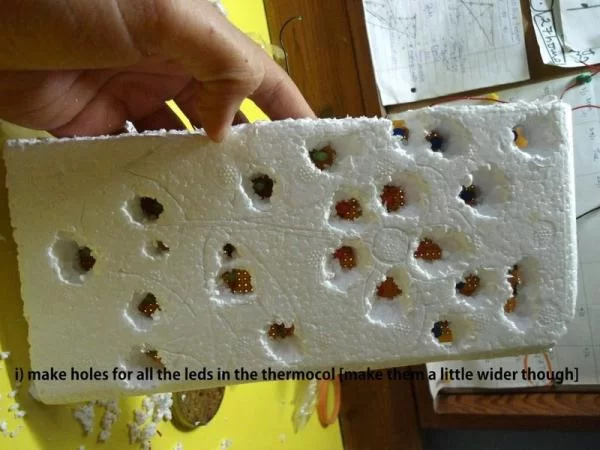
First cut the thermocol the size of your artwork.
Then make holes on the thermocol through which the leds can peep through.
Make the holes a lil wider so that u get a diffused lighting instead of sharp point like effect.
Cut aluminium foil of required sizes at places where u want the sensing.
Step 6: Construct the Sensors – Part 2
For this step, u ll need
i) more aluminium foil
ii) water colors n brushes
iii) thin sheet of foam
iv) butter paper
v) pencil colors n sketch pens
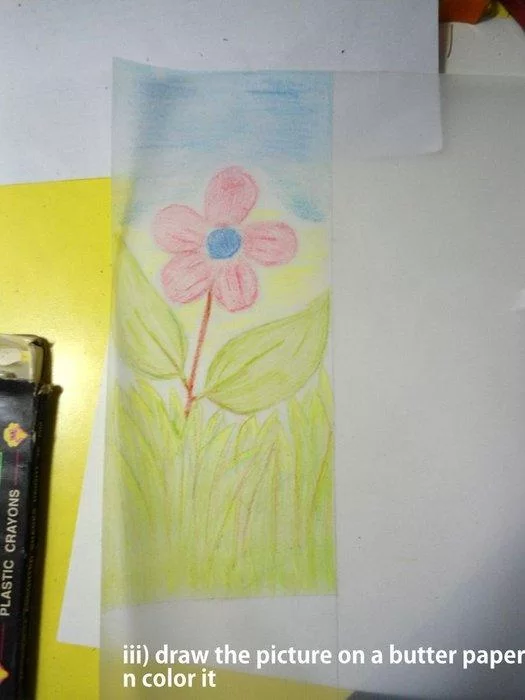
Sketch the picture on the butter paper and color it. [I used pencil colors]
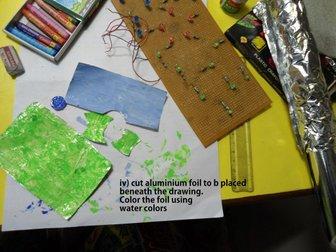
Then cut some more aluminium foil and color it too.
Put it beneath the paper using some dry gum stick [eg. fevistick]
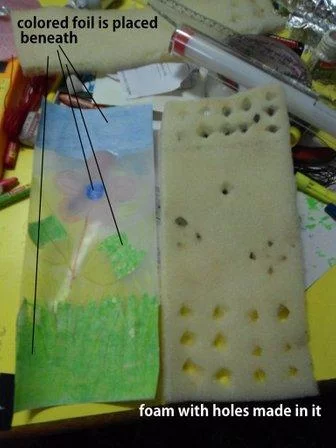
Now comes the tricky thing. We put a foam between the thermocol and the butterpaper which ensures that normally the 2 foils [one beneath the butter paper and the other above the thermocol] do not come into contact. Put when u press , the two come into contact via the small holes in the foam, and it is equivalent to the touch action that we performed initially.
Step 7: Putting the Whole Thing Together
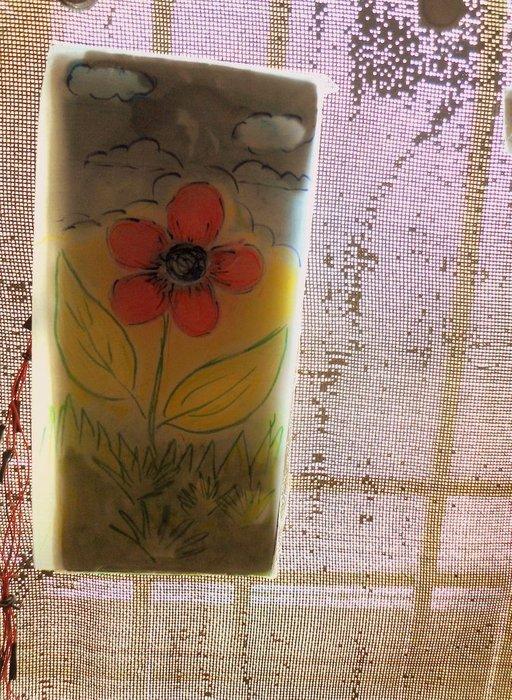
We are almost through now.
All you now need to do is take long thick connecting wires from the sensors [sky,flower and leaves] and insert it into any of the digital pins of the Arduino and configure them as inputs in your code.
Then take connecting wires from the collective LEDs [again 3 wires, sky, flower and leaves] and connect it to the digital pins and configure them as outputs in the code.
Then connect the whole thing together using tape on the side.
Test. Debug. Have fun.
About The Author
Hassan Zaka
I am an expert in accounting and possess diverse experience in technical writing. I have written for various industries on topics such as finance, business, and technology. My writing style is clear and simple, and I utilize infographics and diagrams to make my writing more engaging. I can be a valuable asset to any organization in need of technical writing services.
Follow Us:LinkedinTwitter