I guess I should start by admitting that “Arduino watches for a kitchen catastrophe” article was inspired by my own stupidity. When I was a kid, I left a frying pan on a lit stove. I was probably confused by the tactile controls on the vitroceramic hob. Unfortunately, I unwittingly turned the stove up to maximum. Thinking I had actually turned it off, I went to watch TV.
Some minutes later, the living room started filling with smoke. To make a long story short: The oil in the pan was on fire and, to make things worse, I tried to put it out by running it under a faucet.
So, I was a dumb teenager, but this kind of thing could happen to anyone. Fortunately, cheap and easy solutions are available for monitoring your home to minimize risks of fires, gas leaks, and damage by water.
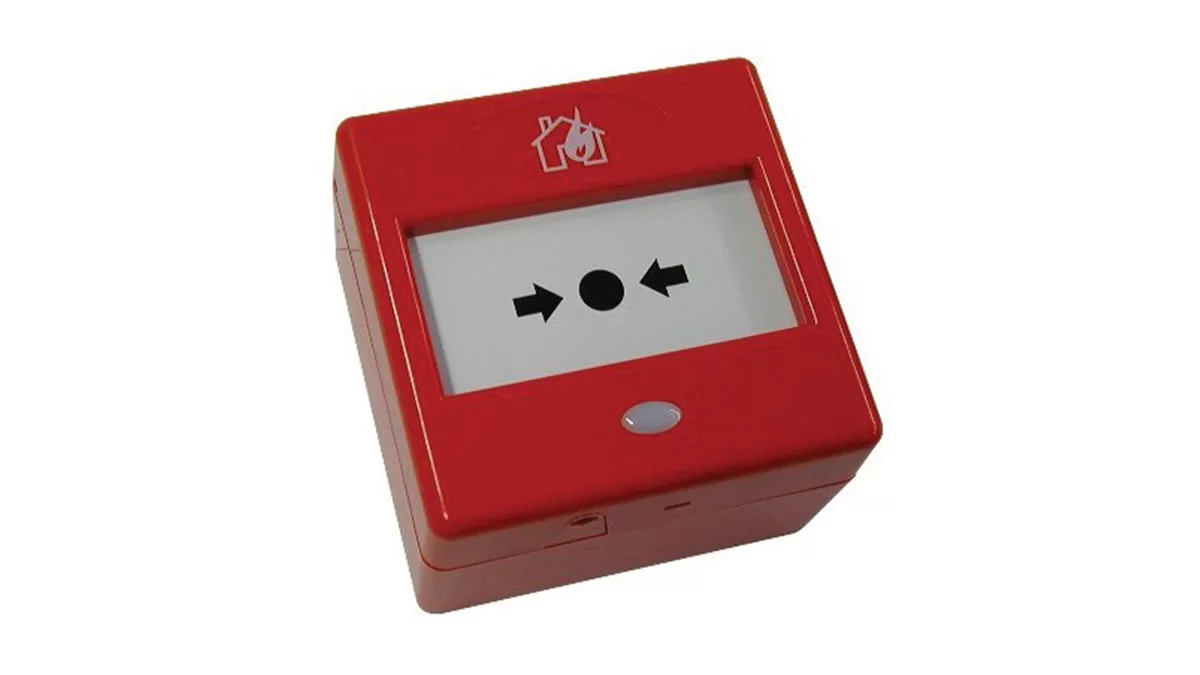
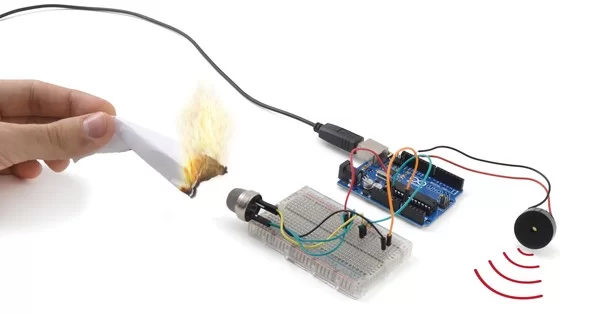
This article describes how to create an alarm system on par with commercial home alarm systems (Figure 1). I’ll focus on monitoring the kitchen, which is where accidents are more likely to happen.
Potential Hazards
Sensors are a common theme in articles about Arduino and Raspberry Pi: distance sensors, humidity sensors, luminosity sensors… In this case, I’ll focus on sensors that can detect dangers in the home. Because fire is one of the most common and destructive hazards, I’ll look at some devices that are normally very small and are commonly used for fire detection.
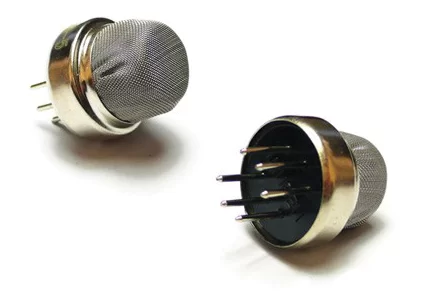
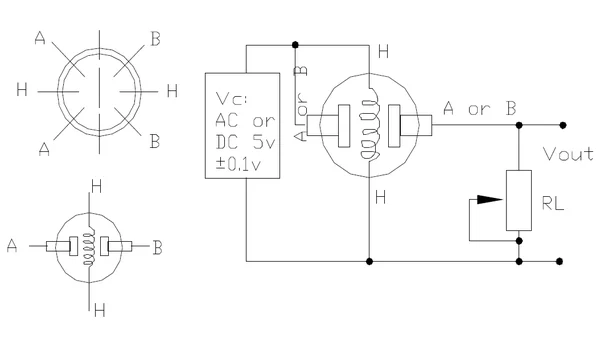
In the first example, I will build a homemade fire detector with a smoke sensor [1]. This sensor is tiny, as you can see in Figure 2, and it has six pins that allow you to measure the presence of various types of gas, but its main function is to indicate the presence of smoke. Figure 3 shows the schematics of the pins and the basic configuration. I have to feed in 5 volts between pin H (5V and GND) and pump 5 volts into A as well to get the analogical signal proportional to the amount of smoke from B. To adapt the current, place an RL resistor of between 3K and 30K between the signal in B and ground. In this example, I used a 4K7 resistor.
The second example in this article uses a methane sensor [2] to detect possible gas leaks in the kitchen. The methane sensor allows you to detect fires and methane leaks in homes and small workshops. The configuration for the methane sensor is similar to the smoke sensor.
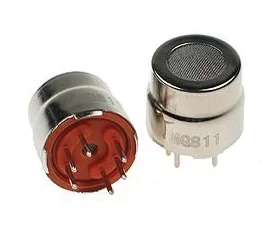
Of course, you can add many other kinds of smoke and gas detectors with similar characteristics. By studying the spec sheets [3], you can see the basic circuits of each, so it shouldn’t be difficult to adapt these concepts to your needs. As you can see in the CO2 sensor in Figure 4, for example, the sensors are similar in size and are encapsulated in similar way, so you can develop a very modular system.
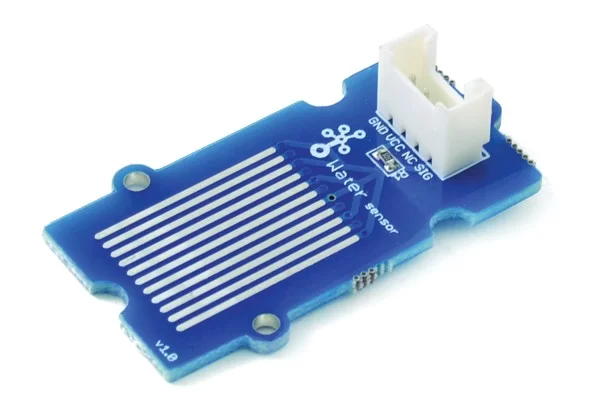
Another danger in the home is the possibility of flooding caused by leaks or broken pipes. To detect this kind of hazard, I will use a system [4] that detects water based on the principle that water conducts electricity.
As you can see in Figure 5, along the surface of the sensor are a series of conductive strips, which are activated in the presence of water, delivering an output signal of 1. The code will take the value of 0 as a sign that everything is dry.
Activating the Alarm
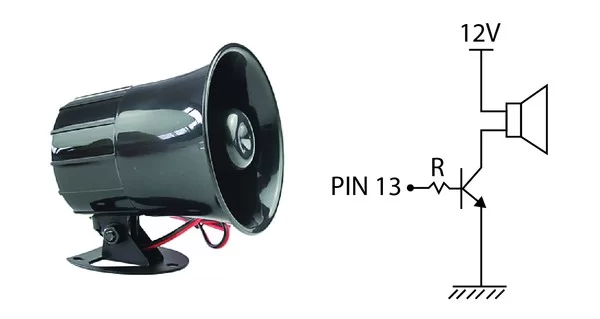
The first example requires some sort of indicator device that alerts the user to the danger. For simplicity’s sake, I’ll use a simple buzzer, but for a real-life situation, I recommend a 12v siren. The noise from one of these sirens definitely would have stopped me from burning down the kitchen.
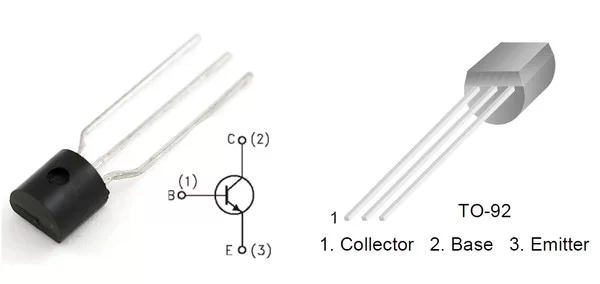
If you decide to go with a siren, you will also need a transistor. A transistor can serve many roles, but in this case, you’ll need it to commute the voltage. The transistor has three zones called Collector, Base, and Emitter. You will need an NPN transistor that has its emitter connected to ground (Figure 6).
You are only working with 12 volts, so you won’t need a relay. Set up the transistor as shown in Figure 7: You can commute the voltage and activate the siren using a resistor to limit the electric current reaching the base of the transistor. Your transistor will work as a switch. If you activate the digital signal on pin 13, the siren will fire up. If not, it will switch the siren off, cutting off the voltage.
Hardware Design
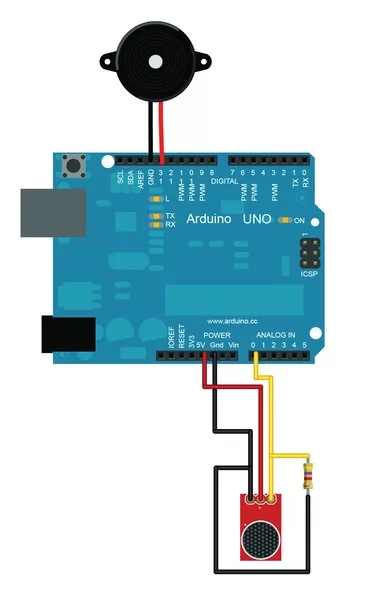
These instructions lead to the setup shown in Figure 8: I connect the buzzer, or the base of the transistor if you are using a siren, to pin 13 with a 1K resistor. You can also set up the smoke sensor as a generic analogical sensor. The final product is a homemade detector device like the one shown in Figure 9.
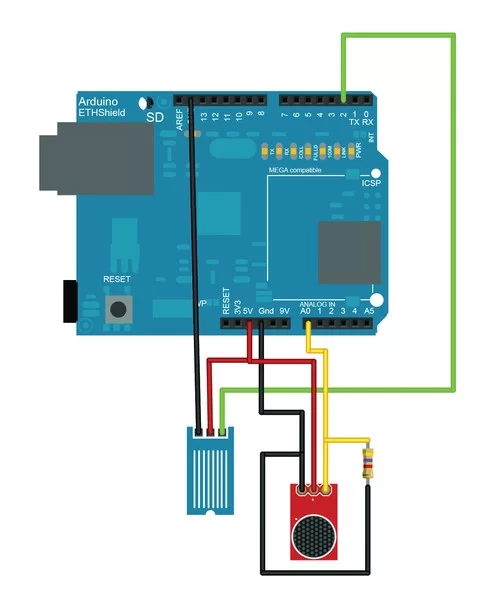
In the second example, which you can see in Figure 10, connect the fluid detector as a digital device and the methane detector in a fashion similar to the smoke detector. The difference is you’re going to mount an Ethernet shield on top to upload the data to the web. The Ethernet shield sits on top of the Arduino, and you can access all the I/O pins through the shield; additionally, you can connect the device to your network.
Programming
Listing 1 shows how to monitor for the presence of smoke. If the amount detected exceeds a certain limit, the program activates the alarm, sending a HIGH signal to the designated pin.
Listing 1
DIY Fire Alarm
01 // Static Variables
02
03 int smokeSensor = A0;      // Smoke sensor pin
04 int buzzer =  13;       // Buzzer pin
05
06 // Dynamic variables
07 int smokeValue = 0;  // Value read in by the smoke sensor
08
09 void setup() {
10   // Initiates the buzzer pin as OUTPUT
11   pinMode(buzzer, OUTPUT);
12 }
13
14 void loop() {
15   // Read the analogical value from the sensor and store it as %
16   smokeValue = analogRead(smokeSensor);
17   smokeValue = map(smokeValue,0,1023,0,100);
18   // Short wait
19   delay(50);
20   // If the smoke level is too high, activate the alarm
21   if (smokeValue > 60) {
22     digitalWrite(buzzer, HIGH);
23   }
24   else {
25     digitalWrite(buzzer, LOW);
26   }
27 }
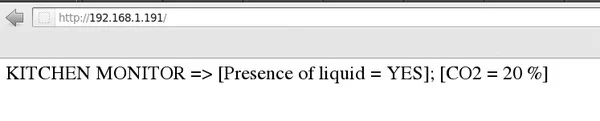
The second example (Listing 2) measures the analogical and digital values from the sensors and uploads them to a website. The data appears as a simple line on the IP address assigned to your web server, as shown in Figure 11.
Listing 2
Monitoring Kitchen Hazards
01 // Libraries we need
02 #include <SPI.h>
03 #include <Ethernet.h>
04
05 // Define server MAC and IP
06 // ID of Ethernet module:
07 byte mac[] = { 0x90, 0xA2, 0xDA, 0x00, 0xFE, 0x70 };
08 // IP address assigned to the Arduino Ethernet Shield:
09 IPAddress ip(192,168,1,191);
10
11 // Starts the server on port 80
12 EthernetServer server(80);
13
14 // Static variables
15 int  liquidDetection= 2;   // Pin for the water sensor
16 int CO2Sensor = A0;       // Pin for the CO2  sensor
17
18 // Dynamic variables
19 int liquidState = 0;   // We'll assume there is no water or CO2 around to start with
20 int CO2Value = 0;
21
22 void setup() {
23   // Initializes the input pin for the liquid sensor
24   pinMode(liquidDetection, INPUT);
25   // Initiate the Ethernet connection and the server
26   Ethernet.begin(mac, ip);
27   server.begin();
28 }
29
30 void loop() {
31   // Read in the digital value for the presence of liquid
32   liquidState = digitalRead(liquidDetection);
33   // Read in the analogical value of CO2 and store it as %
34   CO2Value = analogRead(CO2Sensor);
35   CO2Value = map(CO2Value,0,1023,0,100);
36
37   // Listen for potential incoming clients
38   EthernetClient client = server.available();
39   if (client) {
40     // An HTTP petition ends with a blank line
41     boolean currentLineIsBlank = true;
42     while (client.connected()) {
43       if (client.available()) {
44         char c = client.read();
45
46         // Check if the HTTP request has finished or not
47         if (c == '\n' && currentLineIsBlank) {
48           // Send standard HTTP header
49           client.println("HTTP/1.1 200 OK");
50           client.println("Content-Type: text/html");
51           client.println();
52
53            client.print("KITCHEN MONITOR");
54            client.print(" => ");
55
56             // Print out value from the liquid sensor
57             client.print("[Presence of liquid");
58             client.print(" = ");
59             if (liquidState == 0){
60             client.print("No");
61             } else {
62             client.print("Yes");
63             }
64             client.print("]");
65
66             // Print the amount of CO2
67             client.print(" ; [CO2");
68             client.print(" = ");
69             client.print(CO2Value);
70             client.print(" %] ");
71
72             break;
73         }
74         if (c == '\n') {
75           // Start a new line
76           currentLineIsBlank = true;
77         }
78         else if (c != '\r') {
79           // Get a character
80           currentLineIsBlank = false;
81         }
82       }
83     }
84     // Give the server time to receive the data
85     delay(1);
86     // Close connection
87     client.stop();
88   }
89 }
Conclusion
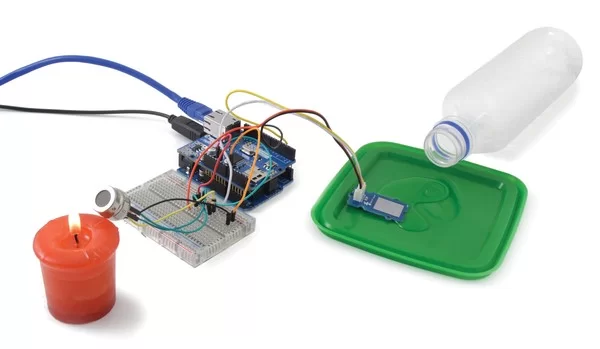
The complete mounted monitoring system is shown in Figure 12. This article is a good starting point for more sophisticated home safety scenarios. You could increase the number of sensors or swap the sensors for other models depending on your needs.
About The Author
Hassan Zaka
I am an expert in accounting and possess diverse experience in technical writing. I have written for various industries on topics such as finance, business, and technology. My writing style is clear and simple, and I utilize infographics and diagrams to make my writing more engaging. I can be a valuable asset to any organization in need of technical writing services.
Follow Us:LinkedinTwitter