Opens your front door bolt unlocker!

Opens your front door Bolt Unlocker!
see video of the end result:
Parts:
– 4xAA Rechargable Switchable Battery Pack + case
– Continuos Rotation Servo. (You can also a regular servo, with some modifications to the software) I used – Futaba S148
– Bread board
– RaspberryPi1 Raspberry Pi Model B + WiFi card
– Raspberry Pi Cobbler
– A piece of string (not sure how long you’ll need, i used about 5 feet \ 1.5 m)
– Weight – I used a bottle of water, because I can easily adjust its weight
– Cable tie
– Over the door coat hanger
– Rubber bands
– Adafruit’s PWM kernel module for the PI. Available in Occidentalis v0.2. The software I wrote uses this module.
Step 1: Assemble Electronics
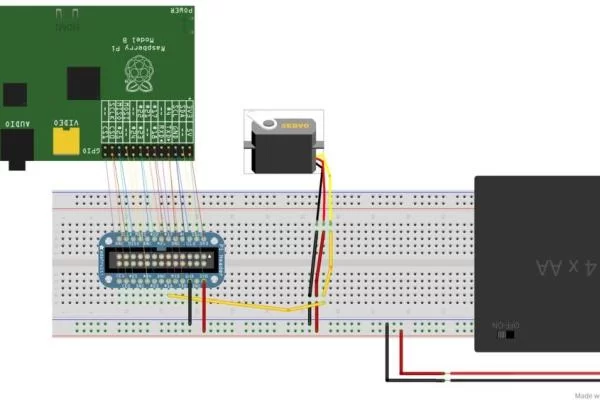
Pretty basic. It’s important to use rechargeable 1.25 V batteries. 4 Regular 1.5 V batteries are too much for the PI!!
Connect the servo to the PWM pin (#18) on the PI .
Step 2: Mount the Parts on the Door
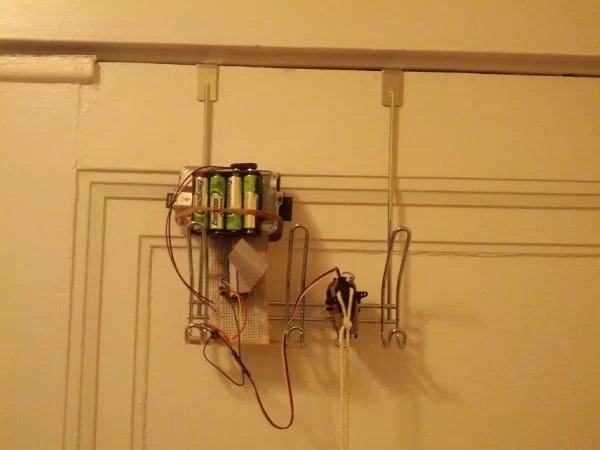
Using an over the door coat hanger and rubber bands, mount all the parts above your front door.
Make sure that the servo is facing you.
Step 3: Tie Loose Ends
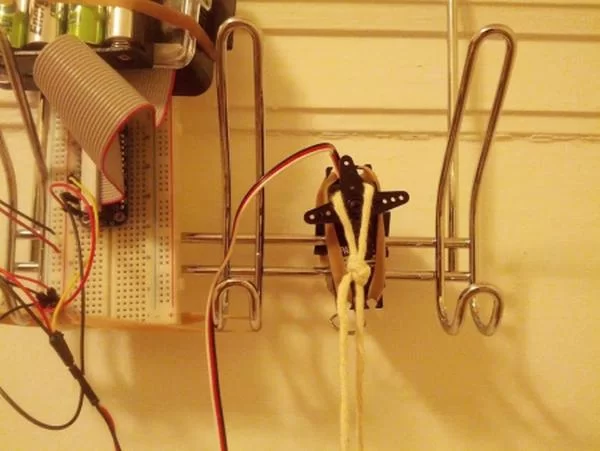

Tie the Sting:
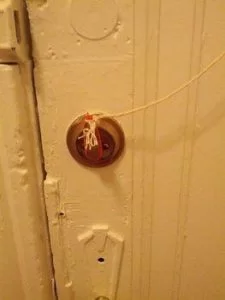
– One end goes on the bolt of the door. Secure it using a cable tie.
– Stretch the string towards the servo, and make a loop tie there, so the loop can hang loosely on the servo.
– Tie the other end of the String to your weight
As you can probably see – When the servo turns, it will drop the weight, and unlock the bolt.
You can test it now – manually dropping your weight.
I used a bottle of water, and tested what was the optimal weight for my door
Basically, the PI will turn the engine – that will drop the weight and open the door.
Step 4: Software
The software i wrote is available at:
https://github.com/uvgroovy/door-unlocker
Make sure you get all the git sub modules, and install the boto and web python modules on your PI.
The “pi” folder contains server code to be used on the PI itself.
The “clinets” folder contains clients that connect to the PI remotly.
You can run the server code either as a web server, or using AWS SQS.
To run it as a web server, using the “pi/main.py”. this exposes a REST API for opening your door, and also gives you a test page, at “/test”
To run it using Amazon SQS:
– Create a file named aws_keys.py containing you credentials, like so:
AWS_KEY = ‘….’
AWS_SECRET = ‘….’
Save this file next to the “sqs_receiver.py” and “sqs_sender.py” files
– On the PI: Run the “pi/sqs_receiver.py”. This process will wait for messages on the Q.
– Anywhere else (i.e your laptop): Run “clients/sqs_sender.py” to send messages. Just press “enter” to send a message.
Step 5: Pro’s and Con’s
Pro’s:
– Easy to make
– Cheap compared to other solutions
– Flexible – you can open the door anywhere in the world using AWS SQS. This is a Cloud based door unlocker !
– No permanent damage is done to the door (good if your rent the place)
Con’s:
– Batteries don’t last too much (less than a day)
– Not a complete solution: This only unlocks the door, and is not fully automatic
– Setup looks a bit messy – not sure if it will be g\f approved…
Source: Front Door Bolt Unlocker
About The Author
Hassan Zaka
I am an expert in accounting and possess diverse experience in technical writing. I have written for various industries on topics such as finance, business, and technology. My writing style is clear and simple, and I utilize infographics and diagrams to make my writing more engaging. I can be a valuable asset to any organization in need of technical writing services.
Follow Us:LinkedinTwitter