Using Raspberry pi and a hdmi/vga display from a old desktop monitor, you can create you own home media center. This is a very simple project and requires minimum prerequisite knowledge of programming/embedded systems design. All components used are off the shelf !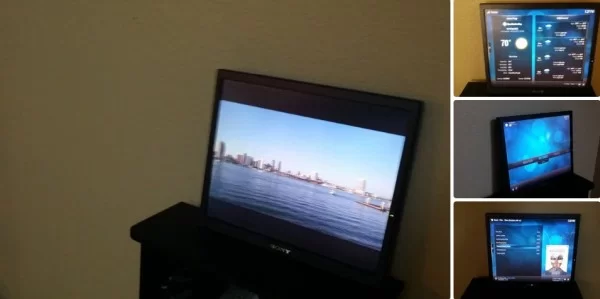
Here are the fun stuff that you can do with your home media center
1) Use it as a digital photo album to do a slideshow of photos from USB storage or from an online repository like dropbox, picassa, flickr !
2) Play Media files(music, video) from USB storage or an online repo like pandora, youtube, netflix etc.
3) Get weather updates
4) Alarm feature – I have configured it to play a custom mp3 file or radio stream as alarm in the morning 🙂
5) Play some cool games
6) And much more .. – The home media center uses kodi which is a free and open-source media player software developed by the XBMC Foundation, a non-profit technology consortium.Kodi is available for multiple operating systems and hardware platforms, with a software 10-foot user interface for use with televisions and remote controls. It allows users to play and view most videos, music, such as podcasts from the internet, and all common digital media files from local and network storage media (www.kodi.tv)
Step 1: What All Do U Need to Create Your Home Media Center ?
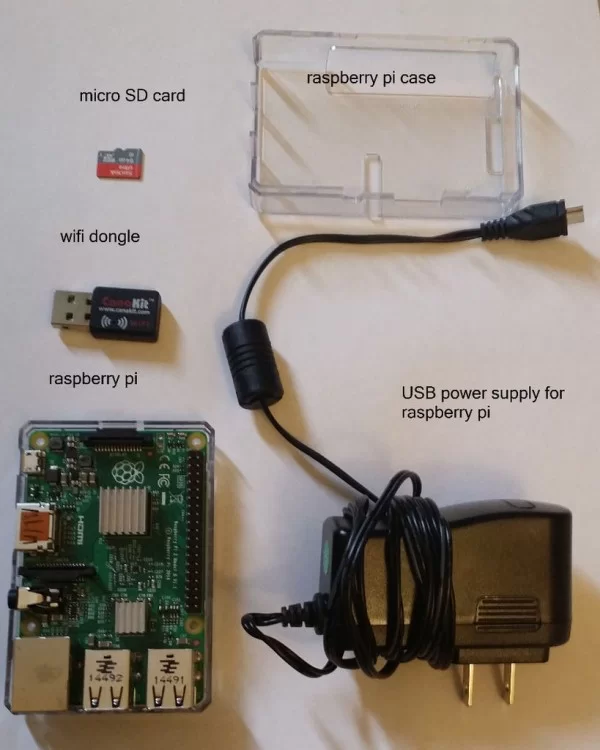
1) Rapberry pi computer – We will use a raspberry pi as a computer for our home media center. It is a credit card-sized single-board computer developed in the UK by the Raspberry Pi Foundation with the intention of promoting the teaching of basic computer science in schools.It is low cost but powerful computer that hosts quad core ARM based processor which brings a lot of computing power to do some cool stuff. It has many interfaces like HDMI, USB ports, 3.5mm jack, EMMC slot etc. which gives many options for embedded developers to play around.
2) USB based Wifi Dongle for network access for your ras. pi
3) A case for raspberry pi
4) Power supply for raspberry pi- You can use a 2.5- 5A usb power supply
5) HDMI cable
6) 8GB sd card to hold the operating system and other system software for your home media center
You can buy these components separately from amazon or you can buy a raspberry pi kit from amazon like this one which has all the components mentioned above for 70$
http://www.amazon.com/CanaKit-Raspberry-Complete-O…
7) A Display for your home media center. You can use an old LED/LCD monitor with HDMI or VGA display(along with VGA to HDMI convertor cable) or you can buy a 9″ or 10″ LCD display for raspberry pi from ebay for 60$
http://www.ebay.com/itm/10-1-10-inch-TFT-LCD-Displ…
Step 2: Loading Kodi Software on Your Raspberry Pi
As i mentioned in Step 1, we will be using SD card to house the operating system and the other system software that runs our home media center. All the software is bundled into a single package called Kodi. We will be copying Kodi software on the sd card and will be booting raspberry pi from sd card
1) Download Kodi software from https://osmc.tv/download/ onto your laptop. Depending on the OS running on your laptop choose the appropriate option ( Windows, Linux, MAC ).
2) Plug the sd card onto your laptop. You can use micro sd to sd adaptor to plug the micro sd card onto laptop.
3) Once you have downloaded the file onto laptop in step 1. Execute it. Select the option to install the software on sd card.
4) Plug out the power supply from raspberry pi
5) Once the installation is complete on step 3, remove the sd card and plug it into raspberry pi
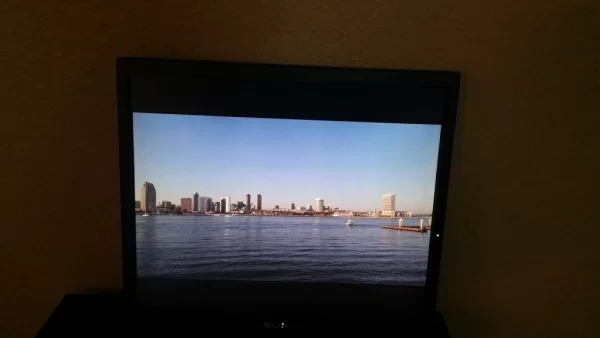
6) Plug in the power supply of raspberry pi. The raspberry pi is configured to boot from sd card by default and it will boot to Kodi homescreen . Connect the raspberry pi onto your LCD monitor to see the Kodi home screen !! Simple is’nt it 🙂
7) You are almost done ! Change the theme to confluence by navigating to System–>Settings –> Appearance –> Skin –> Confluence. you would need a USB mouse to navigate . Plug the USB mouse to one of the USB ports of raspberry pi
8) Now for the exciting part 🙂 You can control your home media center using your android/apple phone ! Yes. by installing a free app called Yatse from playstore/apple store you can navigate through the Kodi software on your home media center. Here is a quick guide to setup Yatse for controlling Kodi
Step 3: Slideshow Your Pics From Dropbox !
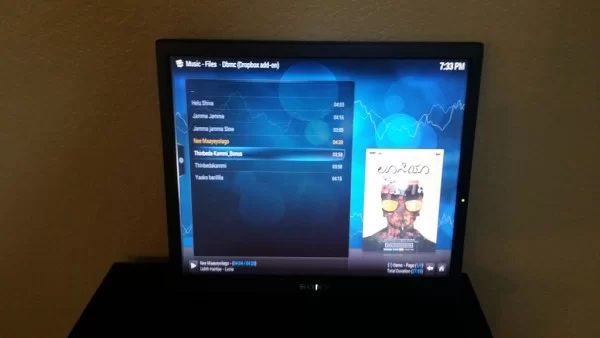
If you want to configure your home media center to access your pics/music/video files from a online repo like dropbox, Kodi has a addon for dropbox which you can install and set it up . This way, whenever you take a pic or video on your cellphone, you can upload it onto dropbox and your home media center would sync to these files automatically .
Follow these instructions to add dropbox addon and link your dropbox account on kodi
Once you have setup the dropbox account on Kodi, you can do a slideshow of your pics by navigating to Picture–>Addons–>Dropbox
About The Author
Hassan Zaka
I am an expert in accounting and possess diverse experience in technical writing. I have written for various industries on topics such as finance, business, and technology. My writing style is clear and simple, and I utilize infographics and diagrams to make my writing more engaging. I can be a valuable asset to any organization in need of technical writing services.
Follow Us:LinkedinTwitter