Recently a family member had his furnace fail while he was away from his house temperature monitor for a long period of time in the winter. His pipes burst and caused quite the mess. This project describes a temperature sensor that broadcasts the temperature in his house to the pachube data logging website. This allows him to check on his house from anywhere he has internet access.
What is it?
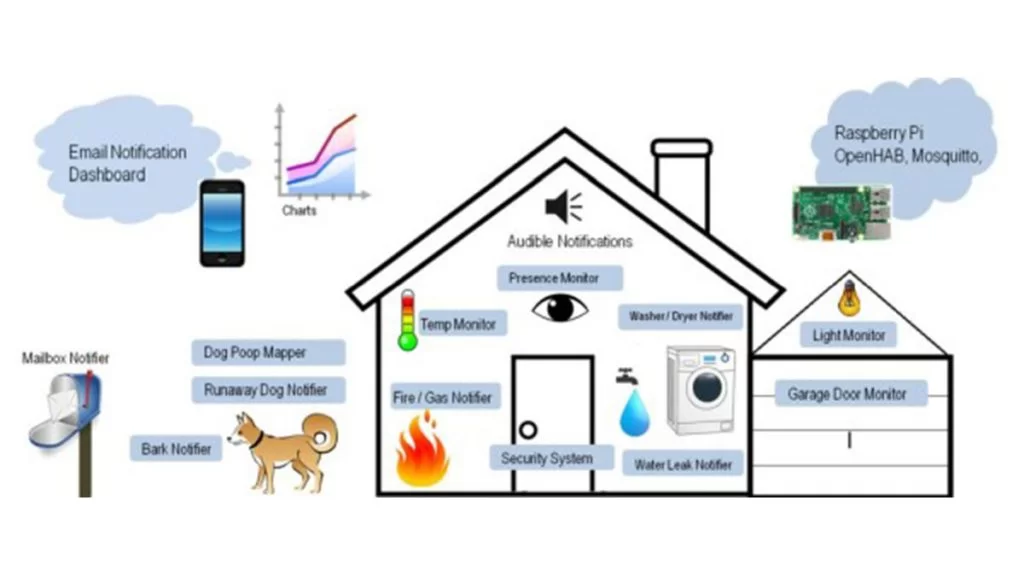
This project includes a temperature sensor and a small computer that can send the temperature readings from inside your house to the internet. This will allow you to monitor the temperature in your house and detect if there may be a problem from anywhere that you have internet access.
Setup
- Plug the wall wart into an 120V electrical outlet
- Plug the cat5 ethernet cord into the back of your router as if it was a computer
- For now, disregard the extra USB cable
- Wait 10 minutes
- Log onto pachube to see the temperature inside your house
How it Works
The temperature sensor (Analog Devices TMP36, source) is a small diode on an integrated circuit that outputs a voltage proportional to the temperature between -50 and 125 degrees Celsius. A small microcontroller (Arduino, lowest circuit board in the stack) reads the voltage output by the sensor. The voltage reading is converted to degrees Fahrenheit by the computer code running in the Arduino. Finally the ethernet shield (source, upper circuit board in the stack) sends the temperature in Fahrenheit to a website named pachube. The pachube website logs the data sent by the ethernet shield and presents the information in an easy to read plot. The procedure from raw temperature measurement to submission to pachube is repeated every five minutes.
Some things to note
- The Arduino uses very little power, so I would suggest leaving it pluged in all the time. After a few weeks of being without power the Arduino will “forget” the code that was installed on it.
- If the Arduino forgets its programing, the USB cord can be used to upload code to the board.
- Pachube is a free website. Therefore we have to tolerate the fact that it has an uptime of about 90%. Since I have been using the site over the past few months on a rare occasion I have seen the site go down for as long as six hours. In most cases service interruptions last less than 15 minutes.
- If for whatever reason the wires to the temperature sensor become detached, you can reconnect them to the holes labeled:
- Yellow → A0
- Blue → 3.3V
- White → GND
- If you hook them up backwards the sensor will get really hot and possibly catch on fire.
- The ethernet cord has a tendency to come loose. If the system is not working as expected try pushing the cat5 plug firmly into its connector.
Troubleshooting
To determine if you arduino/ethernet shield are operating correctly reference the status lights:

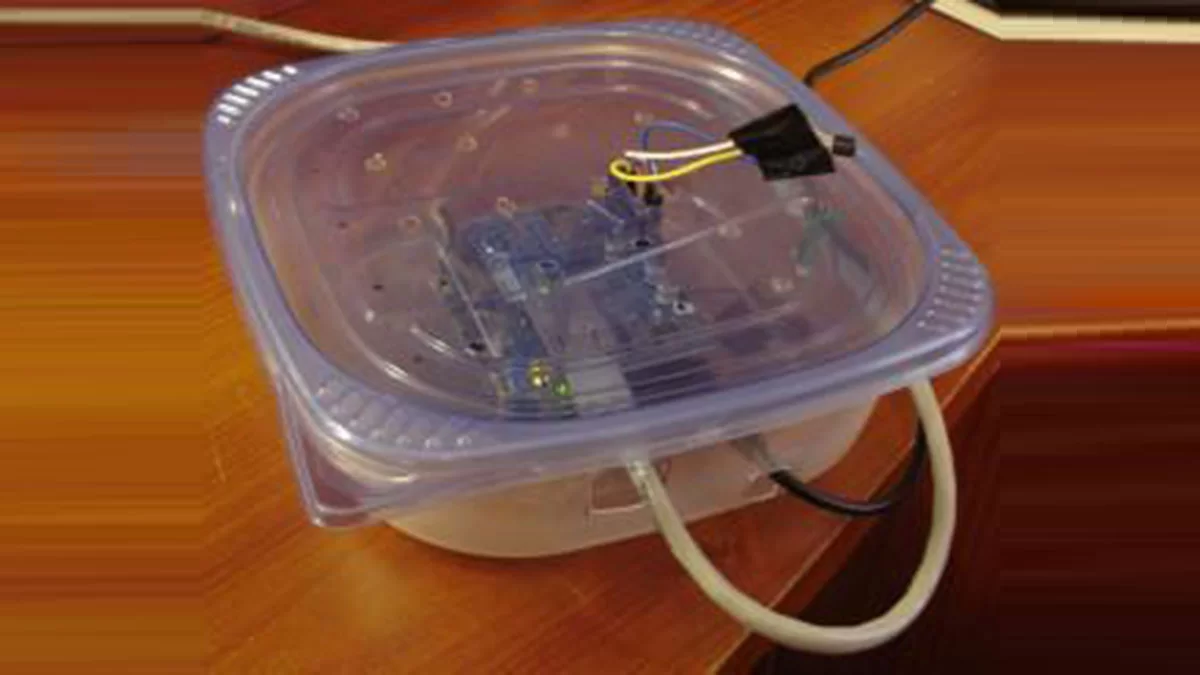
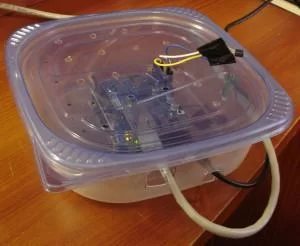
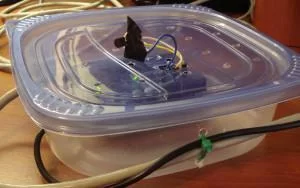
Completed Project Picture
Arduino Source Code
/*
modified by ryan y11m12d28
Requires account at pachube.com
Pachube login/pass: YOUR ID / LOGIN
feed id: YOUR FEED NUMBER
API key: YOUR KEY HERE
Pin Connections
Arduino : Temperature Sensor
A0: signal
3.3V: Vin
GND : Ground
~~~
 Pachube sensor client

 This sketch connects an analog sensor to Pachube (http://www.pachube.com)
 using a Wiznet Ethernet shield. You can use the Arduino Ethernet shield, or
 the Adafruit Ethernet shield, either one will work, as long as it's got
 a Wiznet Ethernet module on board.

 Circuit:
 * Analog sensor attached to analog in 0
 * Ethernet shield attached to pins 10, 11, 12, 13

 created 15 March 2010
 updated 4 Sep 2010
 by Tom Igoe

 http://www.tigoe.net/pcomp/code/category/arduinowiring/873
 This code is in the public domain.

 */
#include <SPI.h>
#include <Ethernet.h>
// assign a MAC address for the ethernet controller.
// fill in your address here:
byte mac[] = { 0xDE, 0xAD, 0xBE, 0xEF, 0xFE, 0xED};
// assign an IP address for the controller:
byte ip[] = { 192,168,1,199};
//byte gateway[] = { 192,168,1,1};
//byte subnet[] = { 255, 255, 255, 0 };
// The address of the server you want to connect to (pachube.com):
//byte server[] = { 209,40,205,190 };
byte server[] = { 173,203,98,29 };
// initialize the library instance:
Client client(server, 80);
long lastConnectionTime = 120001; // last time you connected to the server, in milliseconds
boolean lastConnected = false; // state of the connection last time through the main loop
const long postingInterval = 120000; //delay between updates to Pachube.com
unsigned long t = 0;

void setup() {
 // start the ethernet connection and serial port:
 Ethernet.begin(mac, ip);
 Serial.begin(9600);
 // give the ethernet module time to boot up:
 delay(1000);
}
void loop() {
 // read the analog sensor:
 //int sensorReading = analogRead(A0);
 float currentTemp = getTemp();
 int sensorReading = (int) currentTemp;


 //Serial.print("Analogor Reading: ");
 //Serial.println(sensorReading);
// if there's incoming data from the net connection.
 // send it out the serial port. This is for debugging
 // purposes only:
 if (client.available()) {
 char c = client.read();
 Serial.print(c);
 }
// if there's no net connection, but there was one last time
 // through the loop, then stop the client:
 if (!client.connected() && lastConnected) {
 Serial.println();
 Serial.println("disconnecting.");
 client.stop();
 }
// if you're not connected, and ten seconds have passed since
 // your last connection, then connect again and send data:
 if(!client.connected() && (millis() - lastConnectionTime > postingInterval)) {
 sendData(sensorReading);
 }
 // store the state of the connection for next time through
 // the loop:
 lastConnected = client.connected();
}
// this method makes a HTTP connection to the server:
void sendData(int thisData) {
 // if there's a successful connection:
 if (client.connect()) {
 Serial.println("connecting...");
 Serial.print("Analogor Reading: ");
 Serial.println(thisData);
 float t = millis(); // miliseconds
 t = t/1000.0; // seconds
 t = t/60.0; //minutes
 Serial.print("Timep: ");
 Serial.print(t);
 Serial.println(" minutes");
 // send the HTTP PUT request.
 // fill in your feed address here:
 client.print("PUT/YOUR_FEED_NUMBER_GOES_HERE.csv HTTP/1.1\n");
 client.print("Hostwwwwww.pachube.com\n");
 // fill in your Pachube API key here:
 client.print("X-PachubeApiKeyR_PACHUBE_API_KEY_GOES_HERE\n");
 client.print("Content-Length
// calculate the length of the sensor reading in bytes:
 int thisLength = getLength(thisData);
 client.println(thisLength, DEC);
// last pieces of the HTTP PUT request:
 client.print("Content-Typet/csv\n");
 client.println("Connection: close\n");
// here's the actual content of the PUT request:
 client.println(thisData, DEC);
// note the time that the connection was made:
 lastConnectionTime = millis();
 }
 else {
 // if you couldn't make a connection:
 Serial.println("connection failed");
 }
}

// This method calculates the number of digits in the
// sensor reading. Since each digit of the ASCII decimal
// representation is a byte, the number of digits equals
// the number of bytes:
int getLength(int someValue) {
 // there's at least one byte:
 int digits = 1;
 // continually divide the value by ten,
 // adding one to the digit count for each
 // time you divide, until you're at 0:
 int dividend = someValue /10;
 while (dividend > 0) {
 dividend = dividend /10;
 digits++;
 }
 // return the number of digits:
 return digits;
}

float getTemp(){
 //getting the voltage reading from the temperature sensor
 int reading = analogRead(A0);

 // convert reading into volts, then mV
 float voltage = (reading * 5)/1024.0;
 voltage = voltage*1000.0;

 //converting from 10 mv per degree wit 500 mV offset
 float temperatureC = (voltage - 500) / 10 ;

 // now convert to Fahrenheight
 float temperatureF = (temperatureC * 9.0 / 5.0) + 32.0;

 return temperatureF;
}
Source: House Temperature Monitor
About The Author
Hassan Zaka
I am an expert in accounting and possess diverse experience in technical writing. I have written for various industries on topics such as finance, business, and technology. My writing style is clear and simple, and I utilize infographics and diagrams to make my writing more engaging. I can be a valuable asset to any organization in need of technical writing services.
Follow Us:LinkedinTwitter