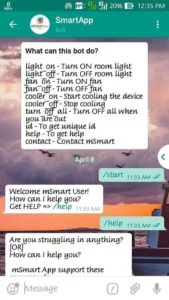
The smart mirror which shows news with date, calendar and quotes. Home automation can be controlled by Telegram chat.
Things used in this project
Hardware components |
||||||||
 |
|
× | 1 | |||||
|
× | 1 | ||||||
|
× | 1 | ||||||
|
× | 1 | ||||||
|
× | 1 | ||||||
 |
|
× | 1 | |||||
Software apps and online services |
||||||||
 |
|
|||||||
|
||||||||
Hand tools and fabrication machines
|
||||||||

Story
Project Idea
The project Smart Mirror with home and garden automation describes the design and development of a futuristic smart mirror that represents an unobtrusive interface for the ambient home environment with automation using Raspberry Pi. The mirror provides a natural means of interaction through which the residents can control the household smart appliances and access personalized services. Emphasis is also given to ensure convenience in accessing these services with a minimum amount of user intervention. The smart mirror functionalities have been demonstrated by developing an easily extendable home automation system that facilitates the integration of household appliances and various customized information services like live custom wallpaper display. Even more, all the appliances connected to this device can easily automate with the online remote chats through telegram. This creates the mirror with more utilities using Raspberry Pi.
Requirement Specifications
- The system has the ability to display latest news in technology.
- The system has the ability to detect the presence of the user.
- The system has a relatively lower cost than existing designs.
- The system functions as a mirror.
- The system looks aesthetically appealing.
- The system has a customizable background.
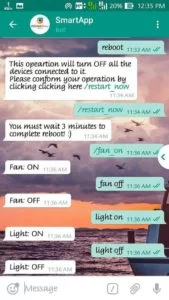
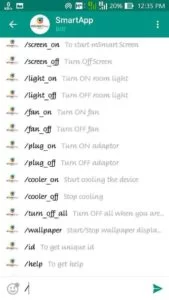
- The system has a means to control home appliances like fan and light through chats.
- The system has a separate account in telegram or any other opensource API.
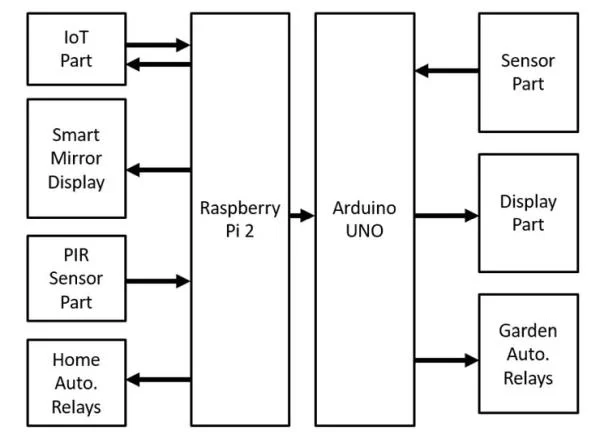
Block Diagram:
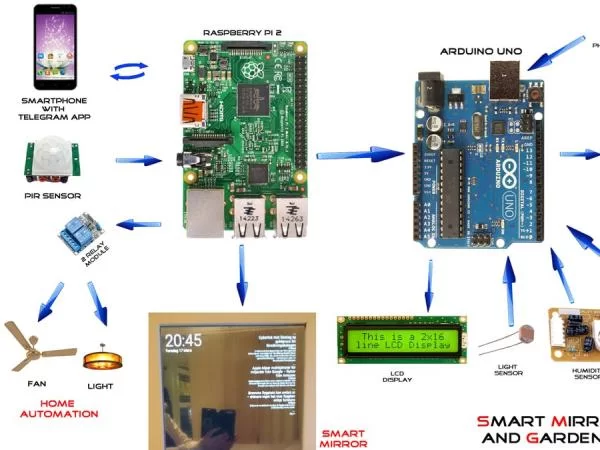
Pictorial Diagram:
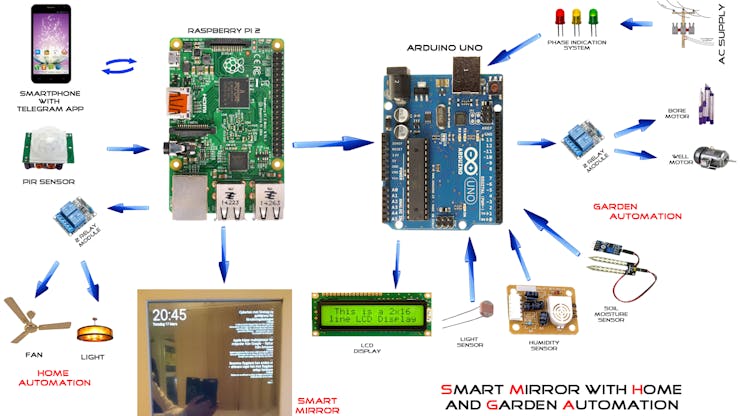
ote: In this post, I gonna describe and provide tutorials of 75% of my project. That is Smart Mirror with Home Automation. Another 25% of project is described in this link.
Key Skills
In Raspberry Pi
· Electronic GPIO Pin Control
· Python Programming – to write and read control to pins
In Web Designing
· HTML
· PHP
· CSS
· Knowledge on Web Hosting & Accessing
In Telegram
· Knowledge on Telegram API
· Creating and modifying BOTs
1.GETTING STARTED WITH RASPBERRY PI
1.1. Download the software’s required,
1. SD Card Formatter
2. Raspbian Operating System
3. Win32DiskImager
4. Putty
1.2 Boot up Operating System to SD Card
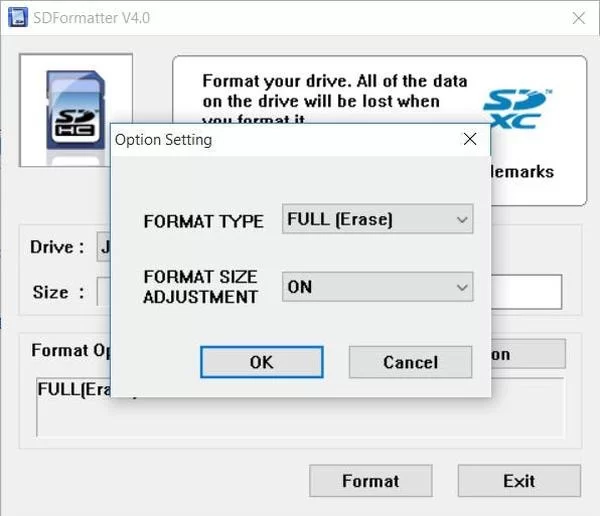
Step-1:
1. Install SD Card Formatter
2. Insert SD Card Reader with SD Card
3. Format the SD Card Fully
Step-2: Use Win32DiskImager to boot image file(operating system) to SD card and click write.
Step-3:
1. Connect HDMI to Monitor through (HDMI – VGA cable)
2. Connect Mouse and Keyboard (Required only for first)
3. Connect Wi-Fi Adaptor (Optional – This is required only if you are not able to connect to internet via Ethernet)
4. Connect Ethernet Cable to Laptop/Pc to use putty (This is not required if you are connected to Internet via Wi-Fi Adaptor)
Step -4:
1. Insert SD Card to Raspberry Pi Board
2. Switch ON your monitor
3. Power up Raspberry pi through USB
4. Check your Raspberrypi IP address using Advance IP Scanner (If it does not work. Follow bellow steps)
5. Connect your Ethernet cable to Laptop/PC
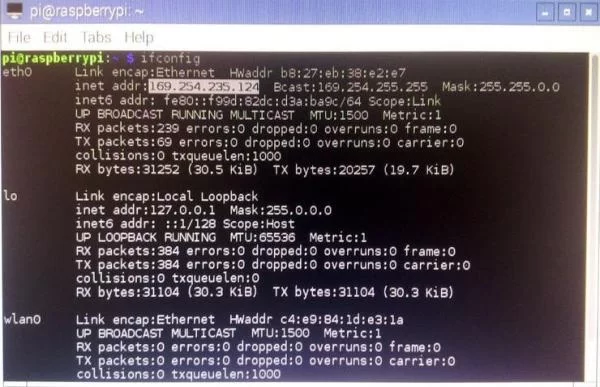
Open Terminal in Raspberry Pi and type ifconfig to get connected Ethernet IP address
Step-5: Open Putty in your Laptop or PC
Login as:piPassword:raspberry
Step-6:
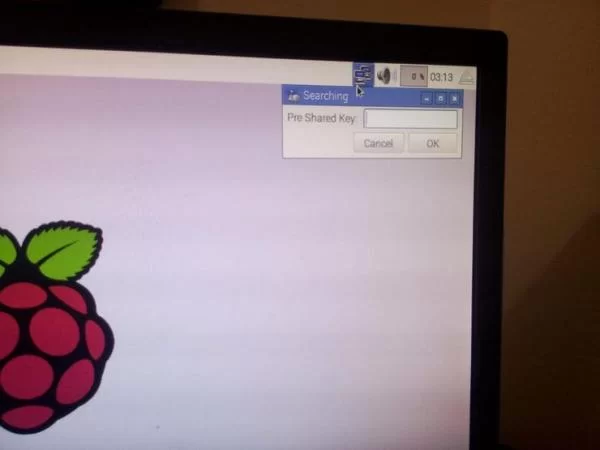
1. Setup Wi-Fi to get downloads
2. Setup Hotspot in your mobile (or go with router name and password)
3. Enter your password and press Enter
Step-7: Get your latest downloads by following steps below
1. Open Putty (or Terminal in Raspberry pi Screen)
2. Type follow commands (takes little time to perform each command)
- Get latest update
sudo apt-get update
- Install Python to Raspberry Pi (18MB)
sudo apt-get install python-dev
sudo apt-get install python3.5
- Install GPIO Library to Raspberry Pi
sudo apt-get install python-rpi.gpio
- How can I use Raspberry Pi on my portrait monitors?
Edit the /boot/config.txt file (sudo nano /boot/config.txt) and add a line to the bottom (without the description):
display_rotate=0Normal
display_rotate=190 degrees
display_rotate=2180 degrees
display_rotate=3270 degrees
display_rotate=0x10000horizontal flip
display_rotate=0x20000vertical flip
I used display_rotate=1
- Install the browser
sudo apt-get install midori
- To stop going blank screen after sometime
sudo nano /etc/rc.local
ABOVE the “exit 0” line insert:
setterm -blank 0 -powerdown 0 -powersave off
sudo nano /etc/kbd/config
Find the line for BLANK_TIME and POWERDOWN_TIME and set them to 0.
BLANK_TIME=0
POWERDOWN_TIME=0
- R
s
Step-8: Do the steps below:
- Create a folder as
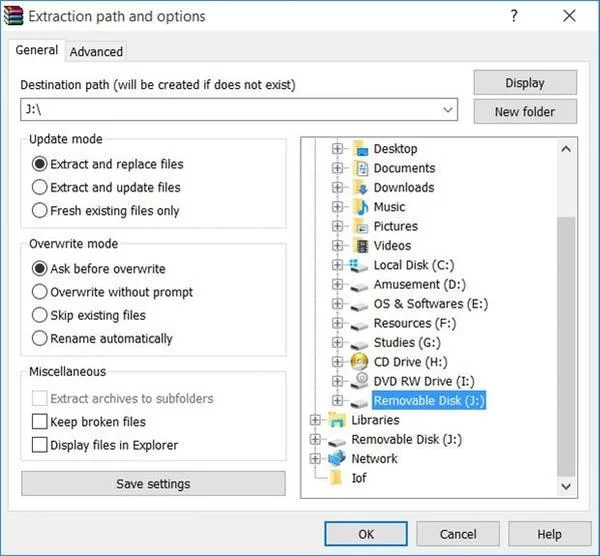
smart
- Copy it to pen drive and paste it in
/home/pi/of Raspberry it. It looks like/home/pi/smart/. Inside this, it contains web contents.
Step-9: Start up the Raspberry pi with browser with link
- Open below address to Edit the autostart file:
sudo nano /etc/xdg/lxsession/LXDE/autostart
- Comment out everything using a ‘#‘ at the start of each line and then add the following lines
# Auto run the browser
@xset s off
@xset -dpms
@xset s noblank
@midori --display=:0 -e Fullscreen -a file:///home/pi/smart/index.php
- Reboot the raspi
sudo reboot
2.GETTING STARTED WITH TELEGRAM BOT CREATION
2.1. Basic Steps
Step-1: After install Telegram in your device(Smartphone/PC/Laptop/WebApp), register it.
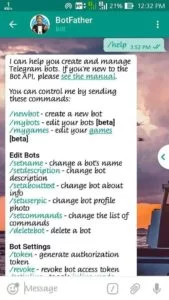
Step-2: Search “BotFather” without quotes and click on it.
Step-3: Press Start and press /newbot
Step-4: Enter the bot name (Example: IOF Bot)
Step-5: Choose a username for your bot. It must end in `bot` without space. (Example: IOFbot)
Step-6: Note down <token key> and keep it safe.
Step-7: Search the bot in search bar and open it.
Step-8: Click Start
3.GETTING STARTED WITH TELEGRAM
Step-1: You can install or upgrade python-telegram-bot with:
sudo pip install python-telegram-bot
Step-2: Test your bot
sudo python /home/pi/smart/finala.py <BOT_TOKEN> <YOUR_CHAT_ID>
Here replace <BOT_TOKEN> with your bot Token Key (get it from BotFather) and replace <YOUR_CHAT_ID> with your chat id(find it from your telegram profile)
After running this, if you get as “Listening…”, then your bot works fine.
Step-3: To start the bot at startup of raspberry pi
sudo nano /etc/rc.local
Before “exit 0”, add the following line.
sudo python /home/pi/smart/finala.py <BOT_TOKEN> <YOUR_CHAT_ID> &
Double check that, the line should ends with ‘&’(single &). If not then the system goes collapse.
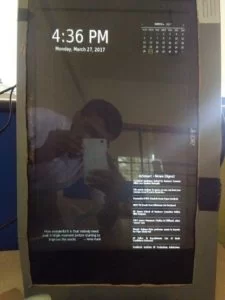
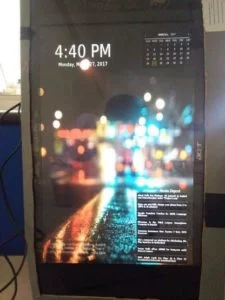
4. MIRROR AS WALLPAPER OR PHOTO FRAME
At night time, mostly we won’t see mirror right. At that time, we can make this smart mirror as Photo frame, as shown in below figure.
4.1. Buy a domain
For this we need to buy a domain and hosting. I got free domain from .tk and hosting from Znetlive (free for 1yr -only for students) or you can get free hosting from various free hosting websites.
4.2. Wallpaper Configuration
Step -1: Goto File Manager of your website and get inside public html folder
Step -2: Download these files and upload there.
Step-3: In Raspberry pi, goto the folder smart, inside that, edit index.php
background-image: url("https://msmart.tk/upload/uploads/msmart.jpg");
Replace it as
background-image: url("https://<YOUR_DOMAIN_NAME>/uploads/msmart.jpg");
5. HARDWARE SETUP
Here hardware setup is very easy.
Step-1: Buy Two-way mirror acrylic sheet (looks like a proper mirror)/normal acrylic sheet (50% as like mirror because of black screen at back).
Step-2: Make the wood box to keep your monitor and raspberry pi and relay circuit inside. Cut this sheet as the size of monitor you are using and size of wood box also considered. Make sure that, this sheet perfectly fit inside wood box.
Step-3: Keep your acrylic sheet first and monitor as second.
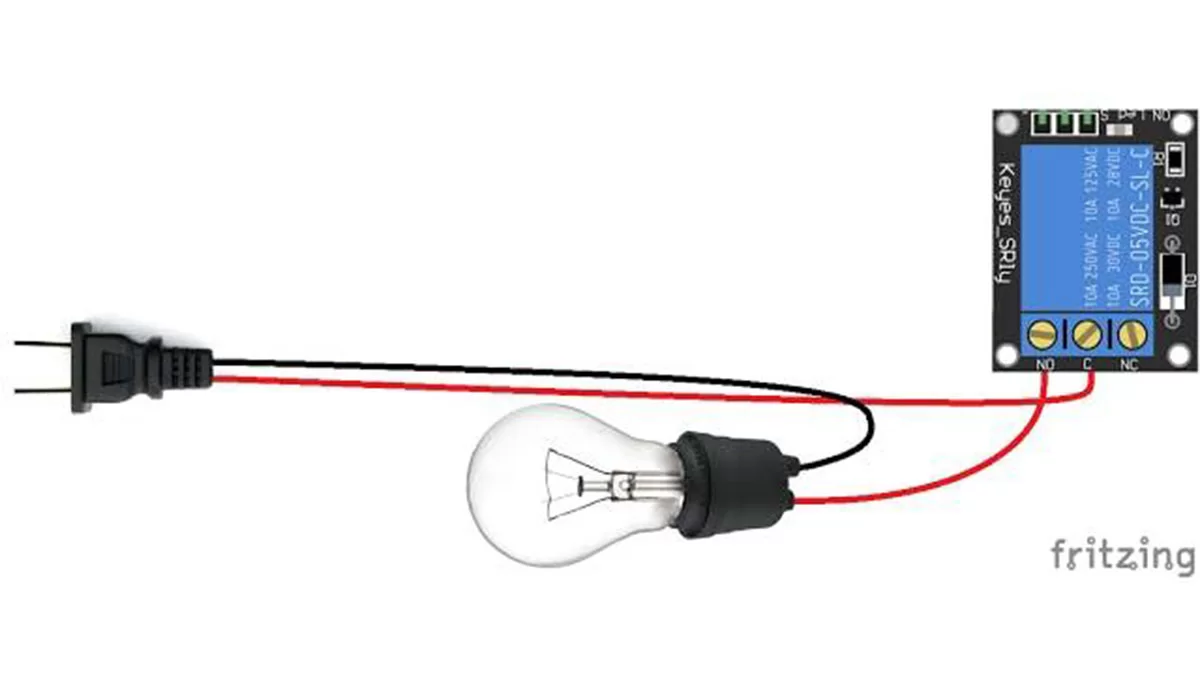
Step-4: Connect two 5v relay circuit to raspberry pi and other ends to fan and light supply(Ac/DC) terminals.
5.1. Pin Configuration
Light relay pin –> 33 of Raspberry pi
Fan relay pin –> 37 of Raspberry pi
As similar to above picture, cut and connect the fan supply to relay instead of lamp.
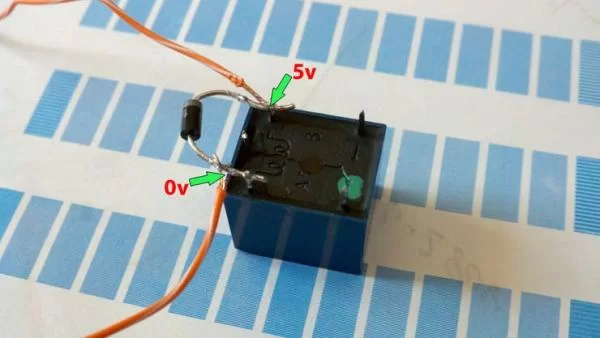
Connect relay’s 5v –> Raspberry pi’s 5v pin
Connect relay’s Gnd –> Raspberry pi’s Gnd
Hope this project is helpful to you. Thank you.
If you have any doubts, let me know.
Source: Smart Mirror with Home Automation using chats
About The Author
Hassan Zaka
I am an expert in accounting and possess diverse experience in technical writing. I have written for various industries on topics such as finance, business, and technology. My writing style is clear and simple, and I utilize infographics and diagrams to make my writing more engaging. I can be a valuable asset to any organization in need of technical writing services.
Follow Us:LinkedinTwitter