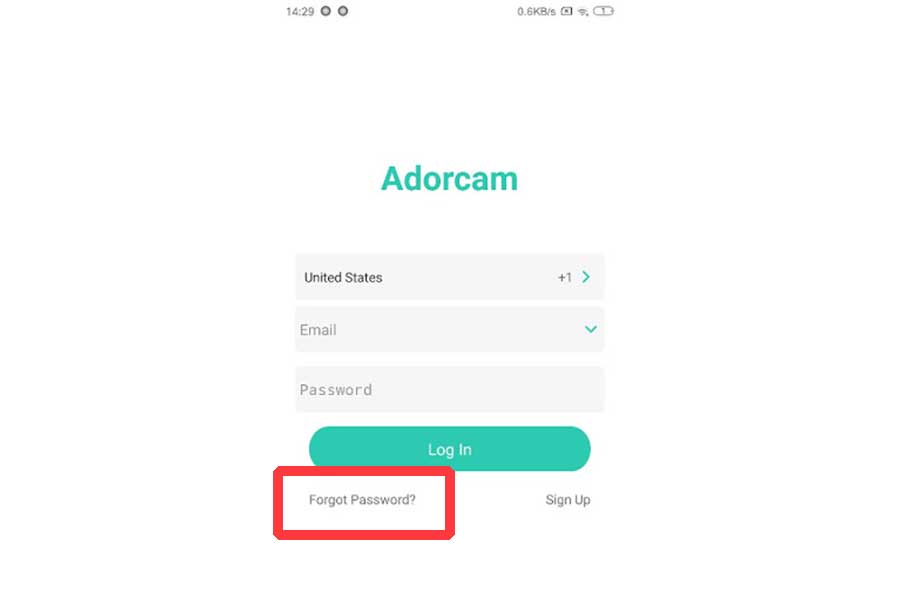
Adorcam Password Reset: A Quick and Effective Guide
Adorcam Password Reset: Quick and easy steps to reset your Adorcam account password and regain access securely.
Adorcam Password Reset: A Quick and Effective Guide Read More »
Adorcam Password Reset: Quick and easy steps to reset your Adorcam account password and regain access securely.
Adorcam Password Reset: A Quick and Effective Guide Read More »
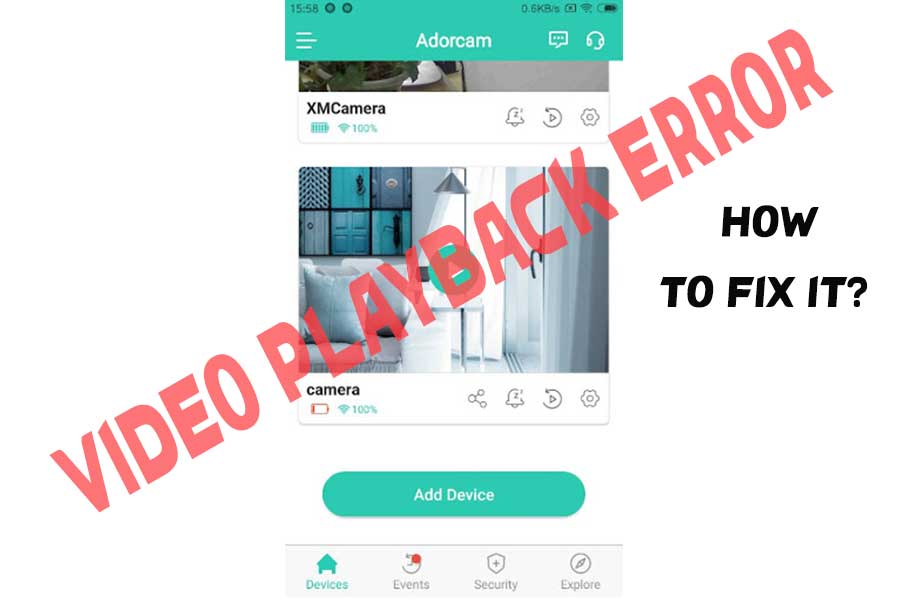
Adorcam Video Playback Error: Troubleshoot common issues with quick solutions and tips to get your video streaming back on track.
Adorcam Video Playback Error: Quick Solutions and Tips Read More »
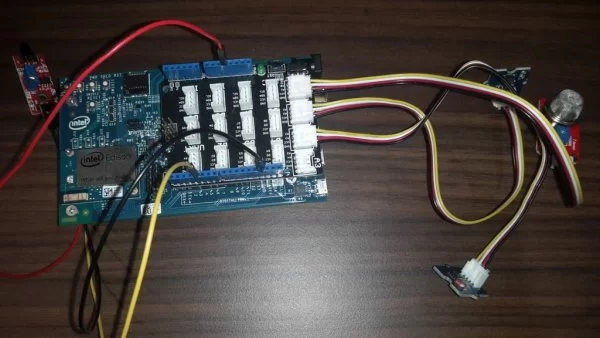
This is the project I have done alone. I tried to make something could be helpful to those Taiwanese whose age is old.
WiFi based home automation by Intel Edison and Banana Pi M1 Read More »

Best DVR App For Android, these are so far the best for CCTV camera app controlled and manage them via from mobile app.
Best DVR App For Android Read More »
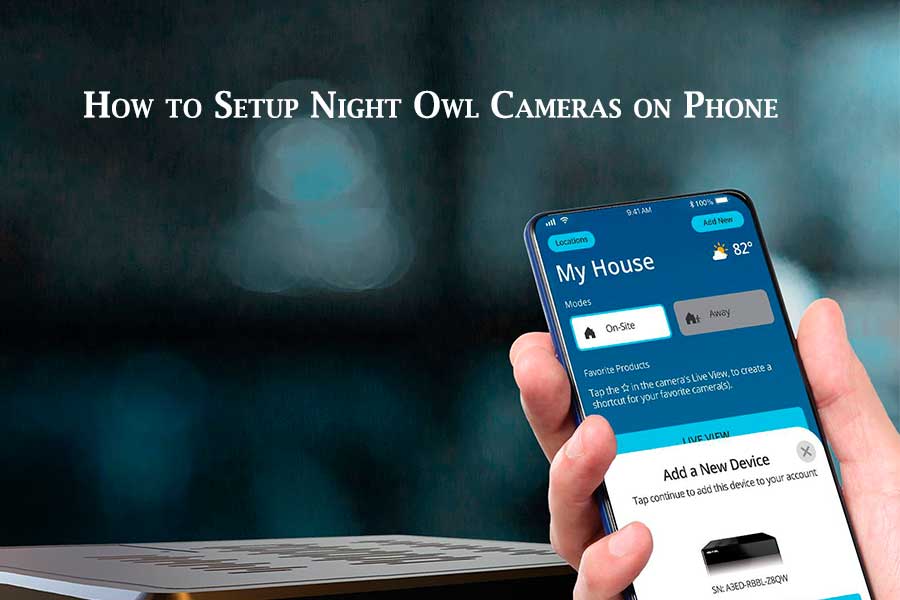
Learn How to Setup Night Owl Cameras on Phone. Get connected quickly and effortlessly with our step-by-step guide.
How to Setup Night Owl Cameras on Phone: Easy Connection! Read More »

Homekit Coffee Maker, here is the a complete guideline of non-smart coffee maker into Homekit compatible with How to setup in detail.
Homekit Coffee Maker Read More »