You’ll want to adjust these six settings whether you just got your Amazon Echo or have owned it for years.
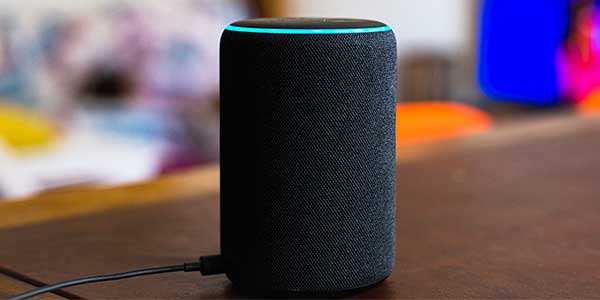
You probably believe you know all there is to know about your favorite Amazon smart home devices, including the Amazon Echo Dot, Echo Dot with Clock, Echo Flex, Echo Studio, and smart displays like the Echo Show 10, Show 8, Show 5, and, most recently, the Show 15. Sure, you’re undoubtedly familiar with the essentials, such as how to use Alexa to make a phone call, how to connect Alexa to Wi-Fi, Bluetooth, and other devices, and how Alexa can assist you in the kitchen. But have you actually explored all of Alexa’s options?
Alexa may be customized in a variety of ways to suit your preferences. And these few minor adjustments might have a significant impact.
- Make sure your Amazon Echo’s privacy settings are up to date.
- On your Amazon Echo, enable Brief Mode.
- Create an account with your favorite music streaming provider.
- Alexa’s wake word should be changed.
- Use your Amazon Echo to make purchases using voice commands.
- Set up profiles for your Amazon Echo for your family.

Relevant: Amazon Alexa Offers New Privacy Choices and Voice Commands
1. Make sure your Amazon Echo’s privacy settings are up to date.
One of the first things that come to mind when considering purchasing an Echo speaker is privacy. Fortunately, Amazon is releasing more privacy options in the future, including upgrades to both the Ring and Echo products that improve customer privacy incrementally.
Your Echo can automatically delete your recordings.
To turn that setting on in the Alexa app More menu:
Go to Settings > Alexa Privacy > Manage Your Alexa Data > and toggle the automatically delete recordings switch on.
You may also remove all of your previous voice recordings.
To do this, open the Alexa IOS, ANDROID app:
- Go to Settings > Alexa Privacy > Review Voice History.
- Next, tap the downward-facing arrow next to Displaying and then the arrow next to Filter By Date.
- Then you will tap All History > Delete All My Recordings.
You may also prevent Amazon personnel from listening to your voice recordings or listening in on your discussions.
In the Alexa IOS, ANDROID app:
- Go to Settings > Alexa Privacy > Manage Your Alexa Data.
- From here, select Choose How Long to Save Recordings > Don’t Save Recordings > Confirm.
- Next, scroll down to Help Improve Alexa, and switch the Use of Voice Recordings to off.
2. On your Amazon Echo, enable Brief Mode.
Alexa will say something like “OK, turning on the lights” when you ask her to do something like play a song or turn on the lights. This is to assist you to figure out why Alexa performed anything other than what you asked for. You may adjust that setting to merely play a brief sound instead of a vocal response if you don’t want Alexa to repeat what you just said.
To do so:
Open the Alexa app More menu and select Settings. Under the Alexa Preferences section, tap Voice Responses, then toggle the switch on for Brief Mode.
3. Create an account with your favorite music streaming provider.
When you first set up your Amazon Echo, Amazon Music is the default music service. If you subscribe to Spotify, Apple Music, or another music streaming service, you might wish to link your Echo to that service instead.
Go to Settings > Music & Podcasts > and link to a service. On the same page, tap Default Services and switch to your preferred music provider. Now the Echo will play from the music streaming service of your choice when you say “Alexa, play music.”
4. Alexa’s wake word should be changed
If you wish to change the name, simply say “Alexa, change the wake word” and choose a new one.
You can also open the Alexa IOS, ANDROID app:
Go to Settings > Device Settings > select your device > tap Wake Word and make a choice. Unfortunately, you can’t come up with your own name for the speaker, like Tallulah or Digital Overlord.
5. Use your Amazon Echo to make purchases using voice commands.
You don’t always have time to go to Amazon and order toilet paper when you’re out. That’s why setting up voice purchasing on your Amazon Echo so Alexa can place orders for you might be beneficial.
To get started:
- You’ll need to turn on voice ordering and 1-Click ordering.
- Open the Alexa app and navigate to Settings > Account Settings > Voice Purchasing and toggle Voice Purchasing on.
- Next, on the same screen, you should set up a voice code or profile so that only you can make purchases. Where it says Purchase Confirmation, tap Enable and select either Voice Profile (only your voice will activate purchasing) or Voice Code (a four-digit code).
6. Set up profiles for your Amazon Echo for your family.
If you have more than one Echo speaker in your home, you’ll want to create voice profiles for each person who uses it. This will help Alexa recognize your voice and differentiate you from other people in the house.
To create voice profiles:
Go to Settings > Account Settings > Recognized Voices > Create a voice profile and follow the onscreen prompts to set it up.
About The Author
Hassan Zaka
I am an expert in accounting and possess diverse experience in technical writing. I have written for various industries on topics such as finance, business, and technology. My writing style is clear and simple, and I utilize infographics and diagrams to make my writing more engaging. I can be a valuable asset to any organization in need of technical writing services.
Follow Us:LinkedinTwitter