In today’s digital world, security cameras act as a key factor in the prevention of vandalisms, burglaries, and break-ins. During the installation of security cameras it is necessary to record everything that has happened. For this reason, we can use Adorcam which is an internet-based security camera.
Adorcam can be described as an app for it is making the connection between your security cameras and internet network so that the live videos of the monitoring as well as motion detection are available for you. Below are the essential articulations of Adorcam.
- Share video images
- Real-time video playback
- Time and message reminder
- Playback image inspection
- Set date and reminder, can also add a message
- Monitoring of multiple cameras at a time
- Alarm system that automatically takes screenshots
- Instant notifications
This app can only be used with P2P IP camera brand on the market. For instance, by providing only a login as users need to enter their ID and passwords to access the live videos. On the other hand, by solidifying all the latest versions and the best optimization sometimes it can still lead to some problems and among the various occurring problems are.
Adorcam Troubleshooting Sheet
| No. |
Description |
Solution and operation |
| 1 |
Unable to connect |
|
| 2 |
Reset |
|
| 3 |
Change to a new Network |
|
| 4 |
Failed to add Device |
Please enable the Adorcam app IOS – Andriod cellular data on in mobile settings |
| 5 | No Alarm Push |
Please enable Adorcam app notification in mobile settings |
| 6 | No Alarm Video Record |
Please insert TF Card |
Here are some of the problems that we will discuss in detail
- Adorcam device is not online
- Adorcam not recording events
- Adorcam motion detection not working
These problems are discussed below with their solutions.
Why is my Adorcam is not Online?
The most often faced problem is that my Adorcam is not online, and if you have also been struggling and cannot access your Adorcam here some solutions.
- First check the status of camera before connecting to Adorcam. If red light is flashing in LED, it means that it is waiting for Wi-Fi setup and if not then try to reset the camera and for restart function click the power button twice.
- Click Add Device > Battery Camera – confirm your Wi-Fi name and enter your Wi-Fi password.
- The camera only supports 2.4G Wi-Fi, so make sure that your Wi-Fi is 2.4G or 5G.
- Most of the security cameras work only with 2.4GHz frequency and if you are using 5GHz frequency it will not connect to the network.
Router Wi-Fi mode:
Most of the routers have dual-frequency Wi-Fi and support the frequency of 2.4GHz or 5GHz simultaneously. Wi-Fi commonly has two modes given below:
1. Combination mode:
If router has only one Wi-Fi that supports the frequency of 2.4G and 5G at the same time, then your devices will automatically connect to the working frequency.
If you have connected the camera by QR code or AP hotspot then you can directly add camera without distinguishing that either the Wi-Fi frequency is 2.4g or 5G.
2. Separation mode
If router has two Wi-Fi, they will have different names. First, Open Wi-Fi menu on your phone or PC to check the Wi-Fi name. For example, “my Wi-Fi” or “my Wi-Fi 5G”, “my Wi-Fi 2.4G” or “my Wi-Fi”, etc.
Select the Wi-Fi name with 2.4GHz included or excluded. If the name of your Wi-Fi does not have 2.4 or 5G, you can check your Wi-Fi frequency by following methods:
Check if Wi-Fi frequency is 2.4G or 5G
For Android Users:
For phones having android system, first of all, connect to Wi-Fi system and then check Wi-Fi detail.
- Your phone is connected to Wi-Fi network.
- Go to settings > Wi-Fi > Select the connected network to check Wi-Fi detail information.
Phones with different Android system can have different settings.
For iPhone Users:
IPhone users require AirPort Utility APP to check Wi-Fi details.
- Download and install AirPort Utility
- You will find AirPort Utility at the bottom of your settings then open Wi-Fi scanning function.
- Open AirPort Utility app and click Wi-Fi Scan > Scan
- Check your Wi-Fi channel.
Adorcam is not recording Events?
If your Adorcam is not recording the events try these points
- Check if your app has stable internet connection.
- Try to restart the device.
- Go to the app settings and make sure the recording function is on.
- Check the storage if storage capacity runs out it can’t record the events, in this case try deleting some videos.
If above given points are not beneficial for you, try to change the Motion Detection sensitivity to high. If this can’t help in solving your problem email at support@hubbleconnected.com. but before that you need to check out below (My Adorcam is not detecting motion) and check every setting accordingly and see if the problem is solved.
My Adorcam is not detecting motion:
In some cases, your Adorcam fails to record the motion triggered events and is unable to distinguish motion detection, if you are also facing this problem you might be facing the following possibilities,
-
Motion Detection may have been turned off
A. if you are using premium version Motion Detection is turned on/off automatically if you set up a schedule.
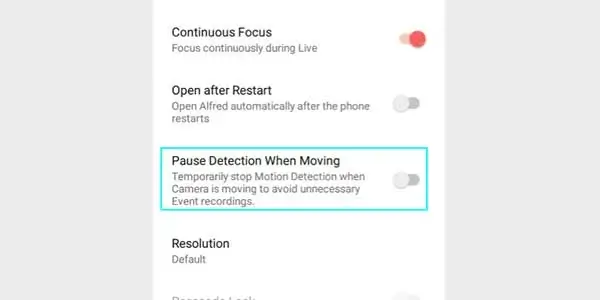
B. If your Adorcam is on Continuous Recording mode make sure to turn on Motion Detection for camera to record. -
If motion happens to be outside the Detection Zone or zoomed-in area
A. Make sure the object or area that you are recording is in the center of your camera frame.
B. Continuous Recording is recommended to avoid missing main events in the last 8 hours. -
Motion isn’t strong enough to trigger the recording
Sometimes, an event looks like a series of images under the camera’s eyes and camera cannot determines motion by comparing these images. If the camera doesn’t record the whole event, it indicates the motion isn’t strong enough for your camera to think of it as a motion.
To make sure the detection of most of the motion taking place
- Set your device within 15 meters of interested objects (with high sensitivity)
- Place adequate amount of light in the monitoring area.
- Record side-to-side movements(lateral) instead of far-to-near movements (depth)
- Avoid filming through window screens and panes
- Keep your camera lens clean.
-
The internet connection is not stable
If the Internet connection is turned off before uploading the video, so the upload will fail.
To improve the connection, you can try to:
- Test your internet connection via net
- Connect the camera to a stronger Wi-Fi signal
- If you find any network problem contact you internet provider to find out the main problem.
Why Adorcam Error Code 05 is coming and how to fix it?
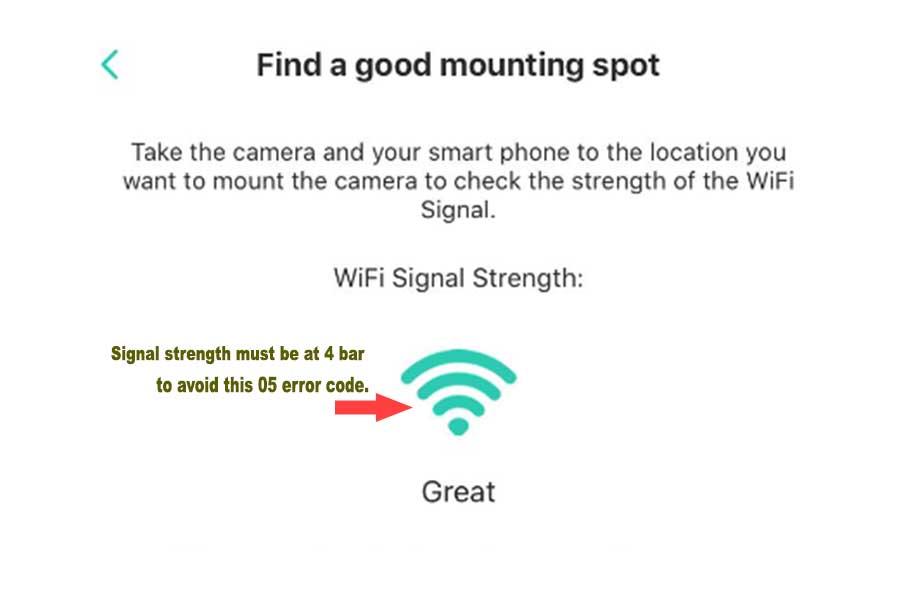
In my experience, the error code 5 with Adorcam cameras often pops up when the camera Wi-Fi signal is weak. It’s like the camera is having trouble talking to your internet because the connection isn’t strong enough.
So What to do to fix it?
Immediatelydo this:
- Move your Wi-Fi router a bit closer to the camera. Even a few feet can make a big difference.
- Once it’s closer, open the Adorcam app and check the signal strength for your camera. There should be a section in the app that shows this.
- If the signal is strong now, This might have solved the error code 5 you were seeing.
I am pretty sure it will solve the issue.
Other general Steps if it remains unsolved:
- Enable App Permissions: Go to smartphone settings and look for the Adorcam app. Then, make sure that you enable the required permissions, especially for the phone data bit if you’re not using the Wi-Fi (JustAnswer).
- Reset the Camera: If the camera is not connected try one more time.Try one more time resetting it. That way you can get the wifi back on track most of the time.
- Re-add the Device: Go to camera settings in your Adorcam app, then click on the option to remove the camera from the app. Try to add the camera back into Adorcam app again. It helps to check the connection status and error state of the system.
Frequently Asked Questions
How do I know if my Adorcam is charging?
Here are some Adorcam camera LED Status Description
- No light: Sleep / shutdown
- Red light solid on: In charging
- Slowly flashing red light once in a second: Waiting for Wi-Fi connection
- Fast red light (multiple times a second) : Wi-Fi connecting
- Blue light solid on: Alarm recording
- Blue light flashes slowly (once every two seconds):Camera in live view status
- Blue light flashes quickly (multiple times a second): Upgrading status
How long does Adorcam take while charging?
Charging time varies from camera to camera but Adorcam, usually, takes 4-6 hours to charge completely.
How do I download Adorcam?
Adorcam For PC
- First download Blue stack for PC for free and install it.
- Then go to play store and search for Adorcam Official app and download it. For further details click here
Adorcam for Android
For android you to download Adorcam app
- First go to Google play store
- Search Adorcam app
- Install it and start using
You can also download Adorcam app by clicking on this link.
Adorcam for iPhone
To download Adorcam app on your iPhone
- Go to Apple play store
- Search for Adorcam app and install it.
You can also download Adorcam app by clicking here.
Find alternative apps if you don’t want to use Adorcam or simply try as an experiment.
How do I reset my Adorcam camera?
To reset your Adorcam camera, you should press the power button twice. This action should make the LED turn red and flash slowly, indicating that the reset operation has been initiated. If you need to perform a full reset, you may need to press and hold the reset button on the bottom of the camera for 10 seconds until the red LED flashing indicates the reset is complete (device.report).
How do I connect my Adorcam to WiFi?
To connect your Adorcam camera to WiFi, follow these steps:
- Ensure your WiFi is on and you’re connected to a 2.4GHz network, as Adorcam cameras do not support 5GHz networks.
- Download and open the Adorcam app on your smartphone.
- In the app, click “Add Device” and select “Battery Camera.”
- Confirm your WiFi name and enter your WiFi password in the app.
- Follow the in-app instructions to complete the connection process, which may include scanning a QR code or waiting for the camera to sync with your network.
Remember to keep your camera close to your router during the setup process to ensure a strong connection


