In the previous post, I outlined some Arduino tide code to generate tide height predictions for a NOAA tidal reference station.
Now let’s do something useful with this newfound functionality. In the experiments I run, it’s useful to keep intertidal animals like snails and limpets on a natural tidal cycle. In addition, some animals like high-shore limpets really dislike being continuously submerged, and will crawl up out of the tank and die when they dry out. In this case, I built a “limpet splasher” system that sprays water in the aquarium for a few seconds at a time with pauses in between to simulate the wave beat, and shuts off completely during low tide. The code in this GitHub repositoryaccomplishes this goal by activating a relay (hooked to a sprinkler solenoid) to spray water for a few seconds, pausing for 15 seconds, and then spraying again, simulating the splashing of waves. During low tide, no water flows.
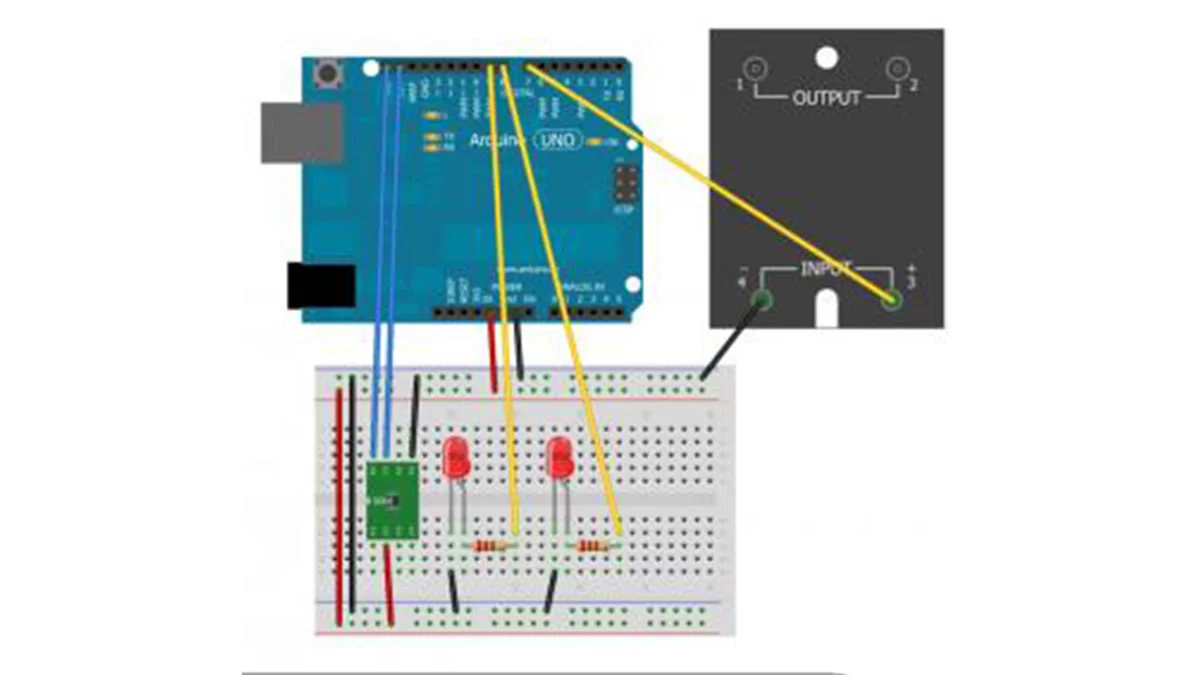
The circuit uses a DS3231 real time clock (in the guise of a Chronodot) to provide the date and time, two LEDs to indicate low tide or when the relay is activated, and a solid state relay to interface with a common home garden sprinkler solenoid. The schematic is shown below.
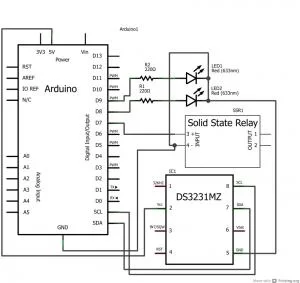
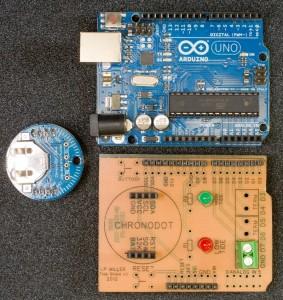
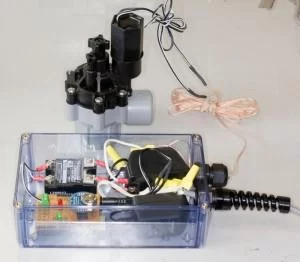
To implement this in real life, I made a circuit board to piggyback onto an Arduino UNO. It holds the Chronodot, LEDs, and a terminal block to wire to a solid state relay. Here’s a pdf of the circuit board design, suitable for toner transfer.
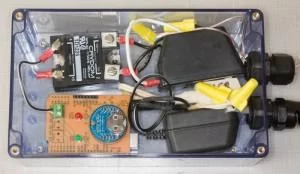
The Arduino tide and shield were placed in a project box and hooked to a Crydom solid state relay. The relay sends power from the 24VAC power supply in the box to a Rainbird sprinkler solenoid. The relay can be controlled directly by an Arduino digital output pin. The other power supply runs the Arduino.
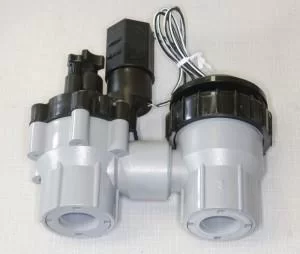
To control the water flow, a Rainbird sprinkler solenoid control valve was modified. Normally these valves come with an anti-siphon valve attached, but this part is useless in this application. It should be noted that these valves require a minimum level of water pressure to activate, and so they must be used on the inlet side of a pressurized seawater delivery system for your tank. They will not operate on the drain of an aquarium tank due to insufficient pressure. In situations where your water pressure is too low to use the sprinkler valve, or when you need to control the drain side of an aquarium, you could adapt this Arduino+relay system to activate an electric ball valve, or use it to power an air or vacuum pump that actuates a pneumatic irrigation valve.
Another variation
The limpet splasher is great from some animals, but in other cases (like mussels), you might simply want to raise and lower the water level in an aquarium once for each high/low tide transition. The code in this GitHub repositoryis a variation on the limpet splasher theme. It is set up to use one or two relays to alternately open and close a drain valve when the predicted tide height passes the “virtual shore level” defined in the sketch.
And another variation
The project that drove this whole development process was to build an apparatus to continuously raise and lower the water level in an aquarium, rather than the simple high/low switch described above. The video illustrates a rack that raises and lowers between an upper and lower limit in time with the local predicted tide (for San Diego in this case). The Arduino is calculating the new tide height every minute and then actuating a stepper motor to drive the rack up and down. Magnetic reed switches set the upper and lower limits.
Source: Using Arduino tide predictions
About The Author
Hassan Zaka
I am an expert in accounting and possess diverse experience in technical writing. I have written for various industries on topics such as finance, business, and technology. My writing style is clear and simple, and I utilize infographics and diagrams to make my writing more engaging. I can be a valuable asset to any organization in need of technical writing services.
Follow Us:LinkedinTwitter