Overview of How to Connect ADT Doorbell Camera to Wi-Fi
The article explains how to power, enroll, and troubleshoot an ADT doorbell camera using WPS PIN mode. It covers button functions, LED indicators, initial power/charging, factory reset, step-by-step WPS PIN enrollment via the ADT Pulse portal or TS Installer App, naming the device, verifying enrollment, and troubleshooting Wi-Fi range and LED signals.
Quick Solutions to Questions related to ADT Doorbell Camera:
-
How do I put the ADT doorbell camera into WPS Pin Code mode?
Press and hold the Doorbell/WPS button for 0–10 seconds to enter WPS Pin Code mode. -
What do the LED light colors and behaviors mean?
Off means no power; blue on means power on/network available; green blinking means WPS active; red on 5 seconds then off means WPS failed; red blinking means network failed; green spinning means firmware upgrade; intermittent red blinking for 2 seconds means AC power disconnected. -
How do I enroll the camera using WPS PIN via ADT Pulse?
Power camera until LED flashes red, log into Pulse portal or TS Installer App, go to Manage Devices > Cameras, click Add Using WPS, enter the camera PIN from the rear label, press the ring button to start WPS (LED blinks green), and click Continue within 2 minutes to complete enrollment. -
What if the camera does not power up or show flashing red LED?
Charge the camera via Micro USB for 2 hours; if LED still does not flash red, hold the reset button for 15 seconds to factory default and restart installation. -
How can I tell if Wi‑Fi range is insufficient at the doorbell location?
If the power LED keeps blinking red after moving the camera to the doorbell location, Wi‑Fi cannot reach it and you need a repeater or to move the CloudLink/TSS closer to the center of the house.
Doorbell/WPS Button
This button has two functions:
- WPS Pin Code Mode. When pressed and held for0-10 seconds, the doorbell camera will be in the WPS Pin Code mode.
Note: When Wi-Fi connection is established, the WPS function is disabled. - Doorbell. Press the button to ring the bell.
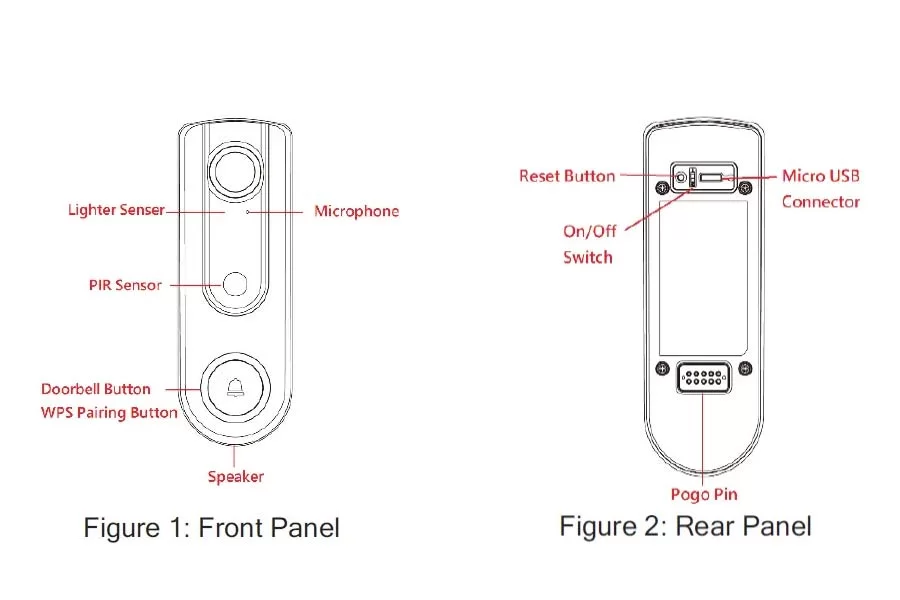
LED Lights Behaviour
- Off – No power.
- On (Blue) – Power On / Network connection is available.
- Blinking (Green). The WPS connection is active.
- On (Red) – If the LED is on for 5 seconds and then turns off, the WPS function has failed.
- Blinking (Red) – Network connection is failed.
- Spinning (Green). The firmware is being upgraded.
- Intermittent Blinking (Red) – If the LED is blinking for 2 seconds, means AC power is disconnected.
Here the Basic setup of How to Connect ADT Doorbell Camera to Wi-Fi and Add Devices
After installation and mounting the camera below steps include how to add and connect Wi-Fi.
- Power Up and check the LED
Turn on the switch on the rear side of the doorbell camera and wait for20 seconds until the LED turns to flashing red.
Note 1: The internal battery usually could last 40 minutes of operation.

If you don’t see the camera powering up, please charge the doorbell camera via Micro USB cable with USB charger for 2 hours before installation.
Note 2: If the LED does not flash red, please hold the reset button for15 seconds to factory default the camera then start the installation process over.
Enroll the Camera in ADT Pulse
This process uses the Wi-Fi Protected Setup (WPS) with PIN method to wirelessly enroll the HD Camera to the gateway via the ADT Pulse Portal or TS Installer App.
Using WPS with PIN to Enroll the Doorbell Camera
- Power up the camera and wait for the LED turning flashing red
- Launch an Internet browser and log in to the Pulse portal or TS installer app.
- Enter the Manage Devices screen using one of these methods:
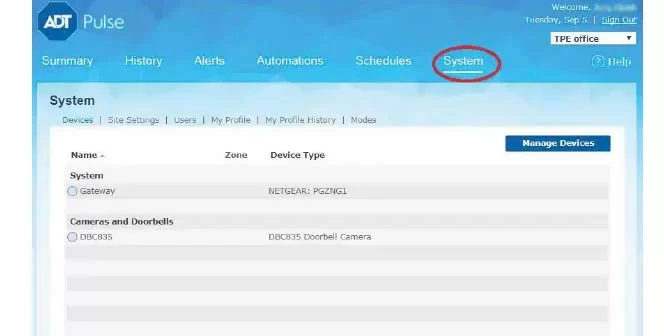
– For the Pulse portal, select the System tab and click Manage Devices.
– For the TS installer app, click the following Pulse Devices link:
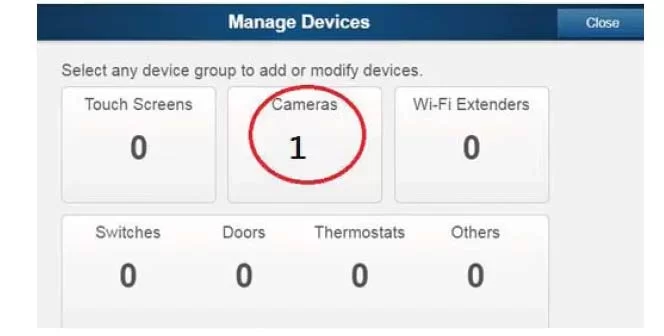
https://portal-aries.icontrol.com/myhome/9.6.0-323/access/signin.jsp - In the Manage Devices screen, click Cameras.
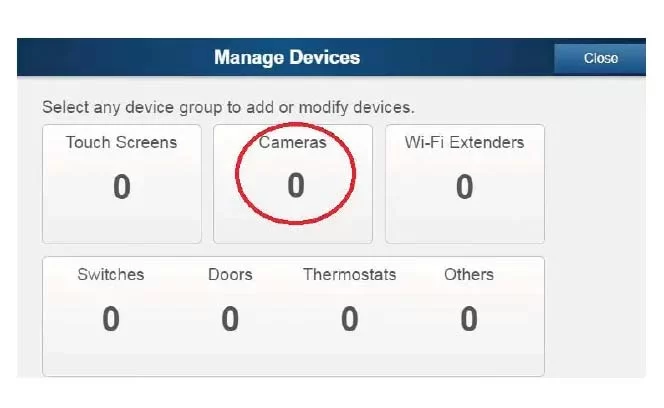
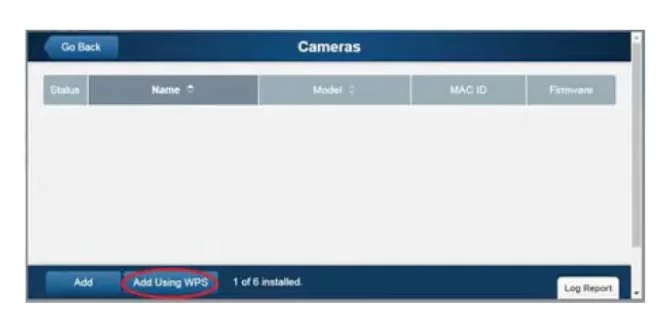
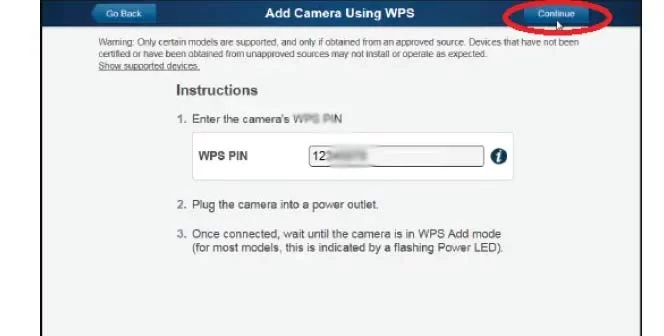
5. Click the Add Using WPS button at the bottom of the screen.
6. Locate the camera’s PIN number on the label on the rear of the camera. Enter the PIN number in the WPS PIN field.
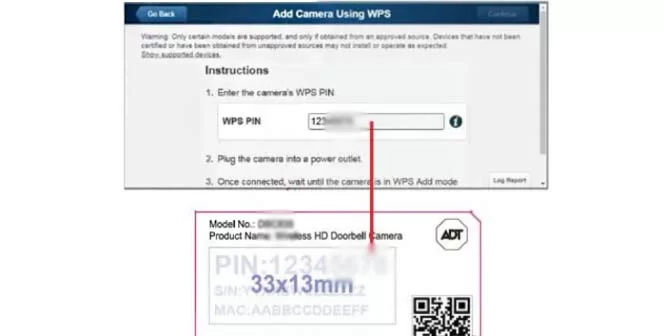
7. Press the Ring button, the LED would be turned to blinking green for WPS process.
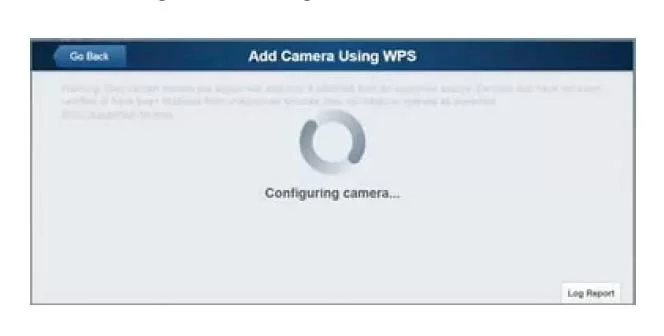
Note: This WPS process must be completed within 2 minutes or else it will be time out. The remaining time is displayed in the upper left portion of the screen.Click the Continue button to initiate the WPS process.
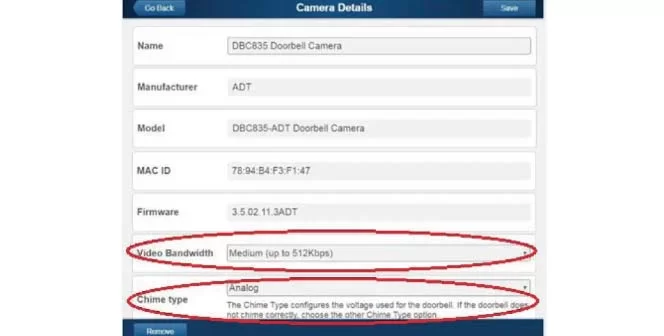
8. If the doorbell camera is enrolled, the Camera Details screen will be displayed. Name the device
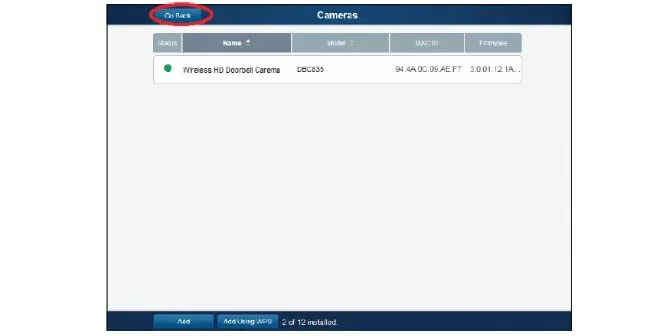
9. The newly-added device will be shown in the Cameras list, then click Go Back at the top left of the screen.
10. The newly-added device will be shown in the Cameras list, then click Go Back at the top left of the screen.
11. The Manage Devices screen is displayed. Click Close.
12. Click “System” page to check if the device is enrolled already.
13. Move the camera to where the doorbell button is located and check the LED to see if the camera still has Wi-Fi connectivity.
Note: If the Wi-Fi cannot reach the front doorbell camera, you will see the power LED kept blinking red. Then a repeater is required or move the CloudLink/TSS to the center of the house.
About The Author
Hassan Zaka
I am an expert in accounting and possess diverse experience in technical writing. I have written for various industries on topics such as finance, business, and technology. My writing style is clear and simple, and I utilize infographics and diagrams to make my writing more engaging. I can be a valuable asset to any organization in need of technical writing services.
Follow Us:LinkedinTwitter