Overview of Marantec Garage Door Opener Troubleshooting
Marantec produces reliable, energy-efficient garage door openers but they can suffer wear or faults. This guide explains common issues—blinking lights, sensor misalignment, error codes for M4500e/M4700E/other models, programming remotes/keypads, resetting units, and troubleshooting remotes, keypads, and sensors. It lists specific LED/error code meanings, step-by-step sensor alignment, remote programming and copying, keypad fixes (batteries, wiring, stuck keys), reset procedures, and model-specific fault solutions to help diagnose and correct problems or decide when to call a technician.
Quick Solutions to Questions related to Marantec Garage Door Opener Troubleshooting Guide:
-
How do I stop my Marantec opener light from flashing?
Check for obstructed or misaligned safety sensors, remove obstructions, clean lenses, and realign photo-eye sensors until the transmitter green light is steady. -
How can I program a remote to a Marantec M4500 or M4700?
Press and hold P until LEDs light and #2 blinks, press P until LED #7 blinks, hold the transmitter button until LED #7 flashes rapidly, then press P to store the code. -
Can I copy a programmed Marantec remote to a new remote?
Yes—install batteries, connect the two remotes with the programming jumper, hold the programmed remote button while pressing the new remote button until the LED indicates successful transfer, then test. -
What does 1 to 12 flashes on the M4500e LED mean?
Each flash count maps to a specific fault (e.g., 1 flash safety sensor lost, 5 flashes motor overheated, 10 flashes control board memory error); follow the troubleshooting tips listed for each code. -
How do I reset a Marantec opener to factory defaults?
Press and hold +, -, and P until timer hits 20 for a basic reset; use the advanced Menu sequence (hold P to 10, select Level 1, Menu 3, choose reset Menu 8, set 1 or 2 and press P) for full factory reset. -
What should I do if my Marantec keypad blinks red?
Check and replace batteries, wait out keypad lockout, improve signal range or interference, reset and reprogram the keypad, or replace the keypad if damaged.
Marantec has been producing high-quality openers with exceptional service. The home garage door opener series is energy-efficient, long-lasting, and trouble-free. It is, nevertheless, susceptible to wear and tear and operating concerns over time, just like any other equipment.
Garage door openers from Marantec are quite simple to diagnose and troubleshoot. However, if you have a more technical problem, you may always seek expert help. Continue reading for information and troubleshooting suggestions for Marantec garage door openers.
So here is the Marantec Garage Door Opener Troubleshooting Guide:
Marantec garage door opener light flashing
Most common reason against light flashing: The safety sensors are misaligned or obstructed if the opener light is blinking and the garage door is not shutting. Modern garage door openers have safety sensors that compel the garage door to reverse while closing or refuse to close if they detect motion or an item in its path. Remove the impediment or realign the safety sensors to stop the light from flashing.
How to Re-Align the Photo Eye Sensors?
The photo-eyes sensors maintain an invisible, uninterrupted light beam between them, and when this beam is obstructed, the garage door refuses to close automatically. The sensors can be readjusted in the following manner.
- Pull the emergency release cord to allow you to manually close the door if it would not close. Then close the garage door to confirm that the light beam is visible.
- The sensors are out of alignment if the opener is turned on and the green light flashes.
- With a screwdriver, loosen the screws that keep the mounting brackets in place.
- Clean the picture lenses with a clean rag if there were no items on the path. When dirt collects on the lenses, it seems as though the doorway is moving.
- Move the sensors around until the transmitter sensor’s green light illuminates steadily, indicating appropriate alignment.
- Tighten the bracket screws while holding the photo-eye sensor in place.
- Disengage the emergency release cable and physically return the garage door to the open position. Make sure there are no obstructions in the opening.
- Place a carton box in front of the beam to block it, then push the wall control button; if the alignment was successful, the garage door would not move. The garage door should close entirely once you remove the carton box.
Other Possible Reasons against Marantec garage door opener light flashing by Self diagnosing Led Light indication
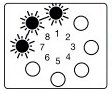
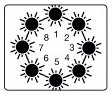
The self-diagnosing LED light indication on your opener can assist you to figure out what’s wrong with it and how to fix it. The LED light indication on the back or bottom panel of a garage door opener, or below one of the light lenses if your opener has dual lights, is placed on the back or bottom panel of the opener. This LED light flashes for a set amount of time. The most typical issue signs and remedies for garage door openers are shown below.
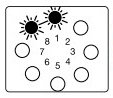
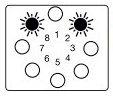
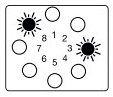
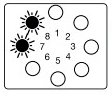
Marantec M4500e Rrror Codes
Below is a table format for the Marantec M4500e error codes, including the error code, LED indication, a description of each error, and troubleshooting tips.
| Error Code | LED Indication | Description | Troubleshooting Tips |
|---|---|---|---|
| Error 1 | 1 Flash | Safety Sensor Signal Lost or Obstructed | Check for obstructions. Ensure safety sensors are aligned. |
| Error 2 | 2 Flashes | Safety Sensor Short Circuit | Inspect sensor wiring for shorts. Replace sensors if necessary. |
| Error 3 | 3 Flashes | Safety Sensor Wire Open | Check sensor wires for disconnections or breaks. |
| Error 4 | 4 Flashes | Force Sensing Interrupted or Exceeded | Reduce door resistance. Lubricate or adjust as needed. |
| Error 5 | 5 Flashes | Motor Overheated | Allow motor to cool down. Check for binding or heavy door. |
| Error 6 | 6 Flashes | RPM Sensor Failure | Ensure RPM sensor is not blocked or damaged. |
| Error 7 | 7 Flashes | Travel Limits Not Set | Set the upper and lower travel limits as per manual. |
| Error 8 | 8 Flashes | Travel Limits Lost | Re-program travel limits. |
| Error 9 | 9 Flashes | Unexpected Movement Detected (Door Drift) | Inspect door balance and springs. |
| Error 10 | 10 Flashes | Internal Control Board Memory Error | Reset the system or replace the control board if persistent. |
| Error 11 | Continuous Flash | Door Operation Exceeded Maximum Run Time | Check for obstructions or binding. |
| Error 12 | Alternate Flashes | Incompatible External Accessories or Faulty Connection | Remove incompatible accessories. Check wiring connections. |
Please note that these error codes are specific to the Marantec M4500e model and may not apply to other models or brands.
Marantec 4500 and 4700E Error Codes:
| Fault Display | Code | Problem | Problem solution |
| #7 Flashes | 7 | If no buttons are pressed within 120 seconds, the programming mode terminates automatically. OPEN and CLOSED door positions are programmed without passing the Reference point. |
|
| #8 Flashes | 8 | Adjustments setting interrupted before completion. Detective reference switch | The door can be operated normally. Recheck adjustments if adjustment settings were not Completed. Have operator serviced. |
| #1 + #8 Flash | 9 | Defective RPM sensor/ operator system blocked. | Have operator serviced. |
| #2 + #8 Flash | 10 | Door movement too stiff. Force required to move door exceeded set force level. working force setting is too low | Check door for obstructions, proper manual operation, proper balance, or broken springs. Clear obstructions or have the door serviced. If door is OK, increase the force setting. Readjust force and run the operator for two (2) uninterrupted complete cycles. “Advanced settings” Level 2 (Menu 1 and Menu 2). REPEAT THE “SAFETY REVERSAL TEST” AFTER ADJUSTMENT IS COMPLETE. |
| #3 + #8 Flash | 11 | Operator exceeded maximum run time limit. | Make sure the rail is connected to operator’s head and the belt or chain is moving. |
| #7 + #8 Flash | 15 | Photo eye sensors not connected properly. Photo eye sensors not aligned. Obstruction in the door path (photo eye beam broken). | Check photo eye sensors wiring and connections. Realign photo eye sensors. Remove obstruction from door path. |
| #1 + #7 + #8 Flash | 16 | Force watchdog circuit found error.The sensor which monitors the operator sensitivity has failed. | Readjust the operator force(s) and run the operator for two (2) uninterrupted complete cycles. “Advanced settings” Level 2 (Menu 1 and Menu 2). REPEAT THE “SAFETY REVERSAL TEST” AFTER ADJUSTMENTS ARE COMPLETE. Have the operator checked |
| #5 + #6 + #7 + #8 Flash | 26 | Under voltage, the operator system overloaded at the maximum force setting.Operator system overloaded. | Have the outlet assigned for the operator and/or supplied power checked. |
| #2 + #5 + #6 + #7 + #8 Flash | 28 | Door movement is too stiff or irregular. Door blocked. Operator operating sensitivity set too sensitive (low). | Check door for obstructions, proper manual operation, proper balance, or broken springs. Clear obstructions or have door serviced, If needed. Have the operating sensitivity settings checked by an authorized dealer/installer “Advanced settings” (Menu 3 and Menu 4.). Run the operator for two (2) uninterrupted complete cycles after adjustments are completed |

Marantec garage door opener programming
First Stage: Installment of the system, you can see later in the section in the manual guides of all of marantec models.
- Marantec Syntergy 360, 370, 380
- Marantec Syntergy 260, 270, 280
- Marantec Line M4500e, M4700e
2nd Stage Programming of Marantec Remote Control
How to Program a Marantec (270/280) Opener
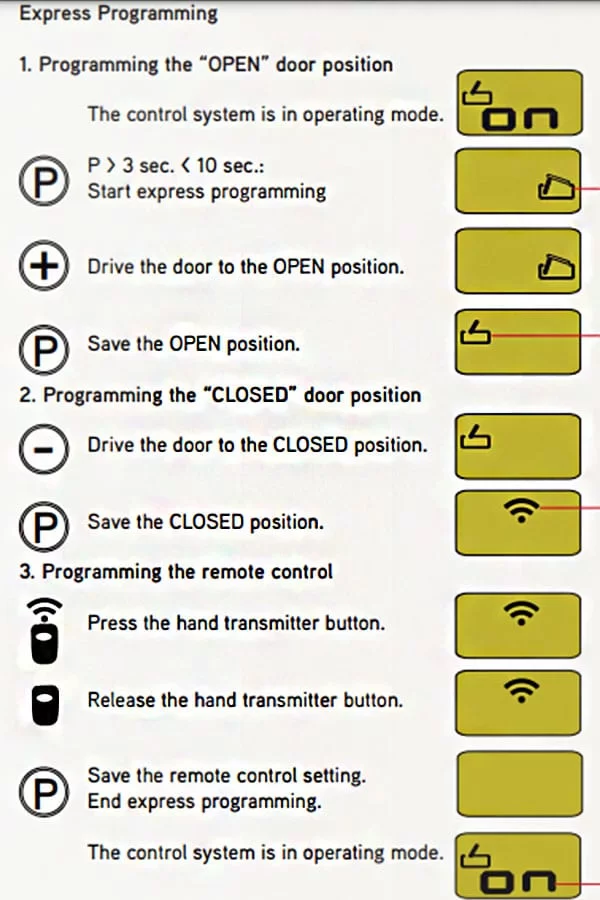
- Press and hold the “P” button① for approximately 3-5 seconds. The LED screen② will
- Count up and release the “P” button① at 4 when the open door icon⑥ appears (see Right).
- Press and hold the “+” button③ to drive the unit to the open position. If required adjust the position using the “-” button④ and “+” button③.
- Save the open position by pressing the “P” button① for 1 second. The closed icon⑦ will appear (see Right).
- Now press and hold the “-” button④ and the garage door will drive to the closed position. If required adjust the position using the “-” button④ and “+” button③.
- Press the “P” button① for 1 second to save the closed position. Now the transmitter learns icon⑧ will appear (see Right).
- Press the desired button⑤ on the remote to learn the remote to the unit.
- Release the remote button⑤.
- Press the “P” button① for approximately 1 second to save the settings and exit programming.
- Once exiting program mode, the unit will return to standby mode
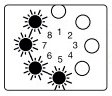
Remote Programming of Marantec M4500 and M4700 Openers
To Program A Remote:
- Press and hold the “P” button for approximately 2 seconds. When all LEDs illuminate and LED #2 begins to blink, release the button. You are now ready to set or change the desired adjustment.
- Press and release the “P” button until the #7 LED is illuminated
- LED #7 should be blinking. The opener can now learn the code of the hand-held transmitter. While LED#7 is blinking, press and hold the button on the transmitter
- When you see LED #7 flashing rapidly, you can release the transmitter button. The opener has now learned the particular code of this transmitter
- Once the opener has successfully received the code from the transmitter, press and release the “P” button. This stores the code in memory. It also completes the adjustment setting sequence and completes the program process. The LEDs will automatically fade out in a circular pattern, which indicates that the program mode is complete.
- LED #8 should now be illuminated, and the opener is ready for operation.
How do you program a universal remote to a Marantec garage door opener? (M4500 or M4700)
Different from other models, Marantec garage door openers only have one remote control code. When you receive more remotes, you may copy the code from the programmed remote to the new ones by connecting the two with the programming jumper and transferring the code. You may add as many remotes to the operator as you desire by doing it this way.
- Install new batteries in the new remote control.
- Plug one end of the programming jumper and into the side of the programmed remote control.
- Plug the other end of the programming jumper into the new remote control you want to copy the code.
- Press and hold the button on the programmed remote control, and the LED light will turn on.
- Without releasing the button on the programmed remote, press the button on the new remote, and the LED light will blink rapidly and then steadily, and then release both buttons.
- To test the programming, disconnect the programming jumper, press the new remote control button, and operate the garage door opener.
Marantec 4500 garage door won’t close
There are a number of possible causes for the garage door not closing:
- Examine the photo eye sensors for any obstructions. Remove any dogs, snow, or debris that may have accumulated in the garage doorway. Dirt and dust might accumulate on the photosensors, obstructing the beam. Wipe the lenses on both sensors with a moist clean towel.
- Look for any misalignment. When both the red and green LED lights are shining steadily, you know you’re in good shape. If the transmitter sensor’s green light flashes, the sensors are out of alignment and need to be adjusted.
- Ascertain that the safety sensors are properly attached. If the photo eye sensors’ LED lights aren’t on, there’s a problem with the connection.
- Examine the termination cable that connects to the powerhead, unhook it, and firmly reattach it. Assemble the sensor by connecting the white wire to terminal 1 and the stripped wire to terminal 2.
- Check for any damaged or short cables if the situation persists. Wires can be chewed away by pests and rats, and electrical surges can burn the wires, causing connection issues. Use a multi-tester to check for current in all of the wires and, if required, replace them.
How Do You Reset A Marantec Garage Door Opener Remote?
Resetting will restore the garage door’s to the default operating system, and you should reprogram all the receivers and limit settings. Read more on the Marantec garage door’s reset procedure.
- Press and hold at the same time all three control buttons (“+,” “-,” “P”) until the timer reaches 20. Then depress buttons and allow the system to reset.
- Once the opener completes the reset process, the display will turn on to indicate standby mode.
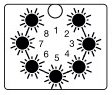
Alternatively, you can perform the advanced reset procedure to restore factory default settings.
- Make sure the garage door is closed and the operation mode is set to “ON” on the display system.
- On the opener powerhead, look for the “+,” “-,” and “P” buttons, as well as the eight numbered red LED lights.
- Hold the ‘P’ button down until the counter hits ’10,’ then release the button.
- To select Level 1, use the “-” button.
- Hold down the ‘P’ button until Menu 3 appears on the LCD screen.
- Select the reset Menu 8 by pressing the “+” button, and the display will show “1.”
- Hold down the “P” key and the number “1” will flash.
- To change the screen display, press and hold “+,” and the number “2” will flash.
- Press and release ‘P’ to reset the garage door opener, and the screen display will turn off for a few seconds.
- When the reset is successful, the screen display will illuminate and return to standby mode waiting for reprogramming.
- Activate the garage door opener for two complete uninterrupted cycles to allow the opener to learn the new default settings.
More Garage Door:
- Xtreme Garage Door Opener Troubleshooting
- Genie Model 7055 Troubleshooting
- Raynor Garage Door Opener Troubleshooting
- Merlin Garage Door Troubleshooting
- Marantec garage door openers – A Complete Guide For You
Marantec Garage Door Opener Keypad Troubleshooting
Your wireless keyless entry may cease operating for a variety of reasons. Here’s how to figure out what’s wrong and how to fix it.
Dead batteries
Replace the batteries with triple (AAA) batteries if they are over a year old or the keypad buttons are flashing for 10 seconds.
Frayed or disconnected wires
The most common cause of keypad problems is a faulty connection between the keys and the cables. Using a screwdriver, remove the keyless entry from the wall and open the rear cover. Inspect and reconnect the internal wires, ensuring sure they are secure. If any of the sires are missing, the keypad will need to be replaced.
Defective keypad
After a year of use, the keypad usually stops functioning. Extreme temperatures, humidity, and spilled liquids can all cause the keypad to fail. Cracks, traces of water damage, and damaged keys should all be looked for. Replace the keypad if you can’t repair it.
PIN code error
If the PIN isn’t accepted by the opener, try not to input it too many times because this might permanently harm the keypad. Clear the keypad memory and change the PIN to a new one to repair the problem. Remove the keyless entry from the wall mounting location, remove the batteries, then press and hold the Enter button to clear the keypad memory. Install the batteries, then press and hold the enter button for around 5 seconds to see the LED flash.
Stuck keys
Dust, dirt, and grime can result in the buttons sticking to the pad. When the buttons become stuck, you have to clean the inside and outside of the keypad. Use a clean rag and some appliance cleaner to clean the outside, and then use a soft toothbrush to clean in between the buttons. You can also use compressed air to clean between the keys.
Marantec garage door opener remote control is not working
If your garage door opener is receiving power and not responding to the remote control, there are several ways you can fix the issue. Here is a brief troubleshooting guide for the Marantec remote control.
- Check the batteries. Depleted batteries are the most common reason for remote control not working. If you have not replaced the batteries in over six months, you should replace them with the CR2032, 3 Volt battery. Make sure you use the correct batteries; otherwise, they won’t work or won’t last long.
- The garage door opener is in Vacation/Lock Mode. The Vacation Mode locks out all remote control transmitters from operating the garage door. To determine if the Lock Mode is active, check if the button on the wall control is flashing. If it is, press and hold the Lock button on the wall control for about 3 seconds, and the big button will give a read steady light to show the opener is out of Lock Mode.
- Radio interference. Could be blocking the remote control signal from reaching the garage door opener. Check for new electrical appliances, radio, speakers, light bulbs, remote-controlled toys, and irrigation systems which can all cause signal interference. Contact the Marantac customer car and ask for a change in frequency.
- Check the modular receiver. On top of the motor head with an antenna wire protruding from it. Disconnect it and reconnect it, check for dirt and clean the contacts. Check for physical damages like bends and warping or losing connection. If a power surge hit the modular, you would have to replace it. Make sure you get one compatible with your garage door opener model.
- Reprogram the garage door opener to the remote control transmitter.
Marantec Garage Door Opener Sensors
If your garage door sensors are faulty, you can troubleshoot to identify the root cause. There are a few signs that can help you determine the underlying problem with a garage door sensor. By checking these, you can decide whether to fix the problem yourself or contact a professional. Look for these three signs:
- Light indicators: An easy way to tell if your garage door sensors are out of alignment is by checking if the exterior LED light blinks when you attempt to close the door. Green lights mean the sensors are working, while red lights indicate the sensors are not aligned. If you see red lights, try inspecting the bracket or tightening a screw on the blinking sensor. You’ll know you fixed the sensor if the light stops blinking and your garage door closes properly again.
- Dirty lenses: Sometimes fixing your garage door sensors requires just a clean cloth. The sensor lenses can fail to operate when dirt or spider webs block their view of the garage door opening. Wiping off the lenses can help your door function as normal. If your garage is especially dirty or your area is known for dust, you will want to clean your sensors regularly.
- Damaged wires: The wires responsible for connecting the garage door sensor system can undergo wear and tear as a result of regular use, weather and even pests. Rain and wind, pest infestations and the use of tools can all affect the wires. Check to see if the wires have water damage, chew marks or other indications of tampering. If so, you may need to replace them.
After performing these remedies, recheck your garage door with another cardboard box. This test offers an easy way to see if you fixed the problem or if you should call a garage door expert.
Marantec Keypad Blinking Red Lights: Causes and Solutions
When the keypad of a Marantec garage door opener blinks red, it’s signaling that something needs your attention. Here’s a detailed look at why this happens and how to address it:
Common Reasons for Red Blinking Lights
-
Low Battery:
- Symptom: The most common reason for a blinking red light is a low battery in the keypad.
- Fix: Replace the battery with a new one. Ensure you use the correct battery type as specified in the user manual.
-
Keypad Lockout or Timeout:
- Symptom: After multiple incorrect code entries, the keypad may lock temporarily, indicated by a blinking red light.
- Fix: Wait for the lockout period to expire (usually a few minutes) before trying again.
-
Signal Interference or Range Issues:
- Symptom: If the keypad is out of range or there’s signal interference, the red light might blink.
- Fix: Move closer to the garage door opener and ensure there are no objects causing interference.
-
Memory Error or Faulty Programming:
- Symptom: Incorrect programming or a glitch in the system can lead to blinking red lights.
- Fix: Reset the keypad and reprogram the codes. Refer to the manual for the correct programming procedure.
-
Keypad Wear and Tear or Damage:
- Symptom: Over time, the keypad may wear out or get damaged, causing malfunction signals like blinking red lights.
- Fix: Inspect the keypad for physical damage. If it’s worn out or damaged, it may need to be replaced.
Detailed Steps to Fix Blinking Red Lights
-
Battery Replacement:
- Locate the battery compartment on the keypad.
- Remove the old battery and dispose of it properly.
- Insert a new battery, ensuring correct orientation.
- Test the keypad to see if the issue is resolved.
-
Waiting Out a Lockout:
- Simply give the keypad some time, usually 5-10 minutes.
- Try entering your code again after the lockout period.
-
Enhancing Signal Strength:
- Remove any large metal objects or electronic devices between the keypad and the opener.
- Reposition the keypad or the opener antenna to reduce distance and obstruction.
-
Resetting and Reprogramming the Keypad:
- Locate the reset button on your keypad or opener.
- Follow the specific steps outlined in your user manual to reset.
- After resetting, re-enter your security code as per the programming instructions.
-
Keypad Inspection and Replacement:
- Check for visible signs of wear, tear, or damage.
- If the keypad is damaged, consider purchasing a replacement.
- Follow the manufacturer’s instructions to install the new keypad.
Other Common issues to All Marantec Garage door opener and how to troubleshoot them
| Situation | Situation Likely Cause And Solution |
| Operator does not operate from either wall control or transmitter | Does the operator have electric power? Plug a lamp into the electric outlet to see if lamp turns on. If not, check fuse box or circuit breaker (some outlets are controlled by wall switch). Have you disengaged all locks on door? If not, do so. The garage door spring may be broken. Have it replaced by a professional garage door technician. Has snow or ice built up under the door? The door may be frozen to ground. Remove any restrictions. |
| Operator operates from transmitter but not from wall control | Are wiring connections correct? Check wall control wiring on page 15. Is wall control door’s Pushbutton lit? If not, disconnect low voltage wires to wall control and momentarily touch them together. If operator runs, replace wall control. If operator does not run, check wiring connections at the operator, and check wire for shorts or breaks under staples. |
| Operator operates from wall control but not transmitter | Is the wall control button light flashing? If so, your opener is in vacation/lock mode. Turn off vacation/lock mode. Refer to “Wall Control Panel” .Does the transmitter indicator light glow when the transmitter button is pressed? If not, replace the battery. Refer to “Battery Replacement”. Has the operator learned the code of the transmitter? Repeat transmitter programming steps. Have all transmitters been set with the same code? Repeat code learning procedure for all remote devices. Is the photo eye system obstructed? If so, door will only close while wall control door Pushbutton is pressed and held. Refer to “Align and Test Photo Eye Sensors”. |
| Operator does not work from HomeLink® | Has the HomeLink® Transceiver learned the code of the transmitter? Repeat programming steps (refer to HomeLink® Manual). |
| Operator light does not turn on | Replace the light bulb(s) with a standard incandescent maximum 60 Watts each. If the standard incandescent light bulb burns out prematurely, replace it with 60 Watts maximum garage door operator incandescent light bulb. |
| Operator light does not turn off | Is the wall control Light Feature on? Press Light Button to turn off |
Further Marantec Garage Door Opener Troubleshooting in detail of these Models:
- Marantec Deluxe 2005
- Marantec COMFORT 250
- Marantec Comfort 257.2
- Marantec EX-2005
- Marantec M-4700
- Marantec Synergy 360
Marantec Deluxe 2005 garage door opener troubleshooting
| SITUATION: | CAUSE AND SOLUTION |
| Opener does not operate from either wall control or transmitter: | – Does the opener have electric power? Plug a lamp into the electric outlet to see if lamp turns on. If not, check fuse box or circuit breaker (some outlets are controlled by wall switch). |
| – Have you disengaged all locks on door? If not, do so. | |
| – Has snow or ice built up under door? Door may be frozen to ground. Remove any restrictions. | |
| – The garage door spring may be broken. Have it replaced by a professional garage door technician. | |
| Opener operates from transmitter but not from wall control: | – Are wiring connections correct? Check wall control wiring |
| – Is wall control door’s Pushbutton lit? If not, disconnect low voltage wires to wall control and momentarily touch them together. If opener runs, replace wall control. If opener does not run, check wiring connections at opener, and check wire for shorts or breaks under staples. | |
| Opener operates from wall control but not transmitter: | – Is the wall control button light flashing? If so, your opener is in the vacation/lock mode. Turn off vacation/lock mode. |
| – Does the transmitter indicator light glow when the transmitter button is pressed? If not, replace battery. | |
| – Has the opener learned the code of the transmitter? Repeat transmitter programming steps. | |
| – Have all transmitters been set with the same code? Repeat code learning procedure for all remote devices. | |
| – Is photo eye obstructed? If so, door will only close while wall control door Pushbutton is pressed and held. | |
| Opener operates from transmitter only from short distance (applies only to 40Mhz models) | – Check antenna wire installation. |
| Door does not open completely: | – Is something obstructing the door? Remove obstructions only after ensuring door area is free of persons, pets, and any other objects. |
| – If door has been working properly but now doesn’t open all the way, increase the up force and/or reset the open travel limit. REPEAT “TEST SAFETY REVERSAL” AFTER ADJUSTMENT IS COMPLETE. | |
| Door does not close completely: | – Is something obstructing the door or in the path of the photo eye? Remove obstructions only after ensuring door area is free of persons, pets, and any other objects. |
| – If door has been working properly but now doesn’t close all the way, increase the down force and/ or reset the close travel limit. REPEAT “TEST SAFETY REVERSAL” AFTER ADJUST- MENT IS COMPLETE. | |
| Door opens but will not close at all: | – Check the photo eyes for proper connection and alignment. |
| – Increase force in down direction. REPEAT “TEST SAFETY REVERSAL” AFTER ADJUSTMENT IS COMPLETE. | |
| Door reverses for no apparent reason: | – Is something obstructing the door? Pull emergency release knob and open door manually. If it is unbalanced or broken, call for professional garage door service. |
| – Clear ice or snow from garage floor area where garage door closes. | |
| – Review and increase force adjustment setting for down travel. | |
| – If door reverses from fully closed position, decrease travel limits. | |
| – REPEAT “TEST SAFETY REVERSAL” AFTER ADJUSTMENT IS COMPLETE. | |
| Opener light does not turn on: | – Replace the light bulb(s)—maximum 60 watts each. Use a “garage door opener light bulb” if regular type bulb burns out prematurely. |
| Opener light does not turn off: | – Is the wall control Light Feature on? Press Light Button to turn off. (applies only to Elite 2007 models) |
| Opener strains or maxi- mum force is needed to operate door: | – Door may be out of balance or springs are broken. Close the door and use emergency release knob to disconnect trolley. Open and close door manually. A properly balanced door will hold itself halfway open while being supported entirely by its springs. If it does not, disconnect the opener and call for professional garage door service. DO NOT increase the force to the opener to compensate for unbalanced or damaged door. |
| Opener does not move door at all: | – Door may be locked with a manual door lock. Remove any manual door locks. |
| – Springs are broken or door is out of balance. | |
| Opener won’t work due to power failure: | – Use the emergency release knob to disconnect trolley. Door can be opened and closed manually. When power is restored, reconnect trolley and resume automatic operation of door. |
Marantec COMFORT 250 garage door opener troubleshooting
| ERROR | ERROR MESSAGE | CAUSE FOR ERROR |
|---|---|---|
| • Error | • Control light VOLTAGE does not light up. | • No voltage • Thermal overload protection in transformer is active. • Control unit defective |
| • No reaction on impulse | • Control light MALFUNCTION is flashing / error No. 36. | • Static current circuit (operating elements) is interrupted. |
| • Photocell | • Control light MALFUNCTION is flashing / error No. 6 or 15 | • Photocell defective • Photocell interrupted |
| • Remote control | • Control light IMPULSE does not light up when giving impulse by hand transmitter. | • Electronic aerial not connected or wrong installation. • Wrong programming of hand transmitter coding. • Empty battery |
| • Power limit – max. power – learning power |
• Control light MALFUNCTION is flashing / error No. 10 or 28 | • Door is too sluggish or is blocked. • Power limit is set too sensitively. |
| • Door can only be opened. | • Control light MALFUNCTION is flashing / error No. 15. | • Photocell programmed but not connected. |
| • Operator only starts to run shortly. | • Control light MALFUNCTION is flashing / error No. 9. | • rpm sensor defective. • Door is too sluggish. |
| ERROR | CAUSE |
|---|---|
 |
Error 6: Photocell is active. |
 |
Error 7: Programming cancelled. |
 |
Error 8: Reference point not OK. |
 |
Error 9: Rpm detection defective/Anti-block device is active. |
 |
Error 10: Power limit is active. |
 |
Error 11: Excess travel stop is active. |
 |
Error 15: Testing photocell not OK. |
 |
Error 16: Testing power sensor not OK. |
 |
Error 26: Voltage monitoring is active. |
 |
Error 28: Learned power limit is active. |
 |
Error 35: Electronics defective. |
 |
Error 36: Static current circuit is interrupted. |
Marantec Comfort 257.2 garage door opener troubleshooting
| ERROR | CAUSE | SOLUTION |
|---|---|---|
| LED 8 does not light up. | – No voltage. | – Check that the mains power supply is operational. – Check the connection to the mains power supply. |
| – Thermal overload protection in power transformer was activated. | – Allow the power transformer to cool down. | |
| – Defective control unit. | – Have the operator system checked. | |
| No reaction on impulse. | – The connection terminals for the “impulse” button were by-passed, e.g. due to a short-circuit or flattened terminals. | – Try temporarily disconnecting any key switches or interior push buttons that are connected to the control unit: remove the cable from socket XB02, insert the shorting plug and look for cabling errors. |
| No reaction on impulse from hand transmitter. | – Module antenna is not plugged in. | – Connect the module antenna to the control unit. |
| – The hand transmitter coding does not correspond to the receiver coding. | – Activate hand transmitter again. | |
| – Hand transmitter battery is empty. | – Insert new battery. | |
| – Defective hand transmitter, control unit electronics or module antenna. | – Have all 3 components checked. | |
| Operator reverses when the door frame photocell is interrupted. | – The programming of the photocell in the door frame area was not performed correctly. | – Carry out a reset of the control, repeat express programming again. |
| ERROR | CAUSE | SOLUTION |
|---|---|---|
Message 3 |
– CESD testing in OPEN direction was activated. | – Check the door and remove any obstacles. |
Message 5 |
– CESD testing in CLOSED direction was activated. | |
Message 7 |
– If no buttons are pressed within 120 seconds, the programming mode terminates automatically. – OPEN and CLOSED door positions programmed without passing the reference point. |
|
Message 8 |
– Reference point button defective. | – Have the operator system checked. |
Message 9 |
– No speed sensor impulses, drive system is blocked. | – Have the operator system checked. |
Message 10 |
– Door movement too stiff. – Door blocked. |
– Ensure that the door moves easily. |
| – Maximum driving power setting is too low. | – Have the max. driving power checked by an expert. | |
Message 11 |
– Excess travel stop. | – Have the operator system checked. |
Message 12 |
– CESD testing in OPEN direction not OK. | – Check closing edge safety device. – Programme out the closing edge safety device if there is no CESD present. |
Message 13 |
– CESD test in a CLOSE direction not OK. | – Check closing edge safety device. – Programme out the closing edge safety device if there is no CESD present. |
Message 15 |
– External photocell interrupted or defective. | – Remove obstacle or have the photocell checked. |
| – Programmed for photocell, but no photocell is connected. | – Deactivate or connect the photocell. | |
Message 16 |
– Power sensor for the automatic cut-out is defective. | – Have the motor unit checked. |
Message 26 |
– Undervoltage, operator system overloaded at maximum power setting, 16. | – Have the external power supply checked. |
Message 28 |
– Door movement too stiff or irregular. – Door blocked. |
– Check the path of the door and ensure that the door moves easily. |
| – Automatic cut-out is set to be too sensitive. | – Have the automatic cut-out facility checked by an expert . | |
Message 35 |
– Electronics are defective. | – Have the operator system checked. |
Message 36 |
– Wire jumper removed, but stop button not connected. | – Connect stop button or insert shorting plug. |
| – Operator system disengaged. – Closed circuit is interrupted. |
– Engage the operator system. |
Marantec EX-2005 garage door opener troubleshooting
| FAULT | CAUSE | REMEDY |
|---|---|---|
| Indicator 8 does not glow. | No voltage. | Check mains supply. Check electric socket. |
| Thermal protection in mains transformer activated. | Allow mains transformer to cool down. | |
| Defective control unit. | Cut off mains supply to operator. Remove lamp cover and motor cover. Unscrew control unit, pull slightly forward and withdraw the connecting plug. Remove control unit and have it checked. | |
| Indicator 6 flashes. Error 10 or 28 | Automatic cut-out set too sensitively. Door operation too sluggish. Door blocks. | Re-set automatic cut-out to be less sensitive. Ensure door moves easily |
| Indicator 6 flashes. Error 6 or 15 | External photo eye defective or interrup- ted. | Remove obstruction or have photo eye checked. |
| Drive only operates in “OPEN” but not in “CLOSE-direction. Error 15 | Photo eye programmed, but not connected | Reprogram photo eye function or connect photo eye. |
| No response on impulse. Indicator 7 glows. Error 36 | Connecting terminals for “IMPULSE” button bridged, e.g. due to short-circuit or wrong terminal connection. | Temporarily isolate cabled key switches or interior push buttons from control unit. Remove plug, insert plug and look for cable fault. |
| No response on impulse. Error 36 | Short-circuit label removed, but “STOP” button not connected. | Connect “STOP” button. |
| Transmitter problems | Hand transmitter coding is not consistent with receiver coding. | Check coding Menu Q |
| Flat battery. | Insert new battery. Flashing LED in transmitter indicates Flat battery. | |
| LED 7 does not light up when pressing transmitter button | Electronic aerial not connected or wrong installation | |
| Hand transmitter or control unit defective. | Have both components checked. | |
| Insufficient range of remote control (less than 5 m). | Flat battery in hand transmitter. | Insert new battery. Flashing LED in transmitter indicates Flat battery. |
| Operator only starts to run shortly. Error 9 | RPM sensor defective. | Have operator checked. |
| Door too sluggish. | Check door. | |
| Transmitter command does not respond but wall control does (LED 8 on, LED 7 flashes) | Operator is in electronic ‘vacation’ lock | De-activate ‘vacation’ lock on 3-function wall control or by briefly pressing eP button on operator. |
Marantec M-4700 garage door opener troubleshooting
| DISPLAY | CODE | PROBLEM | SOLUTION |
|---|---|---|---|
#7 Flashes |
7 | ■ Adjustments setting interrupted before completion. | ■ Door can be operated normally. Recheck adjustments if adjustment settings were not completed. |
#1 + #8 Flash |
9 | ■ Defective RPM sensor. | ■ Have opener serviced. |
#2 + #8 Flash |
10 | ■ Force required to move door exceeded set force level. | ■ Check door for obstructions, proper manual operation, proper balance, or broken springs. Clear obstructions or have door serviced. |
| ■ If door is OK, increase force setting. | |||
#3 + #8 Flash |
11 | ■ Opener exceeded maximum run time limit (30 seconds). | ■ Make sure rail is connected to opener head and belt or chain is moving. |
#7 + #8 Flash |
15 | ■ Photo eye not connected properly. | ■ Check photo eye wiring and connections. |
| ■ Photo eyes not aligned. | ■ Remove obstruction from path of door, or realign photo eyes. | ||
| ■ Photo eye became obstructed during downward door travel. | ■ Replace photo eye. | ||
#1 + #7 + #8 Flash |
16 | ■ Force watchdog circuit found error. | ■ Readjust force and run opener up and down twice. |
| ■ Have opener serviced. | |||
#1 + #5 + #6 + #7 + #8 Flash |
27 | ■ Power limit sensitivity exceeded. | ■ Check door for obstructions, proper manual operation, proper balance, or broken springs. Clear obstructions or have door serviced if needed. |
#2 + #5 + #6 + #7 + #8 Flash |
28 | ■ Self learned force limit exceeded. | ■ Check door for obstructions, proper manual operation, proper balance, or broken springs. Clear obstructions or have door serviced if needed. |
| All Flash | 36 | ■ Internal control error. | ■ Have opener serviced. |
Marantec Synergy 360 garage door opener troubleshooting
| FAULT DISPLAY | CODE | PROBLEM SOLUTION | |
|---|---|---|---|
 |
7 | If no buttons are pressed within 120 seconds, the programming mode terminates automatically. | |
 |
8 | Adjustments setting interrupted before completion. | Door can be operated normally. Recheck adjustments if adjustment settings were not completed. |
| Have operator serviced | |||
 |
9 | Rational speed (RPM) sensor impulse not present, operator system is obstructed. | |
 |
10 | The door does not move easily or is obstructed. | The maximum driving power has been set too low. Have maximum driving power checked by specialist |
 |
11 | Excess travel stop. | Have operator serviced |
 |
15 | Photo eye sensors not connected properly. | Check photo eye sensors wiring and connections. |
| Photo eye sensors not aligned. | Realign photo eye sensors. | ||
| Obstruction in the door path (photo eye beam broken). | Remove obstruction from door path. | ||
 |
16 | The current sensor for the monitoring motor overload is defective. | Have operator serviced |
 |
26 | Power overload condition. | Have the outlet assigned for the operator and/or supplied power checked. |
 |
28 | Door movement too stiff or irregular. Door blocked. Operator operating sensitivity set too sensitive (low). |
Check door for obstructions, proper manual operation, proper balance, or broken springs. Clear obstructions or have door serviced. If needed. Have the operating sensitivity settings checked by an authorized dealer/installer. |
 |
30 | MS bus fault. | Reset the bus modules. Have the connected bus modules checked? |
 |
35 | Electronic defect. | Have operator sen/iced. |
 |
36 | Wall control connected incorrectly. | Check wall control terminal connection. Reset operator. |
Marantec Garage Door Opener Instructions Manual
- Marantec Synergy 260
- Marantec Synergy 270
- Marantec Synergy 280
- Marantec Synergy 360
- Marantec Synergy 370
- Marantec Synergy 380
- Marantec Comfort 250
- Marantec Comfort 260
- Marantec Comfort 270
- Marantec Comfort 280
- Marantec Line 4500
- Marantec Line 4700
Frequently Asked Questions:
Marantec m4500e Hard Reset
Here’s a guide to walk you through the process:
Before you begin:
- Locate the small button on the back of the motor unit labeled “Learn” or “Prog.” You might need a thin object like a paperclip to press it.
- Ensure your garage door is closed.
Performing the hard reset:
-
Disconnect the power: Unplug the Marantec M4500e from the outlet.
-
Wait for 10 seconds: This allows the unit to fully discharge any residual power.
-
Hold the “Learn” or “Prog” button: While holding the button, reconnect the Marantec M4500e to the power outlet.
-
Keep holding the button for 10-15 seconds: The LED light on the unit will blink rapidly during this time.
-
Release the button: After 10-15 seconds, release the button. The LED light will stay on steadily.
Reprogramming your remotes:
Once the hard reset is complete, you’ll need to reprogram your remotes to the Marantec M4500e. Here’s how:
- Press and hold the “Learn” or “Prog” button on the motor unit for 3-5 seconds. The LED light will blink slowly.
- While the LED is blinking, press and hold the desired button on your remote control for 3-5 seconds. The LED light will blink rapidly, then stay on steadily.
- Repeat steps 1 and 2 for any additional remotes.
Additional notes:
- The hard reset will erase all existing memory from the Marantec M4500e, including programmed remotes and custom settings.
- If you have a newer Marantec M4700e model, the hard reset process may be slightly different. Consult your user manual for specific instructions.
About The Author
Hassan Zaka
I am an expert in accounting and possess diverse experience in technical writing. I have written for various industries on topics such as finance, business, and technology. My writing style is clear and simple, and I utilize infographics and diagrams to make my writing more engaging. I can be a valuable asset to any organization in need of technical writing services.
Follow Us:LinkedinTwitter


