Overview of Raynor Garage Door Opener Troubleshooting
Raynor garage door openers troubleshooting guide covers common faults and fixes for multiple Raynor models (Premium 8500RGD Prodigy II, MJ5011UCHB, FliteStar-7, COMMANDER 2000RGD). It lists diagnostic flash codes, sensor alignment, wiring checks, reprogramming limits/forces, remote and antenna issues, motor/clutch/brake symptoms, overloaded motors, broken springs/cables, and reset/reprogram steps for remotes and keypads. Emphasis is on inspecting sensors, wiring, power, limits/force settings, and calling technicians for spring or motor replacements.
Quick Solutions to Questions related to Raynor Garage Door Opener Troubleshooting:
-
How do I reset my Raynor garage door opener?
Press and hold the Learn button on the motor unit for about 4–6 seconds until the LED goes off; to reset all devices, press and hold Learn again until the LED goes out to return to factory settings. -
What causes the safety sensor LEDs to flash or not glow steadily and how do I fix it?
Flash indicates broken, disconnected, shorted, or reversed sensor wiring; inspect and repair wiring, shorten and reattach wires to test, realign sensors, clean lenses, and replace sensors if indicator lights do not glow steadily. -
Can a Raynor opener reverse or stop unexpectedly and what should I check?
Yes; check for obstructions, sensor alignment, cable tension monitor connection, limits and forces settings, and possible door balance or spring issues; reprogram limits/forces or call a technician for springs or binding. -
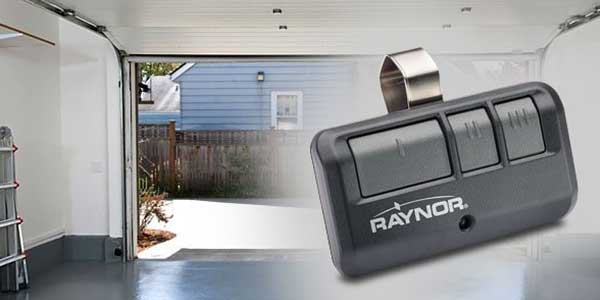
How do I troubleshoot a remote control that will not operate the opener?
Verify lock feature off, replace remote batteries, reprogram the remote, check antenna position and range, and confirm remote compatibility; check diagnostic codes if problem persists. -
What should I do if the motor hums but the door will not move?
Disconnect trolley and check door balance and movement, inspect capacitor and motor windings/thermal protector, check electrical connections, and replace motor or capacitor as needed; call technician for door spring or cable hazards. -
How do I address poor radio range for my Raynor opener?
Replace remote battery, ensure antenna extends downward, change remote location in vehicle, mount or configure antenna properly, or use an external antenna kit if interference persists.
When it comes to garage door openers, Raynor garage door opener is a reputable and skilled brand. Their garage door openers are long-lasting and simple to maintain, with a variety of alternatives. The Raynor garage door opener, on the other hand, may develop problems with time, either as a result of constant usage, faulty installation, and wiring, or normal wear and tear, therefore troubleshooting against those is here in detail.
Here are Raynor Garage Door Opener Troubleshooting
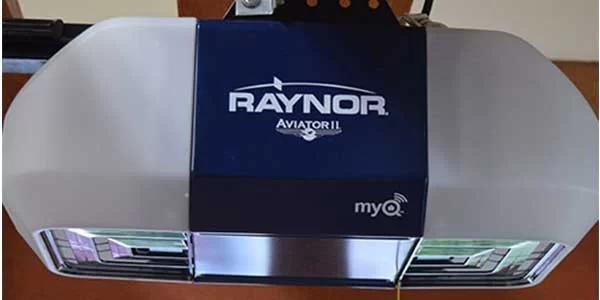
Raynor Premium series 8500RGD Prodigy II garage door opener troubleshooting
| PROBLEMS | SOLUTIONS/SYMPTOM |
| 1 Flash Safety reversing sensors wire open (broken or disconnected) OR 2 FLASHES Safety reversing sensors wire shorted or black/white wire reversed |
One or both of the Indicator lights on the safety sensors do not glow steadily. • Inspect sensor wires for a short (staple in wire), incorrect wiring polarity (black/white wires reversed), damaged or disconnected wires, and replace or reconnect as appropriate. • Disconnect all wires from the back of the garage door opener. • Remove sensors from brackets and shorten sensor wires to 1 -2 ft. (30-60 cm) from back each sensor. • Reattach sending eye to garage door opener using shortened wires. If sending eye indicator light glows steadily, attach the receiving eye. • Align sensors, if the indicator lights glow replace the wires for the sensors. If the sensor indicator lights do not light, replace the safety reversing sensors. |
| 3 Flashes Door control or wire shorted |
The door doesn’t activate from the door control. • Inspect door control/wires for a short (staple in wire), replace as needed. • Disconnect wires at door control, touch wires together. If the garage door opener activates, replace the door control. • If the garage door opener does not activate, disconnect door control wires from garage door opener. Momentarily short across red and white terminals with a jumper wire. If the garage door opener activates, replace door control wires. |
| 4 Flashes Safety reversing sensors slightly misaligned (dim or flashing LED) |
Sending indicator light glows steadily, receiving indicator light is dim or flashing. • Realign receiving eye sensor, clean lens and secure brackets. • Verify door track is firmly secured to wall and does not move. |
| 5 Flashes Motor RPM is not recognized |
Door travels 2-3 inches and stops. • Reprogram limits and forces. • If the motor unit continues to travel 2-3 inches, check the travel module connection or replace the travel module.” SYMPTOM: No movement, motor runs 2-3 seconds. • Reconnect the emergency release. • Motor may need to be replaced. |
| 9 Flashes Cable tension monitor reversal |
Door stops and reverses while closing. • Check for possible door obstructions and remove. • Check that the cable tension monitor is properly connected to the opener. • Replace the cable tension monitor. |
| 10 Flashes Limits and forces need reprogramming |
Door stops while opening. • Reprogram limits and forces. |
| 11 Flashes Limits and forces need reprogramming |
Door stops and reverses while closing. • Reprogram limits and forces. |
| 12 Flashes Attempting to compensate |
Door stops and reverses while closing. • Garage door opener will try to compensate three times before turning to a 10 Flash. |
| 13 Flashes Attempting to compensate |
Door stops while opening. • Garage door opener will try to compensate three times before turning to a 11 Flash. |
| The garage door doesn’t operate from the MyCF Home Control App or website. | • When using Model 580LG Alternate Power Supply or when in Battery Backup mode, the Internet Gateway will not activate the garage door through the MyQ® Home Control App. If you wish to use the Internet Gateway with your garage door opener, please contact your local electrician to wire an outlet next to the garage door opener. |
| The garage door opener doesn’t operate from either the Door Control or the remote control: | • Does the garage door opener have electric power? Plug a lamp into the outlet. If it doesn’t light, check the fuse box or the circuit breaker. (Some outlets are controlled by a wall switch.) • Have you disabled all door locks? • Is there a build-up of ice or snow under the door? The door may be frozen to the ground. Remove any restriction. • The garage door spring may be broken. Have it replaced. • If the yellow command LED does not turn on, reverse the wires connected to the RED and WHT terminals of the control panel. Replace wire if necessary. |
| The yellow and red LEDs on the Door Control are blinking quickly: | • The control panel is charging and may take up to 5 minutes to become operational. |
| My remote control will not activate the garage door: | • Verify the lock feature is not activated on the door control. • Reprogram the remote control. • If the remote control will still not activate the door check the diagnostic codes to ensure the garage door opener is working properly. |
| The remote control has short range: | • Change the location of the remote control in your car. • Check to be sure the antenna on the side or back panel of the garage door opener extends fully downward. • Some installations may have shorter range due to a metal door, foil backed insulation, or metal garage siding. |
| The door doesn’t open completely: | • Check power door lock. • Is something obstructing the door? Is it out of balance, or are the springs broken? Remove the obstruction or repair the door. |
| The door opens but won’t close: | • Check cable tension monitor • If the garage door opener lights blink, check the safety reversing sensor. • If the garage door opener lights don’t blink and it is a new installation. For an existing installation. Repeat the safety reverse test after the adjustment is complete. |
| The door reverses for no apparent reason and the garage door opener lights don’t blink: | • Check cable tension monitor. • Is something obstructing the door? Pull the emergency release handle. Operate the door manually. If it is unbalanced or binding, call a trained door systems technician. |
Raynor MJ5011UCHB garage door opener troubleshooting
The MJ5011UCHB garage door opener produced by the US-based manufacturer Raynor is a medium-duty door operator equipped with a built-in 315 MHz radio receiver. The model was created exclusively for commercial use. The opener system can perform not more than 12 cycles per hour or 50 cycles per day.
| CONDITION | POSSIBLE CAUSE | FIX |
| The operator will not respond to any commands | A) No power | ― Verify primary line voltage (120 Vac, 60 Hz) is present at terminals L1 & 12. The LED will flash when power is present. |
| B) Stop circuit not complete | ― Verify Stop Button input (terminals 3 & 5) is properly wired and stop button is not stuck. | |
| C) Stuck button on 3-button control station | ― Verify that all buttons are actuating freely and releasing properly. | |
| D) Interlock input activated | ― Verify jumper is located at terminals 3 & 4 if interlock is not present. | |
| ― Verify interlock is properly wired and not activated. | ||
| E) Motor overload tripped | ― Overload is internal within the motor. Allow to cool and retry. | |
| F) Accessory failure | ― Attempt to close by holding the CLOSE button for more than 5 seconds. If a door closes, check the accessory for proper wiring, polarity, connections, or damage. | |
| ― Verify photoelectric sensors are aligned or sensing edge is not activated. | ||
| G) Possible component failure | ― Call Technical Support for assistance. | |
| The operator makes noise but the door does not move | A) Clutch slipping | ― Adjust clutch |
| B) Brake not releasing (if present) | ― Verify brake assembly operation and wiring. | |
| C) Door operation problem | ― Disconnect the trolley and check the door for proper operation. | |
| The operator moves in the wrong direction | OPEN and CLOSE button wiring connection reversed | ― Check the 3-button control wiring. |
| Door drifts after the operator stops | A) Door not balanced property | ― Disconnect trolley assembly and check door for proper operation. |
| B) Clutch slipping | ― Adjust clutch | |
| C) Brake not functioning properly | ― Check the brake mechanism to ensure the brake lever is free and brake pads are engaging the brake disc. | |
| The door opens/closes too far | Limits not adjusted properly | ― Adjust limits. |
| Door reverses unexpectedly | Intermittent Entrapment Protection Device activation | ― Check all connections. |
| Ttc not functioning | A) Monitored Entrapment Protection Devices | ― Check all connections. Verify photoelectric sensors are not blocked and the sensing edge is not activated. |
| B) TTC temporarily disabled | ― Close and Open the door. TTC will be re-enabled. | |
| C) TTC not programmed properly | ― Reprogram TTC. | |
| No response | A) Remote control is not programmed | ― Make PROGRAMMING REMOTE CONTROLS |
| B) Remote control not compatible | ― Obtain a qualified LiftMaster remote control device. | |
| C) Low battery | ― Replace the battery. | |
| Remote cannot be learned | A) Low battery | ― Replace the battery. |
| B) Remote control not compatible | ― Obtain a qualified LiftMaster remote control device. | |
| Poor radio range | A) Low battery in remote | ― Replace the battery. |
| B) Antenna not configured | ― Configure the RADIO ANTENNA. | |
| C) Ambient radio interference or building structural issue | ― Use the EXTERNAL ANTENNA kit |
More:
Raynor FliteStar-7 garage door opener troubleshooting
The Raynor FliteStar-7 is a residential garage door opener that can handle doors up to seven feet tall. The supplemental entrapment prevention mechanism, which complements the typical built-in safety reverse function, adds to the opener’s overall safety. The door will not work properly if the entrapment protection device is not installed.
| SYMPTOM | PROBABLE SOLUTIONS |
| The operator runs from radio controls but not from push button | Check connections at the push button and operator terminals. The wire may be broken under staples or at terminals. |
| Reverse wires at terminals 6 and 7 on the back of the opener. | |
| Remove wires from terminals 6 and 7, momentarily short across terminals 6 and 7, if the operator runs then replace the wall button. | |
| The operator runs from push button but not from radio control | Check the battery in the transmitter. |
| Check receiver and transmitter code settings. | |
| Measure the voltage at terminals 1 and 3 on the 3-position terminal strip at the rear of the operator. With terminal 1 being negative and terminal 3 being positive, the voltage should read between 20-28 VDC. | |
| If it is necessary to return radio controls for repair, both transmitter and receiver must be returned. | |
| The operator does not run from a push button or radio control | The illuminated wall-mounted push-button lock switch is activated. Operator plugged into an outlet. |
| Burned-out fuse or an open breaker. | |
| Pull the power plug and plug back in. | |
| Replace the microprocessor control board. | |
| The operator stops functioning after repeated cycling | The motor may be overheated. Wait 20 minutes and try again. Replace microprocessor control board. |
| Less than 25 feet operating range from radio control | Change the battery in the transmitter. |
| Change the location of the transmitter in auto. | |
| Mount the receiver to the wall and wire to the operator. | |
| If two or more operators are located within the same building, unplug all other operators and then test range. | |
| Faulty radio – return to distributor to repair or replace | |
| Motor hums but will not open or close the door | Jammed or hard moving door. Disconnect door from operator and check door for correct balance and operating condition. |
| Do not disconnect an opened door, if the door spring is broken the door may fall at a high speed and cause injury or property damage. | |
| Repairs and adjustments, especially to cable and spring assembly, can be hazardous and should be performed by qualified door installers only. | |
| Bad capacitor – Visually inspect capacitor | |
| Motor – Disconnect motor leads and test motor windings and thermal protector with an ohmmeter. Replace the motor if windings or thermal protector are open. (Motor must be cool to test.) | |
| Check for proper electrical connections. | |
| NOTE: If the operator is activated but does not open or close the door, the motor will shut off after approximately 25 seconds. | |
| Unwanted (phantom operations) | Short in the push-button circuit. |
| Check where stapled to the wall or ceiling. | |
| Check connections at both ends of the wire. | |
| Can be caused by a signal from another radio control in the area. Change frequency of radio control. | |
| Doorstops while it is opening | Make sure there is no obstruction keeping the door from opening or closing, either during door travel or photo-eye obstruction. |
| The door reverses while it is closing | Disconnect door arm and check door operation by hand. |
| Adjust force adjustment sensitivity. Turning the screw counter-clockwise will require more force to stop or reverse the door. After making adjustments the safety reverse test must be performed. | |
| Light will not come on | Check light bulbs and replace if burnt out. Check electrical connections. |
| Faulty microprocessor board. | |
| Illuminated wall-mounted push-button locked. | |
| Light will not go off | Press the wall button or radio control to reactivate the timer. |
| Wait 5 minutes before initiating another signal. The light should go off. Faulty microprocessor board. | |
| The door does not fully open or close | Make sure there is no obstruction keeping the door from opening or closing. |
| Operator limit switch settings need adjustment. | |
| The operator will not reverse when the door hits an obstruction while closing | CAUTION – Do not use a door operator that does not reverse when coming in contact with a solid object 1 inch from the floor. If the operator cannot be made to function properly, disconnect and disable it until a qualified door installer can make repairs. |
| Readjust force adjustment sensitivity. Turning the screw clockwise will require less force to reverse the door. | |
| Close limit not set properly. Adjust close limit for more travel. | |
| Radio control will only operate to open the door | External entrapment safety device malfunction check instructions for the device used. The red light on the back of the operator will be on to indicate this. |
| The Wall button must be held in to close the door | The external entrapment safety device is not installed. This is a normal operation without a device installed. |
| Burned out fuse or an open breaker | MOV on terminal strip blown. Remove cover and visually inspect MOV. (Powerhead Assembly, for location.) If discolored, deformed, or cracked, replace MOV. |
Raynor COMMANDER 2000RGD garage door opener troubleshooting
The Raynor COMMANDER 2000RGD is a 1/2 horsepower residential garage door opener. It is critical to note that the door operator system will not function effectively until the protector system is appropriately aligned. In the event of a small problem, the troubleshooting methods below will allow you to fix the garage door opener on your own.
| SITUATION | PROBABLE CAUSE & SOLUTION |
| The opener does 7 operate from either the door control or the remote control: | 1. Does the opener have electric power? Plug a lamp into the outlet. If it doesn’t light, check the fuse box or the circuit breaker. (Some outlets are controlled by a wall switch.) |
| 2. Have you disabled all door locks? | |
| 3. Is there a build-up of ice or snow under the door? The door may be frozen to the ground. Remove any restriction. | |
| 4. The garage door spring may be broken. Have it replaced۔ | |
| 5. Repeated operation may have tripped the overload protector in the motor. Wait 15 minutes. Try again. | |
| The opener operates from the remote control, but not from the door control: | 1. Is the door control push bar lit? If not, Remove the bell wire from the opener terminal screws. Short the red and white terminals by touching both terminals at the same time with a pick of wire. If the opener runs, check for a faulty wire connection at the door control, a short under the staples, or a broken wire. |
| 2. Arc the wiring connections correct? Review Installation | |
| The door operates from the door control, but not from the remote control: | 1. Is the door push bar flashing? If your model has the Lock feature, turn it off. |
| 2. Your opener needs to re-lcam a remote control code. | |
| 3. Program the receiver to match the remote control code. | |
| 4. Repeat the receiver programming procedure with all remote controls. | |
| The remote control has a short range: | 1. Change the location of the remote control in your car. |
| 2. Check to be sure the antenna on the right-side panel of the opener extends fully. | |
| 3. Some installations may have a shorter range due to a metal door, foil-backed insulation, or metal garage siding. | |
| Opener noise is disturbing in living quarters of home: | If operational noise is a problem because of the proximity of the opener to the living quarters, the Vibration Isolator Kit 41A3263 can be installed. This kit was designed to minimize vibration in the house and is easy to install. |
| The garage door opens and closes by itself: | 1. Be sure that all remote control push buttons and battery indicator lights arc oil’. |
| 2. Remove the bell wire from the door control terminals and operate from the remote control only. If this solves the problem, the door control is faulty (replace), or there is an intermittent short on the wire between the door control and the opener. | |
| 3. Clear memory and reprogram all remote controls. | |
| The door doesn’t open completely: | 1. If the door has been working properly but now doesn’t open all the way, increase the up force. |
| 2. Is something obstructing the door? Remove the obstruction or repair the door. | |
| 3. If the door opens at least 5 feet, the travel limits may need to be increased. One turn equals 2 inches of travel. Repeat the safety reverse test after the adjustment is complete. | |
| The door stops but doesn’t close completely: | Review the travel limits adjustment procedures Repeat the safety reverse test after any adjustment of door arm length, close force or down limit. |
| The door opens but won’t close: | 1. If the opener lights blink, check the safety reversing sensor. |
| 2. If the opener lights do not blink and it is a new installation, check the downforce. For an existing installation, sec below. Repeat the safety reverse test after the adjustment is complete. | |
| The door reverses for no apparent reason and the opener lights don’t blink: |
1. Is something obstructing the door? Pull the manual release handle. Operate the door manually. If it is unbalanced or binding, call for a professional garage door service. |
| 2. Clear any ice or snow from the garage floor area where the door closes. | |
| 3. Review the force adjustment procedures | |
| 4. If the door reverses in the fully dosed position, decrease the travel limits. Repeat the safety reverse test after adjustments to force or travel limits. The need for occasional adjustment of the force and limit settings is normal. Weather conditions, in particular, can affect door travel. | |
| The door reverses for no apparent reason and the opener lights blink for 5 seconds after reversing: | Check the safety reversing sensor. Remove any obstruction or align the receiving eye. |
| The opener lights… | Don’t turn on: Replace the light bulb(s) (100 watts maximum). Use a standard neck garage door opener bulb if the regular bulb burns out. Don’t turn off: Is the Light feature ow? Turn it off. |
| The opener strains or maximum force is needed to operate the door: | The door may be out of balance or the springs are broken. Close the door and use the manual release handle to disconnect the trolley. Open and close the door manually. A properly balanced door will stay at any point of travel while being supported entirely by its springs. If it does not, disconnect the opener and call for professional garage door service. Do not increase the force to operate the opener. |
| The opener motor hunts briefly, then won’t work: | 1. The garage door springs are broken. Sec above. |
| 2. If the problem occurs on the first operation of the opener, the door may be locked. Disable the door lock. Repeat the safety reverse test after the adjustment is complete. | |
| The opener won’t operate due to power failure: | 1. Use the manual release handle to disconnect the trolley. The door can be opened and closed manually. When power is restored, press the Door Control push bar and the trolley will automatically reconnect (unless the trolley is in lockout position.) |
| 2. The Outside Quick Release accessory (for use on garages with no service door) disconnects the trolley from outside the garage for ease of power failure. |
You Might Want to see this:
Frequently Asked Quested:
How do I reset my Raynor garage door opener?
If your garage door opener stops working, an unauthorized remote control activates it, or your hand-held remote is stolen or misplaced, you’ll need to reset it. The procedure for resetting the Raynor garage door opener varies based on the model number, however here is a general guideline.
Reset the remote control and keyless entry
- Locate the ‘Learn’ button on the motor unit.
- Press and hold the ‘Learn’ button for about four to six seconds or until the LED light goes off.
- A reset deletes all the codes from all remote controls and keyless entry devices.
Reset all devices
- Locate the ‘Learn’ button on the motor unit.
- Press and hold the ‘Learn’ button for about four to six seconds or until the LED light goes off.
- Immediately press and hold the ‘Learn’ button again until the learn LED goes out.
- All the garage door opener devices reset to factory settings.
Raynor garage door opener not working
There are several reasons responsible for your garage door not working. Here is how to diagnose and troubleshoot a garage door opener that is not working:
A blocked photo-eye
A camera eye approximately four to six inches from the ground in the most modern garage door openers detects whether a person or item is in the entryway. It fires a laser beam across the length of the garage doorway, interrupting the ability to close and raise the door.
- Inspect the condition of the wire connected to the photo-eye and replace it if necessary.
- Clean the lens of the photo eye with a lint-free cloth. Dust can accumulate on the eye and block the laser beam.
The door is off track.
If the garage door is off track, it will not move. To troubleshoot this:
- Disconnect the garage door opener from power and manually lift the garage door to ensure that it is rolling smoothly on the track.
- Check the track for bends, gaps, bumps, and obstructions.
- While moving the garage door, listen for squeaks and other unusual noises to indicate a faulty track.
- Loosen the fasteners that attach the track to its frame. Gently tap the track back to its position using a rubber mallet and a level.
- Remove any debris on the track with a dry scrubbing brush.
Broken garage door torsion springs
You will hear a big noise when spring break arrives. You may also look at it to check if it’s in any way damaged.
- You should not try to open the garage door if you suspect a broken spring. Have a professional come and replace the spring.
The cables are broken or disconnected
When a spring breaks, the cables also snap off, or they loosen and disengage over time. It would be best if you got a technician to fix the disengaged cables.
Misaligned sensitivity or safety sensors
The garage door opener will not operate if the sensitivity is set too high or too low. Position the sensor about six inches above the floor and reset your safety sensors.
- Ensure the indicator lights on the sensors are glowing steadily. If they are light glowing steadily, they are wired and aligned correctly.
- Check the amber LED on the sending sensors, which always glows regardless of misalignment or obstruction. If it is off, check if the garage door opener is receiving power; look for a broken or short sensor wire and replace it if necessary.
- Check the wiring on the sensors. White wires should connect to the white terminals and the black wires to the gray terminals.
- If the green LED light on the receiving sensor is off, realign the sensors or check for broken wires and replace them if necessary.
To align the sensors:
- Loosen the fasteners holding the receiving eye and adjust it until it receives the sender’s beam. Then secure it in place.
- Loosen the fasteners on the sending eye, move it until it receives the sender’s beam, and then lock it in place.
An unseen object is obstructing the door.
As a safety measure, the garage door reverses when it comes into contact with an object. Something you cannot see could be obstructing the garage door.
- Inspect the tracks for dirt, debris, or even birds. Wipe the tracks with a lint-free cloth to remove any stuck objects or debris.
A faulty remote control
If your remote control is not engaging your garage door, here are some of the causes of a faulty remote control;
- Your remote control or wall switch could require a battery change.
- The remote control is out of range.
- The motor’s antenna could be damaged or obstructed from receiving the signal. Readjust the antenna to hang down from the motor.
- If all these solutions fail, reset and reprogram the remote control.
The limit setting requires adjustment
Weather conditions can affect door travel; therefore, the garage door openers limit setting needs adjustment every so often. The adjustment limit setting regulates how high or low the garage door moves.
- Manually check the balance of the door and any binding.
- Run the door opener through a complete travel cycle. Check if the door opens or closes fully or if it reverses unintentionally when fully closed.
- If the door travel is off, use a screwdriver to turn the adjustment screw and adjust the up and down travel limits accordingly.
The emergency release handle is engaged
Raynor garage door openers have an emergency release handle is a lock button that disengages the motor and allows you to operate the garage door manually. Check to see that you did not accidentally turn the release handle down.
Raynor garage door opener remote not working.
When your remote control stops operating the garage door, try these troubleshooting solutions:
Remote batteries are dead
If it’s been a while since you’ve replaced the batteries in your remote control, it’s time to do so. Garage door remote batteries typically last two years before needing to be replaced. To change the remote control batteries, follow these steps:
- Use the visor clip or flathead screwdriver to pry the case’s edges to open the battery compartment.
- Insert the new battery with the positive (+) side up. Only use the 3VCR2032 lithium coil cell batteries.
- Replace the case until it clicks into place and dispose of the old batteries properly,
Remote control requires reprogramming
After prolonged use, the remote control signal becomes disrupted, and it sends hazy signals to the antenna. To reprogram your remote control.
- Locate the ‘Learn’ button on the opener.
- Press and hold the ‘Learn’ button until the lights flash or the LED light blinks.
- Test the door’s response by pressing the push button on the remote control.
A disrupted remote signal
The garage door will not respond if the signal between the remote control and the antenna is obstructed. When you utilize the remote control when you’re out of range or the receiving antenna is broken, this might cause a disturbance.
- Use the remote control within 20 feet of the garage door opener.
- Check if the antenna is broken and replace it if necessary.
- If the antenna is not damaged, ensure there is no debris stuck on the antenna and that the antenna is pointing towards the garage door.
The lock button is engaged
Ensure that the wall mount control panel’s lock button is turned off. When the lock button is pressed, the motor is turned off and the garage door cannot be opened using the remote control. Turn off the lock and use the remote control to test the door.
Malfunctioned door control wiring
Follow these steps to test the condition of the garage door opener’s wiring:
- Unplug the opener from power.
- Disconnect the two wires from the motor.
- Reconnect the opener to power, erase the motor’s memory and reprogram all remote controls.
- Unplug the opener again from power.
- Reconnect the two wires to the motor.
- Disconnect the wiring to the wall control panel.
- Press the push button on the remote control to test the functionality of the garage door.
A blown GFI
If you have a blown Ground Fault Interpreter, the remote control will not operate (GFI). The GFI detects variations in amperage or a motor that is overheating, which might harm your garage door opener or cause a fire. When the GFI fails, it either stops the door from moving or, in certain versions, operates the door using the backup batteries.
- Locate the GFI switch on the wall outlet and press it once to reset it.
- If the GFI keeps tripping, you need to remove the devices connected to the same wall outlet as the garage door opener.
Why is my Garage door Won’t Close Light Blinks?
-
- Sensors Blocked
- The Garage Door Is Locked
- Misalign sensors
- Wiring Problems
- Error Code due to Multiple Reasons
To learn how to fix these above issues to prevent light blinking then click here…
About The Author
Hassan Zaka
I am an expert in accounting and possess diverse experience in technical writing. I have written for various industries on topics such as finance, business, and technology. My writing style is clear and simple, and I utilize infographics and diagrams to make my writing more engaging. I can be a valuable asset to any organization in need of technical writing services.
Follow Us:LinkedinTwitter


