Overview of Teckin Smart Plug Setup: A Guide to Smart Home WiFi Outlets – Video Tutorial
This article provides step-by-step instructions to set up Teckin smart plugs using the Smart Life (Tuya) app, connect them to Alexa and Google Home for voice control, change Wi-Fi networks, and troubleshoot common connectivity issues. It covers resetting the plug, pairing on 2.4 GHz Wi-Fi, linking Smart Life with voice assistants, example voice commands, and model-specific setup tips for SP27, SP10, and SP20.
Quick Solutions to Questions related to Teckin Smart Plug Setup:
-
How do I set up a Teckin smart plug?
Install the Smart Life or Teckin app, plug the device into an outlet, press + ADD, select Electrical Outlet, reset the plug by unplugging and holding its button for 5 seconds until it rapidly blinks, confirm the blink in the app, enter your 2.4 GHz Wi-Fi password, and complete pairing. -
How can I connect my Teckin smart plug to Alexa?
Install the Alexa app, enable the Smart Life skill, log in with your Smart Life account to authorize linking, then use Discover Devices in Alexa to find and control the Teckin smart plug. -
How do I link a Teckin smart plug to Google Home?
Install Google Home, go to Home Control, tap Add Device, search for Smart Life, log in with your Smart Life credentials to authorize linking, then the plug will appear in Google Home. -
Can I change the Wi-Fi network for my Teckin smart plug?
Yes. Reset the plug, remove the old device from the app if needed, ensure your phone is on the new 2.4 GHz network, then add the device again in the Smart Life app and enter the new Wi-Fi password. -
What if my Teckin smart plug is not connecting?
Check your Wi-Fi (use 2.4 GHz), restart the plug and router, move the plug closer to the router, update the Smart Life app, or factory reset the plug and reconfigure it via the app.
Here is the complete process for setting up the Teckin smart plug, including how to connect it to Alexa and Google Home. This allows you to manage the smart plug using your voice. The Teckin smart plug is designed for use with electrical outlets and has square plugs. Once connected, you can easily tap into the smart plug to control various devices.
Step-by-Step of Teckin Smart Plug Setup
Step-1
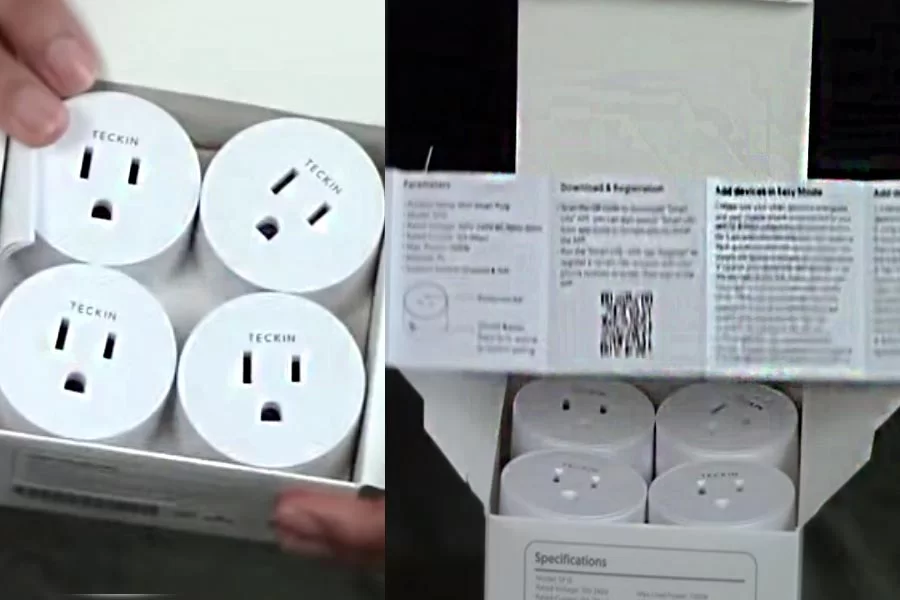
- First, what you have to do, unbox it.
- With Teckin plug, you will see a manual on which there is a written QR code for scan to be able to install the app.
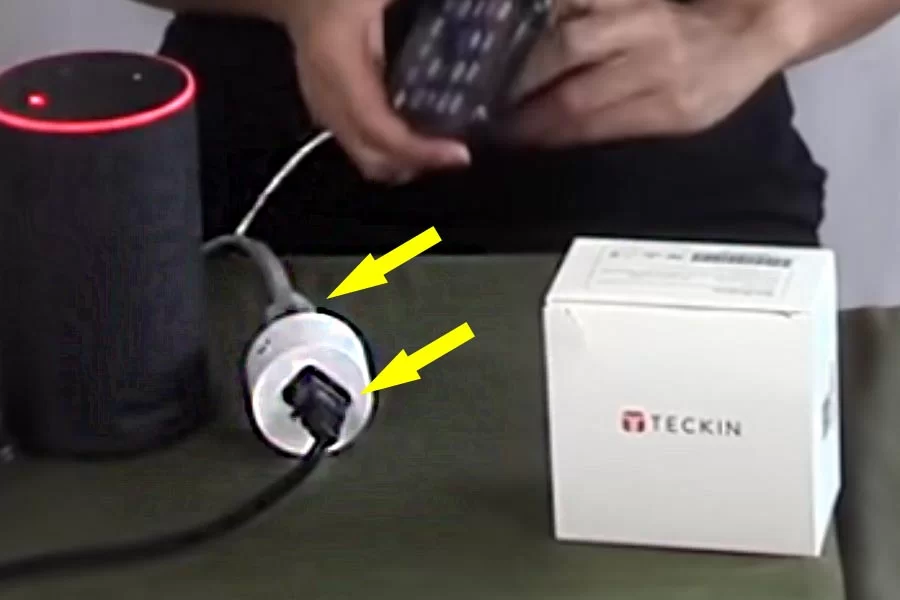
- Then connect the Teckin plug to a main electrical socket and then plug the lamp into the Teckin socket.
A comprehensive review of the Teckin Plug, a smart plug that can be easily inserted into any electrical outlet, is available here.
Smart Home: Best Programmable Light Switch
Step-2
So let’s Start the Teckin Smart Plug Setup process.
Here is How to Connect Teckin Smart Plug:
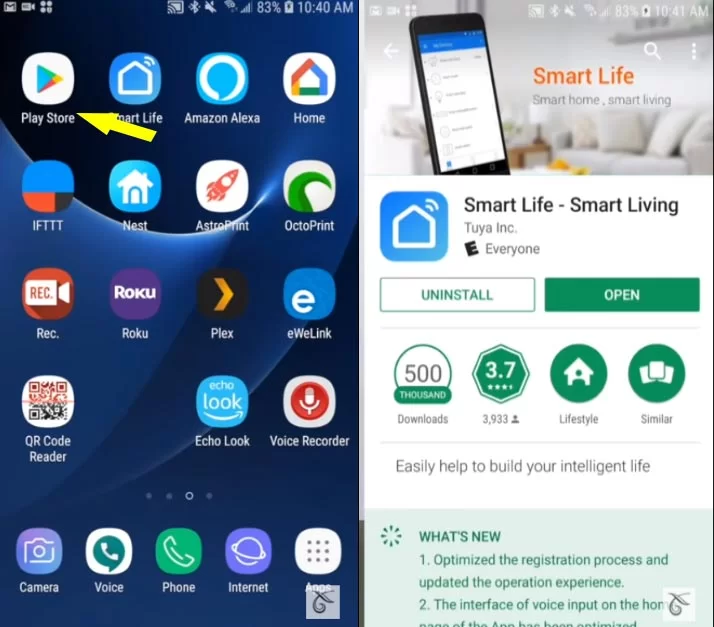
- 1 – Go to Playstore and search for (Android) Smartlife app /Teckin app (IOS) Smartlife app /Teckin app and install it.
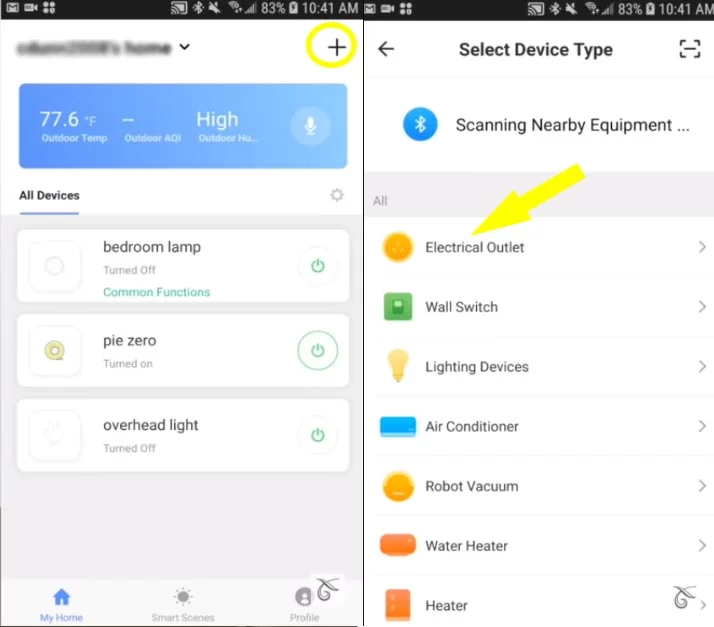
- 2- Open the app and push the + ADD button right at the top hand corner.
- 3- Tab Electrical Outlet.
- 4- And then unplug the Teckin plug from main socket and plug back in and then hold for 5 second to reset it.
- 5- To confirm that the reset is successful, Teckin outlet button rapidly blink.
- 6- Tap Confirm Indicator Rapidly Blink.
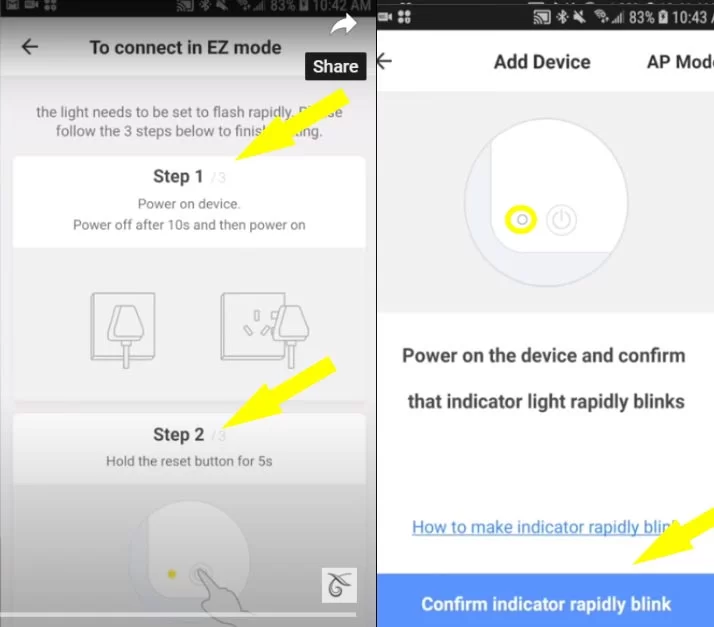
- 7- And then app ask for Wi-Fi password to connect.
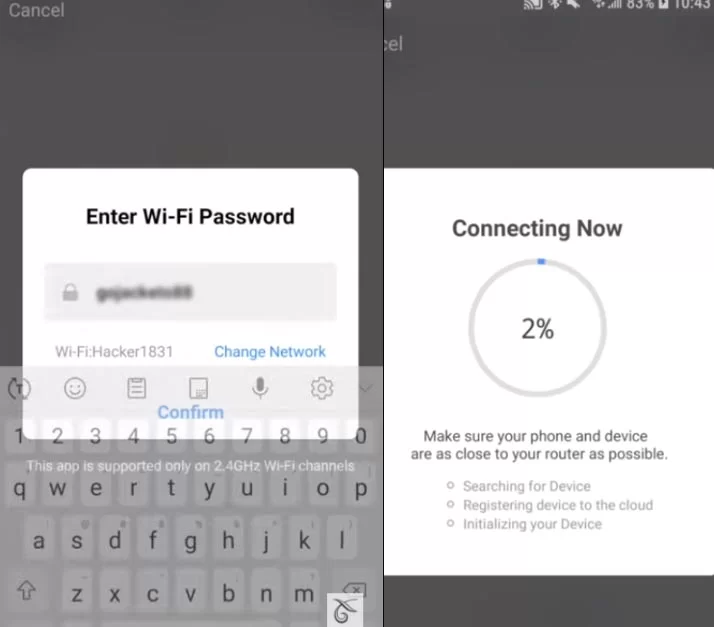
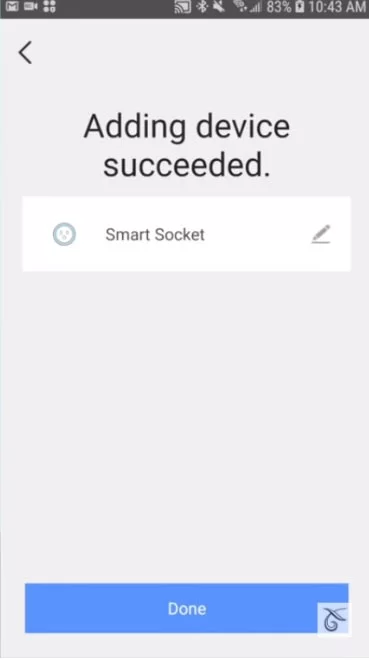
- Done.
Teckin Smart Plug Change to New Wifi
To change the WiFi network on your Teckin smart plug, you usually need to reset the plug and then reconnect it to the new WiFi network using the Smart Life app (or Tuya app, depending on which one you use). Here are the general steps you can follow:
Step to Follow:
You have to go the same process as mentioned above of how to setup teckin smart plug until stop at step 2 sub step (6).
After 2 sub step (6)
-
Remove the Old Wi-Fi Connection (if needed):
- If the smart plug is still listed in your app under the old Wi-Fi connection, you may need to remove it.
- Go to the device settings in the app and find the option to remove or delete the device.
-
Connect to the New Wi-Fi Network:
- Ensure your smartphone is connected to the new Wi-Fi network you wish to use with the smart plug. Remember that Teckin smart plugs typically only support 2.4 GHz Wi-Fi networks.
- In the Smart Life app, tap the ‘+’ icon to add a new device.
- Select the device type (e.g., socket) and follow the in-app instructions to connect the smart plug to your new Wi-Fi network. This usually involves selecting the new Wi-Fi network and entering its password.
-
Follow the App Instructions:
- The app will guide you through the process of connecting the smart plug to the new Wi-Fi network. Wait for the app to discover the smart plug and establish a connection.
-
Rename or Configure the Smart Plug (Optional):
- Once reconnected, you can rename the smart plug or configure its settings as desired in the app.
-
Test the Connection:
- Test the smart plug by turning it on and off via the app to ensure it’s properly connected to the new Wi-Fi network.
Teckin Smart Plug Setup WITH ALEXA
To connect your Teckin smart plug with the SmartLife app, you need to tap into the connection with Alexa. Without the SmartLife app, your smart plug won’t work with Amazon’s Siri.
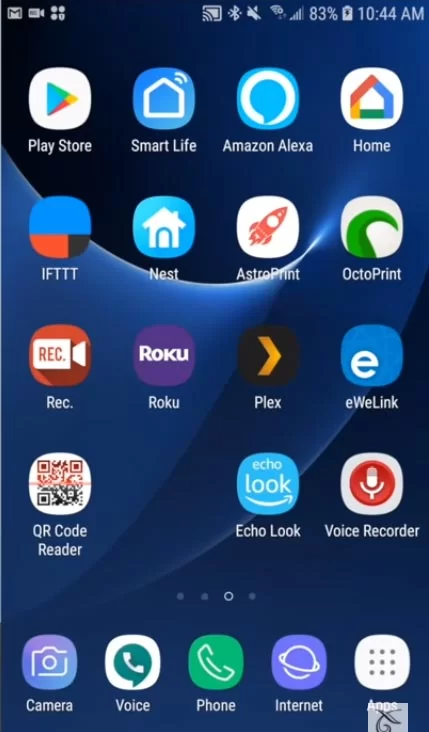
- Find the Alexa app on Playstore from your phone/tablet and installed it.
- Open the teckin smart plug app. (Android) (IOS)
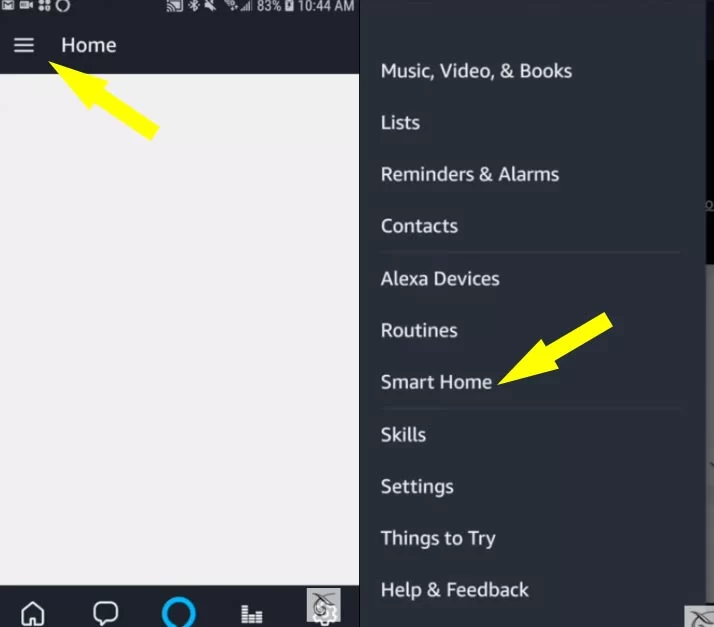
- Tap the Home Button at the top left corner.
- Tap Smart Home.
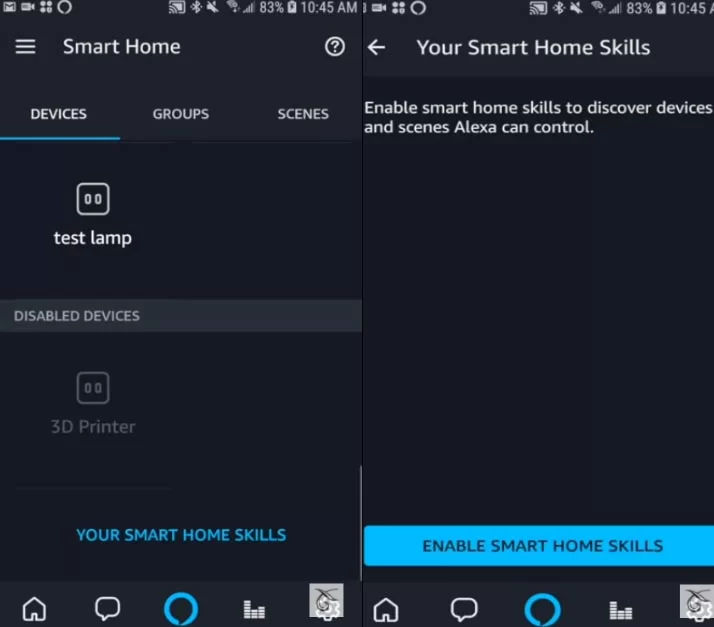
- Scroll down at the bottom and Tap the Your Smart Home Skills.
- Enable smart home skills.
- Type in the search tool Smart life app.
- Tap the Enable button.
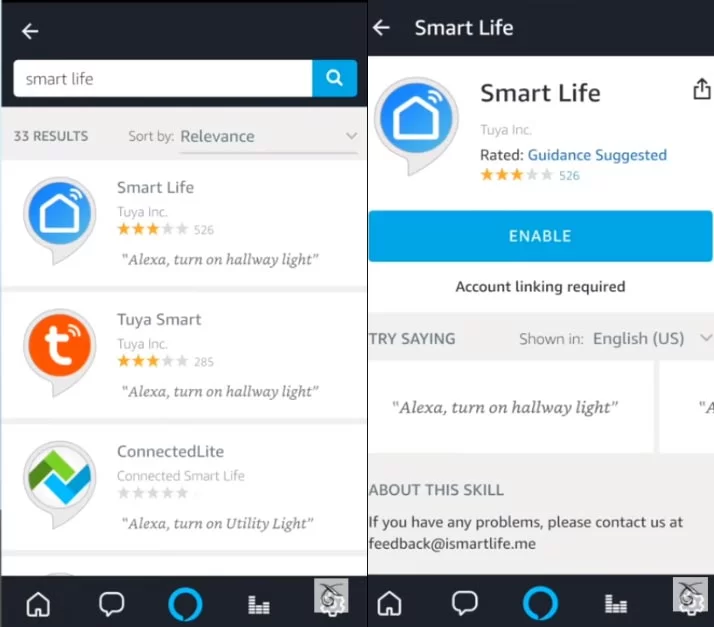
- Alexa App ask for login and password of your smart life app to Authorized and to Link it.
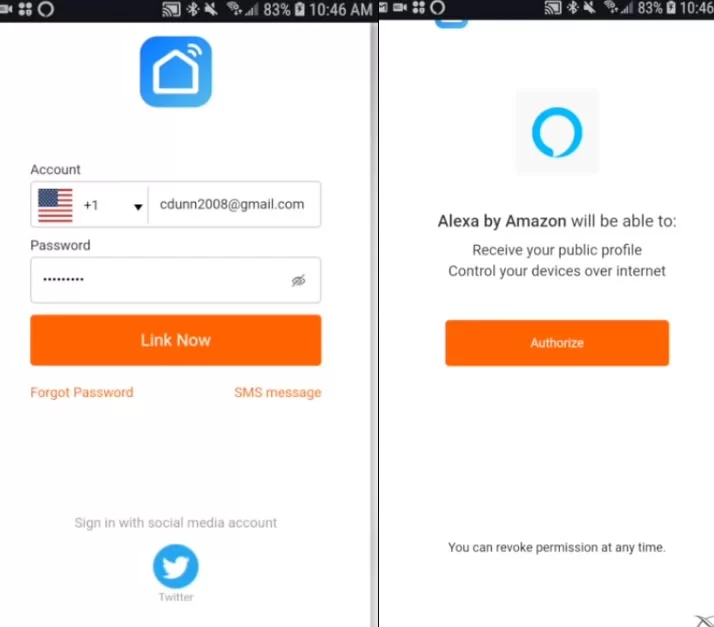
- A pop up of Discover Devices shown after closing down the link page.
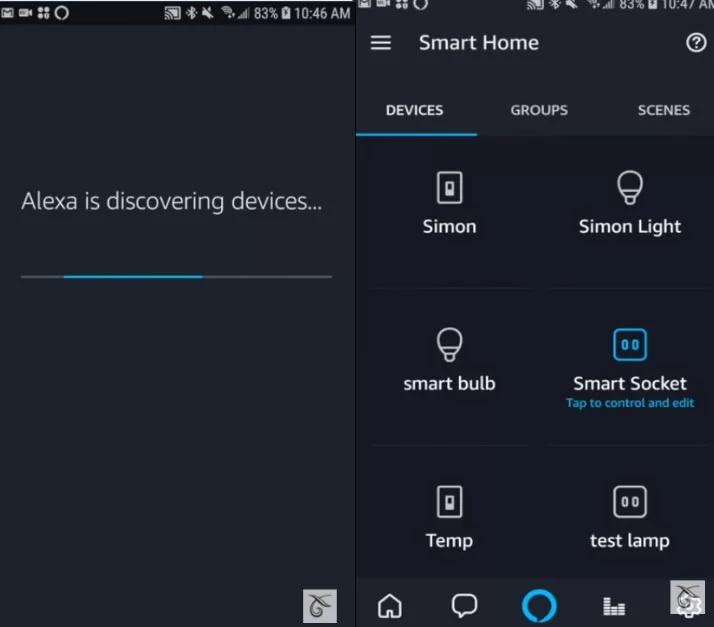
- Tap the Discover Devices Button.

- Done.
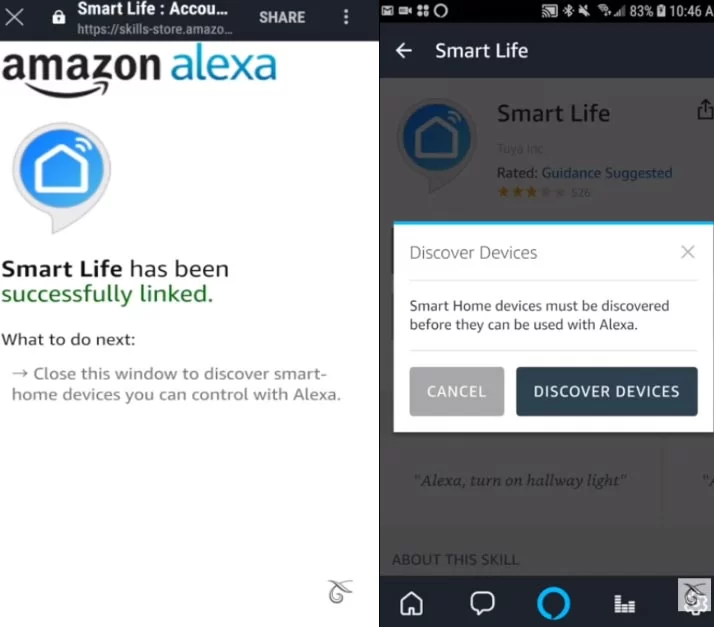
- Now you can see on smart home in Alexa app by the name of Smart socket.
Amazon Alexa Teckin smart Plug Commands For Voice Control
- Alexa Turn on smart socket
- Alexa Turn off smart socket
Teckin Smart Plug Setup With Google Home
Before starting the Google Home setup process, ensure that you have already installed the Smart Life app and connected your smart plug with it. This will ensure proper connectivity between your devices.
- Go To Google Home App And Install It.
- Tap The At The Top Left Corner
- Select Home Control
- Tap the + Add Device Button.
- Search and Find Smart Life App.
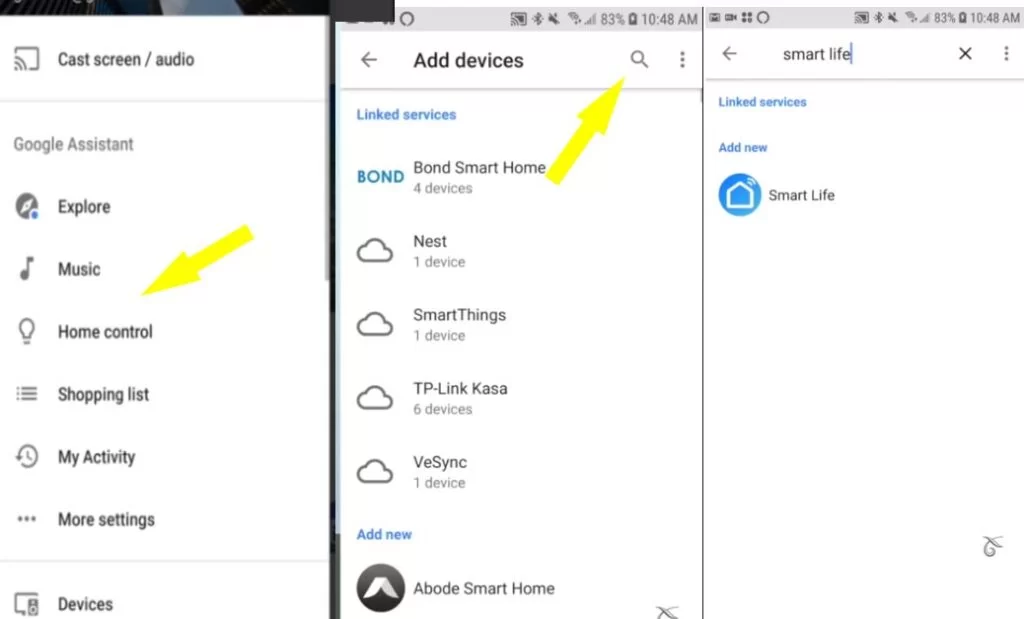
- You Will See Login And Password On Your Screen Once You Tap The Smart Life App.
- Google Home App Ask For Login And Password Of Your Smart Life App To Authorize And To Link It.
- After Entering Password and Login.
- Tap the Link Button
- Tap the Authorize Button
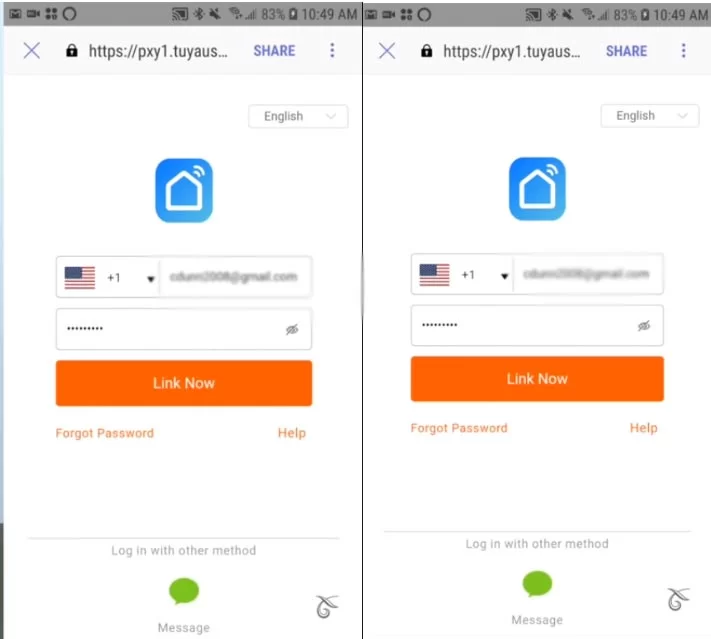
- Done.
Google Commands for Teckin smart plugs
You can use Google Assistant, Siri, or the Alexa app to control your smart plug with voice control. Simply press the power button on your devices to activate voice control.
- Hey google turn smart socket on
- Hey google turn smart socket on
What if Teckin smart plug setup not connecting
Step 1: Check Your Wi-Fi Network
- Wi-Fi Connection: Ensure your Wi-Fi network is active and working properly. Test the connection using another device like a smartphone or laptop.
- 2.4GHz Band: Teckin Smart Plugs typically require a 2.4GHz Wi-Fi network to operate. Ensure your router is set to support 2.4GHz connections as some smart devices are not compatible with 5GHz networks.
Step 2: Restart Your Devices
- Restart Smart Plug: Unplug the Teckin Smart Plug for about 10 seconds and then plug it back in. This can reset the device and clear minor glitches.
- Restart Router: Similarly, restarting your Wi-Fi router can resolve network-related issues.
Step 3: Check the Teckin Smart Plug’s Proximity to Router
- Signal Strength: Ensure the smart plug is within a good range of your Wi-Fi router. If it’s too far away, the signal might be weak, causing connection problems.
Step 4: Ensure Your Smartphone App is Updated
- App Update: If you’re using a smartphone app to control the smart plug (like the Smart Life app), ensure it’s updated to the latest version. Outdated apps can lead to connectivity issues.
Step 5: Reset the Smart Plug
-
- Factory Reset: If the above steps don’t work, try resetting the Teckin Smart Plug to its factory settings. The process usually involves holding down the power button for a specific duration. Refer to the user manual for the exact procedure.
- Reconfigure: After a reset, you’ll need to set up the smart plug again as if it were new.
Note: This is a brief overview of troubleshooting issues with smart plugs, including the common problem of Teckin smart plug not connecting. If you’re still struggling to identify the root cause and seek a more detailed solution, there’s a comprehensive guide available to assist you in resolving this issue promptly.
Step-by-Step Teckin SP27 and SP10 Smart Plug Setup
To set up the Teckin SP27 smart plug, follow these steps:
- Download the App: First, download the Smart Life app from the App Store or Google Play Store on your smartphone.
- Create an Account: Open the Smart Life app and create an account. You’ll need to provide an email address and create a password.
- Plug in the SP27: Plug the Teckin SP27 smart plug into an electrical outlet. Make sure the plug is in pairing mode, which is usually indicated by a rapidly flashing light.
- Connect to WiFi: Open the Smart Life app and tap the “+” icon to add a new device. Select the device type (in this case, a smart plug). Ensure your smartphone is connected to your 2.4 GHz WiFi network as most smart plugs do not support 5 GHz networks.
- Pair the Device: Follow the in-app instructions to pair the smart plug with your app. This usually involves entering the WiFi password and waiting for the app to discover the smart plug.
- Configure the Smart Plug: Once the smart plug is connected, you can name it and configure its settings in the app. You can set schedules, timers, and even create automation with other smart devices if supported.
- Voice Assistant Integration (Optional): If you want to use voice control with your Teckin SP27, you can link it to a voice assistant like Amazon Alexa or Google Assistant through their respective apps.
Teckin Smart Plug Setup Manual in PDF
Find out more manuals and Download:
Teckin SP20 Smart Wi-Fi Plug User Manual
Teckin SP10 Smart socket User Manual
Frequently Asked Questions:
How do I change the Wi-Fi on my Teckin smart plug?
- Open the Teckin Smart Plug app on your smartphone or tablet.
- Go to the settings menu by tapping on the gear icon in the top right corner of the screen.
- Select the smart plug that you want to change the Wi-Fi for.
- Tap on the Wi-Fi settings option.
- Click on the “Change” button.
- Select your new Wi-Fi network from the list and enter the password when prompted.
- Click on the “Connect” button.
- Wait for the smart plug to connect to the new Wi-Fi network. Once connected, you should see a confirmation message on the screen.
- The smart plug will now be connected to the new Wi-Fi network.
Why Is My Smart Plug Not Pairing?
Your smart plugs may not be pairing with your devices due to poor Wi-Fi connection or incorrect setup instructions. Make sure you followed the instructions correctly and that your lamp and heater are connected to the same Wi-Fi network as the smart plugs.
About The Author
Hassan Zaka
I am an expert in accounting and possess diverse experience in technical writing. I have written for various industries on topics such as finance, business, and technology. My writing style is clear and simple, and I utilize infographics and diagrams to make my writing more engaging. I can be a valuable asset to any organization in need of technical writing services.
Follow Us:LinkedinTwitter


