Honeywell Thermostat has been my favorite for years, not just because of its lengthy 100-year history, but also because of the variety of thermostats it has provided throughout the years. From the Series 1000 to modern smart Wi-Fi-equipped thermostats, you may find everything you need within your price range. However, because of its numerous variants, we are frequently perplexed about the proper approach for changing batteries, since the process varies depending on the model.
So, how do I change the battery in my Honeywell thermostat? In general, you may change the Honeywell thermostat’s batteries by simply taking out the cover plate or sliding out the battery compartment. Replace the battery and return it to its original position.
What Honeywell Thermostat Battery Type Is?
This type of thermostat system will require AA or AAA batteries, depending on the thermostat model. Some devices will use the thermostat’s main power source, whereas those that require batteries will use two or three common batteries. Any similar size battery can be used as a replacement.
| Honeywell Thermostat | Battery Type | Number of Batteries | Battery Location |
| 1000 Series | AAA | 2 | Under the cover plate |
| 2000 Series | AAA | 2 | Under the cover plate |
| 3000 Series | AA | 2 | Under the cover plate |
| 4000 Series | AA | 2 | Under the cover plate |
| 5000 Series | AA | 2 | Battery compartment |
| 6000 Series | AA | 2 | Battery compartment |
| 8000 Series | AAA | 3 | Under the cover plate |
When should the Honeywell Thermostat battery be replaced?
A Honeywell thermostat’s battery should be replaced once a year, and you will receive a warning 60 days before the battery expires. As a result, you have ample time to change the batteries, but there is a catch!
The thermostat features an LED panel that displays Low Batt or Replace the battery. This is the first notification you receive, which is likely 60 days before your battery dies. However, another warning is the black screen, which causes your thermostat to cease operating.
You may have a thermostat that merely utilizes a battery as a backup, and you may not be concerned about updating the thermostat’s batteries.
But believe me, even if your thermostat uses a battery for the backup process but you still need to replace the battery as this might cause certain changes in the Time and Date settings of the Honeywell thermostat.
This is How to Replace Battery in Honeywell Thermostat to almost all thermostat models with few exceptions.
To change the batteries on a Honeywell thermostat:
- Turn the power off at the circuit breakers
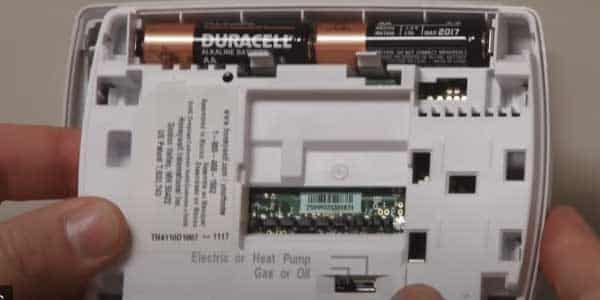
- Remove the battery compartment from the baseplate
- Remove the old batteries
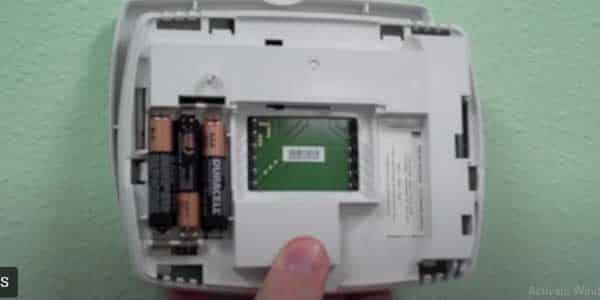
- Replace the batteries
- Replace the battery compartment with the baseplate
- Turn the power on at the circuit breakers
Note: This is how Honeywell Thermostat Battery Replacement works for many devices.
Here is the list of How to Replace Battery in Honeywell Thermostat (Series)
Series 2000 & 1000 Honeywell Thermostat Battery Replacement
Models TH1100DV, TH1110DV, TH1210DV, TH2110DV & TH2210DV
- Turn the Thermostat Off.
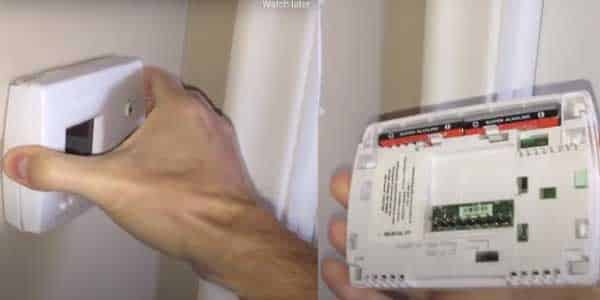
- Now, take out the cover plate from the base plate. You have to pull it from the bottom of the plate.
- Replace the batteries. It contains 2 AA batteries. Make sure to check the polarity of the battery ( + & -).
- Put the cover back on the base plate.
- Now, Switch on the Thermostat
Series 3000 Honeywell Thermostat Replacement of Battery
Models TH3110D & TH3210D
- Turn the Thermostat Off.
- Now, push and pull the thermostat cover from the bottom.
- Once the cover plate is separated from the base plate, replace the batteries.
- Put the cover back to the base place by sliding it gently until it gets fixed firmly.
- Turn On the Thermostat.
Series 4000 Honeywell Thermostat Replacement of Battery
Models TH4210D & TH4110D
- Switch off the Thermostat from the main circuit breaker so that you are not exposed to any live wire.
- Remove the Cover plate. Push it from the bottom.
- Now, change the batteries (AA) with fresh ones.
- Put the cover plate back in the base place. Place it firmly.
- Now that the batteries are replaced you can turn on the Thermostat.
Series 5000 Honeywell Thermostat Replacement of Battery
Models TH5110D, TH5220D & TH5320U
- Turn off the Thermostat.
- Just press and pull the cover to take out the battery compartment from the top right corner.
- Take out the battery compartment and Replace the battery (AA).
- Now, place the top cover as it was before.
- You have replaced the battery, it’s time to switch on the Thermostat.
Series 6000 Honeywell Thermostat Replacement of Battery
Models TH6110D, TH6220D & TH6320U
- Switch off the Thermostat from the circuit breaker.
- Press and pull the cover from the bottom to remove the battery holder.
- Slide out the battery compartment and replace it with AA batteries.
- Now, put the cover as it was fixed to the base plate earlier.
- Make sure to check the polarity of the battery before placing the battery compartment.
Series 8000 Honeywell Thermostat Replacement of Battery
Models TH8110U, TH8320U & TH8321U
- The first step for battery replacement of all the thermostats is to switch it off.
- Once, you switch off the Thermostat, open the front cover by holding the base in place and pulling out the front cover gently.
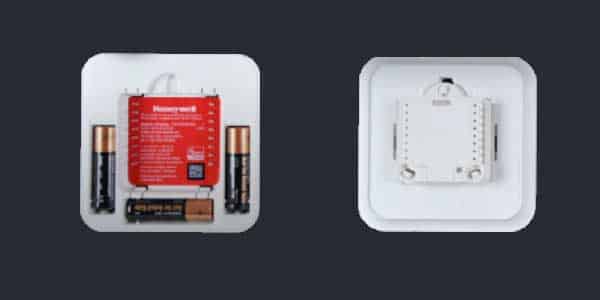
- Replace the batteries (3) with new AAA batteries and make sure to check the + and – polarity of the battery.
- Now, put the cover back and place it as it was attached to the base plate.
- The battery replacement is done and now you can switch on the Thermostat.
Honeywell Thermostat – Lyric Round
- Make sure to Switch Off the Thermostat and take out the thermostat from the sub-base.
- Replace the old batteries with fresh new AAA batteries.
- Now, place the faceplate back to the sub-base.
- Turn On the Thermostat.
How Do I Restore My Honeywell Thermostat After Replacing the Battery?
Assume the thermostat is not operating after the batteries have been replaced. In that situation, the batteries are oriented wrongly, the faceplate is poorly installed, the batteries are defective, or the system has to be reset.
- If the thermostat system does not switch on following a battery change, the first thing to verify is that the control panel faceplate or the battery compartment cover or tray has been properly replaced. The control panel will not turn on if the pins in the control panel do not make appropriate contact with the baseplate.
- Examine the control panel to ensure that it is firmly positioned. If not, carefully remove the panel without damaging any connections and fasten it to the base plate.
- If this does not resolve the issue, go to the instructions for accessing the thermostat battery compartment. Inspect the batteries to ensure they are put correctly according to the thermostat’s schematic.
- The thermostat will not work if the batteries are not inserted with the correct polarity orientation. If the batteries were fitted improperly, this should resolve the issue.
- If the problem persists, insert the batteries into another device to ensure that they are correctly discharging.
- If the problem persists, place the batteries into another device to check that they are discharging properly.
- If all is well with the batteries and the control panel, the system may need to reset. Since the control panel is not working, you must reset the system by turning off the electrical supply at the circuit breaker.
- This hard reset will force the system to reboot. Follow the steps in the previous section to perform a thermostat system reboot by turning off the breaker switch.
- If this does not solve the problem, it is time to contact a certified Honeywell technician to resolve the issue without causing damage to the thermostat system.
Do All Honeywell Thermostats Require Batteries?
Batteries are not used in all Honeywell thermostats. The control unit of certain non-programmable Honeywell thermostats does not require batteries. Because they consume so little power, these devices are linked to the thermostat’s primary electrical power supply. These machines lack displays and other power-consuming features.
Some Honeywell non-programmable thermostats are so basic that they do not require batteries to operate. The control units do not require a power source because they essentially simply switch, and if they do require power, they may be plugged into the thermostat power source due to their low power requirements.
Thermostats such as the Honeywell T87N1000 Tradeline Thermostat do not require batteries. This system has a control unit without a screen or even any buttons. It is simply a dial that sets the temperature of the thermostat.
Related:
- How to Unlock Honeywell Thermostat without Code
- Honeywell Pro Series Thermostat Troubleshooting
- How to Program a Honeywell Pro series Thermostat
- Honeywell Thermostat Heat on Blinking
Frequently Asked Questions:
How to change the battery in Honeywell thermostat RTH230B?
- Change the switch on the system towards the “Off” position.
- Pull the faceplate away from you to remove it.
- Battery chambers are located at the top of the thermostat, on the side facing the user.
- Remove the battery cover toward you.
- Replace the battery.
- Replace the battery’s cover. When it’s correctly placed, it makes a clicking sound.
- Replace the thermostat on the wall.
- The thermostat performs a series of checks before displaying the temperature of the surrounding environment.
- Set the time and day of the week. Program settings are saved on the memory chip and do not need to be entered again.
The Honeywell thermostat battery replacement not working
Sometimes the thermostat will not operate because the batteries were not correctly placed. Check the battery compartment again to confirm that the batteries are placed correctly. If you discover an error, realign the batteries to position them in the proper orientation.
Why is my Honeywell thermostat showing a low battery?
The thermostat displays Low Battery 60 days before the battery is completely gone to alert you to replace the battery as soon as possible.
How to Remove Honeywell Thermostat Cover to Replace Battery?
- Locate the thermostat on the wall. It should have a small cover on the front that can be removed.
- Using a flathead screwdriver or similar tool, gently pry the cover off the thermostat. It may be held in place by clips or screws, so be careful not to damage the device.
- Once the cover is removed, you should see the thermostat’s display and control buttons.
- Locate the battery compartment, which is usually located on the back or bottom of the thermostat. It may be hidden behind a small panel or cover.
- Open the battery compartment and remove the old batteries.
- Insert new batteries into the compartment, making sure to follow the correct polarity (positive and negative).
- Close the battery compartment and reattach the thermostat cover.
- Turn the thermostat back on and test the display to make sure it is functioning properly.


