Overview of Liftmaster Flashing Light Codes
This article explains LiftMaster AC garage door opener diagnostic flash codes, what symptoms they indicate, and step-by-step troubleshooting for common codes (1, 2, 3, 4, 5, 6 flashes) including sensor wiring/alignment, door control tests, mechanical checks (springs, trolley, gears, motor, capacitor), RPM sensor issues, and when to replace logic boards or parts. It also summarizes Security+ 2.0 and Jackshaft operator codes and links to additional LiftMaster resources.
Quick Solutions to Questions related to LiftMaster Flashing Light Codes:
-
How do I fix 1, 2, or 4 flashes indicating a safety-related error?
Inspect safety sensor LED status and wiring for broken, disconnected, shorted, or reversed wires; clean and realign sensors until LEDs glow steadily and repair or replace wires as needed. -
What should I do if the opener shows 3 flashes (door control related error)?
Remove the wall control, disconnect and short the door control wires to test; if opener activates replace the door control, otherwise test by shorting at motor unit and replace wires or control per results. -
How can I troubleshoot 5 flashes when the opener detects no RPMs?
Cycle power, check door balance and springs, look for manual locks or trolley stuck on stop bolt, inspect gears, capacitor, motor, chain/belt sprocket and RPM sensor and replace faulty components or call a technician. -
What does 6 flashes mean and how do I resolve it?
6 flashes indicate a motor circuit failure; replace the receiver logic board because the motor rarely fails. -
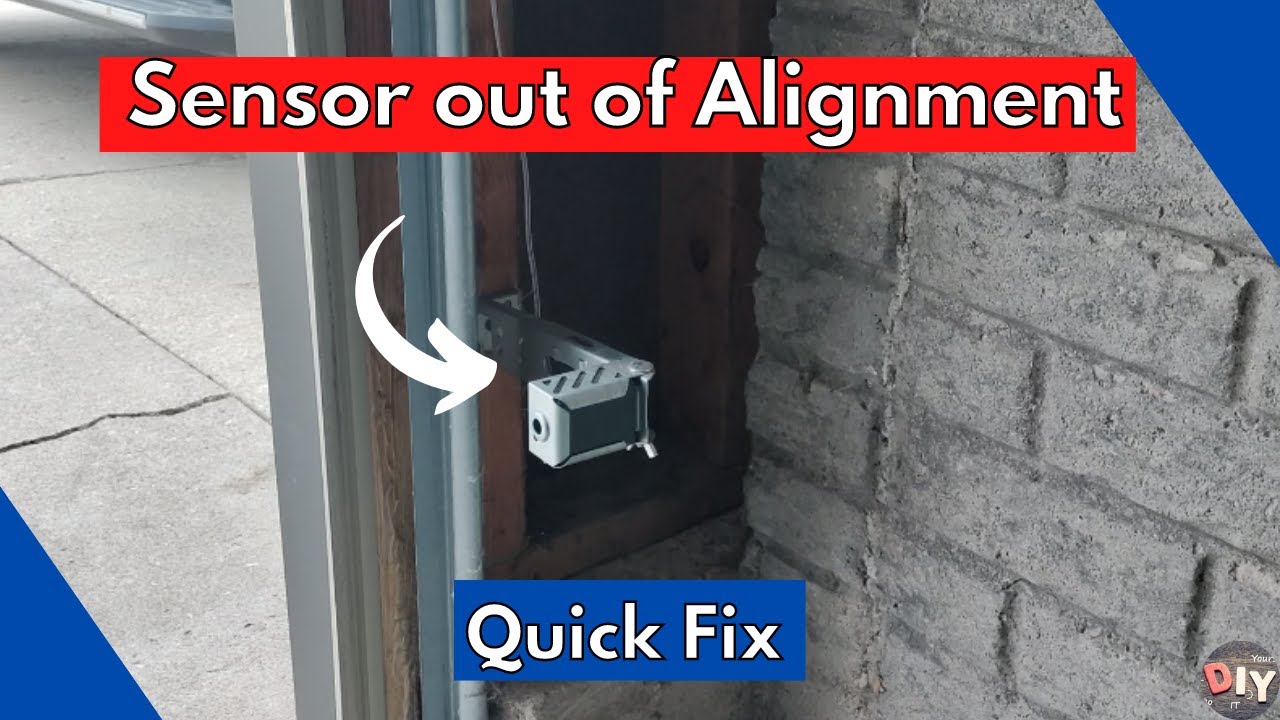
Can misaligned safety sensors cause the door to not close and lights to flash?
Yes; misaligned or obstructed sensors cause flashing and prevent closing—clean lenses, realign until both LEDs are steady, and secure the brackets. -
How do I test and fix RPM sensor or encoder related movement issues?
Disconnect door from opener and cycle; if opener runs >6–8 inches check balance and reset limits, if not check RPM sensor harness, interrupter cup, motor shaft end play and replace the RPM sensor.
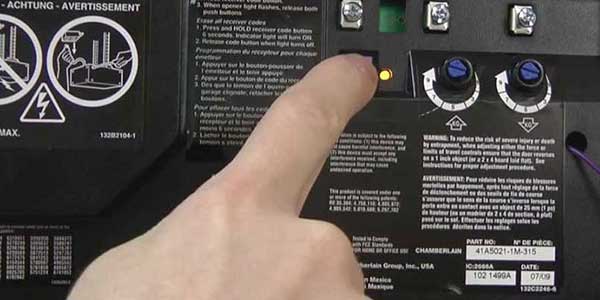
Your garage door opener has self-diagnostic capabilities for repairs, error codes, and beeping. The diagnostic LED light next to the learn button will flash a few times before pausing and repeating, indicating that there are error codes. The beeping sound and arrow flashes suggest possible problems with the garage door opener lights. So here is Troubleshooting Liftmaster garage door flashing light according to their number of flashes.
Here is a complete detail of Liftmaster Flashing Light Codes for AC garage door openers only:
Diagnostic Chart:
1, 2, or 4 flashes—Safety – Related Error
The LiftMaster Garage Door Opener will not close the door and the light bulbs blink 5 times.
Note: Any garage door opener or replacement logic board manufactured after 2022, will no longer have this feature.
One or both of the LED on the safety reversing sensors do not glow steadily.
- One Flash: A broken or disconnected wire to a safety reversing sensor.
- Two Flashes: A wire to a sensor is shorted out or a black/white wire is reversed.
- Four Flashes: The safety reversing sensor sending LED glows steadily, and the receiving light is dim or flashing.
Note: You can learn more about troubleshooting flashing problems and how to fix them in a separate article called “Why Does My Chamber Garage Door Blink Light?” and discover solutions for arrow flashes, openers, and times. In case you failed to resolve your issue from this topic.
Inspect the sensor wires for short, disconnected or broken wires (black/white wires reversed)
- If the home is pre-wired for a garage door opener, remove the wires from behind the wall next to the sensors. Check the connections for loose or broken wires, and replace or repair as needed.
- Check the wires at the opener, and lightly pull on the wires to verify if they are connected properly.
- Replace or reattach as needed.
Verify the Safety Sensors wires are properly connected and not reversed at the sensors (if pre-wired) or opener.
- White wires from the sensors should be connected to the #2 or White Terminal, where arrow flashes.
- White/Black wires from the sensors should be connected to the #3 or Grey Terminal.
The safety reversing sensors are slightly misaligned.
- Loosen the wing nut on the receiving sensor.
- Clean the lens.
- Realign the sensor until it glows steadily.
- Tighten the wing nut and secure the brackets.
- Verify that the door track is firmly secured to the wall and does not move, ensuring that no arrow flashes are present.
For additional support on the garage door opener not closing and the opener lights flashing, click here.
More: How to Reprogram Liftmaster Garage Door Opener
-
3 flashes – Door Control related error
The LED or Screen on the door control is not lit.
- Inspect the door control wires for a short (arrow flashes or staple in wire), and replace as needed.
How to Test:
- Remove the door control from the wall. The screw is located under the push bar, or under the buttons on the bottom, where arrow flashes. Refer to your product manual’s installation section to verify how to remove the door control from the wall.
- Disconnect the wires from the back of the door control, then touch the arrow flashes wires together.
- If the garage door opener activates and the arrow flashes, replace the door control.
- If the garage door opener does not activate, disconnect door control wires from the motor unit. Short across the red and white terminals with jumper wire.
- If the garage door opener activates and the arrow flashes, replace the door control wires.
- The above steps do NOT work for Security+ 2.0 garage door openers, as shorting the door controls wires will not cycle the opener.
- If the LED or Screen is on but not working, a short wire test is NOT needed. Instead, replace the door control to fix the issue with arrow flashes.
5 Flashes
This means the opener is not detecting any RPMs (rotations-per-minute) during the first second of operation. This typically means there is a mechanical stoppage:- If the opener is operating normally.
- Cycle power to the opener by unplugging it for 5 seconds, and reapply power to reset the error code.
- If the opener is humming for less than 5 seconds, then turns off. Check the following in order:
- Check the balance of the garage door opener
- Disengage the garage door from the opener.
- Manually lift the garage door 3 to 4 feet off the floor and release it.
- If the garage door forcefully closes to the floor, or is difficult to manually open and close, contact a trained door technician to have the door serviced.
- A broken spring above the garage door
- Check the spring above the garage door, if this is broken you will not be able to manually lift open the garage door.
- Identify if there are manual locks installed on the garage door, once a garage door opener has been installed, then should be removed.
- Inspect the door control wires for a short (arrow flashes or staple in wire), and replace as needed.
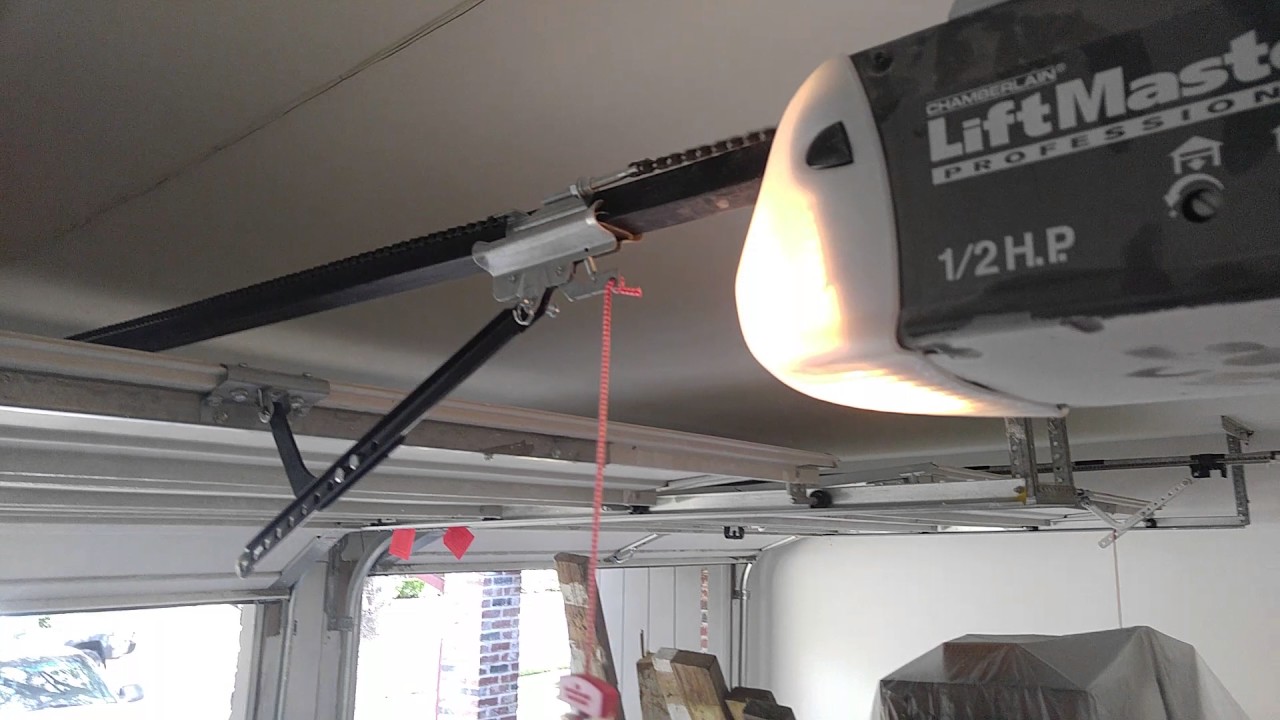
- Opener Trolley is stuck against the rail stop bolt: See How to get the trolley off the stop bolt or stop tab.
- The garage door has opened and will not close. Loosen the chain or belt to relieve the tension, then press the door control to run the trolley to the closed position. Re-tighten the chain or belt without the door connection, refer to the product manual for proper tension. Once tension has been completed, reset the travel and force adjustments, followed by all safety tests.
- Bad Capacitor, Stripped Gears or a Bad Motor
- Unplug the garage door opener and remove the cover. While the cover is removed, inspect the following:
- Capacitor: If the unit is humming and the gears are good, replace the capacitor.
- Gears: If there is white shaving inside the unit, replace the gears instead of the capacitor.
- Motor: If there are no white shavings, and you have already replaced the capacitor, replace the motor. Ensure the bolts used to connect the rail to the chassis are the black bolts provided with the unit from the factory.
- Motor has overheated
- This usually happens during a new installation after setting the limits and forces, or replacing components. The opener has been ran numerous time and the motor has overheated.
- Allow the opener to reset for 45 minutes allowing the motor to cool, then continue with the adjustments.
- If the opener is humming for more than 5 seconds, (up to 30 seconds) then turns off. Check the following in order:
- Check the balance of the garage door opener
- Disengage the garage door from the opener.
- Manually lift the garage door 3 to 4 feet off the floor and release it.
- If the garage door forcefully closes to the floor or is difficult to manually open and close, contact a trained door technician to have the door serviced.
- Trolley is disconnected (about 15 seconds)
- Cycle the opener and verify if the chain or belt is moving
- If so, re-engage the trolley so the opener will open and close the garage door. Refer to your product manual on how to engage and disengage the garage door.
- Cycle the opener and verify if the chain or belt is moving
- The Chain or Belt Sprocket is broken (up to 30 seconds)
- Unplug the garage door opener, remove the battery backup if applicable.
- Remove the sprocket cover
- If a DC opener, replace the DC Motor
- If an AC opener, replace the gear and sprocket assembly
- The internal Gears are stripped (Less than 5 seconds – units with travel modules, or 30 seconds – units with RPM Sensor)
- Unplug the garage door opener and remove the cover.
- If there are white shaving inside the unit, replace the gears
- Unplug the garage door opener and remove the cover.
- Check the balance of the garage door opener
- If the opener is moving less than 6 to 8 inches (15-20 cm) the RPM Sensor may not be functioning properly.
- Disconnect the garage door from the opener and cycle the opener.
- If after disconnecting the garage door, and the opener runs more than 6 to 8 inches, check the balance of the garage door and reset the travel and/or force settings if there are no door issues. See adjust the travel and force limits or program the travel and force limits.
- If the opener will NOT run more than 6 to 8 inches, check the following:
- Unplug the opener, remove the battery backup if applicable.
- Check the RPM sensors wire harness for loose connections
- Verify the interrupter cup is on the motor shaft
- Verify there is no end play in the motor shaft
- Replace RPM Sensor
- Unplug the opener, remove the battery backup if applicable.
- Disconnect the garage door from the opener and cycle the opener.
- If the opener has a single click with no movement check the following in order:
- If the unit is a DC motor unit:
- DC motor wiring harness or transformer wiring harness disconnected: reconnect wiring harness.
- If the unit is an AC motor unit:
- AC motor overheated: disconnect the motor from power and wait 45 minutes for the motor to cool down.
- Defective Logic Board: Replace Logic Board.
- Defective Transformer: Replace Transformer.
- If the unit is a DC motor unit:
6 flashes
Motor Circuit Failure. Replace the receiver logic board.
- Replace the logic board because the motor itself rarely fails.
If you’re still unsure about how to handle these flashes or just aren’t getting the above solutions, don’t worry. Here is a comprehensive collection of Liftmaster flashing codes, including with symptoms, causes, and troubleshooting instructions.
Hope it will help you a lot:
Here is a Liftmaster Diagnostic Codes for Security+ 2.0 Garage Door Openers manufactured:
Note: These codes only supports Security+ 2.0 Garage Door Openers manufactured after 2011 that utilize a yellow learn button and UP and DOWN adjustment arrows.
| UP | DOWN | SYMPTOM | CAUSE | RESOLUTION | |
| 1 flash | 1 flash | The light(s) will flash and the garage door opener won't close. | Safety sensors are not connected, installed, or there could be a cable cut. | Look for disconnected or severed wires in the sensor wires (s). Check the sensor's wire and connections if the amber LED on the sending sensor isn't lit. Check the wire connections going to the receiving sensor if the transmitting sensor LED is lit (green LED). If necessary, reconnect the connection or switch out the 22 gauge wire. Check the splices if the house is pre-wired. Use the door control or the remote to shut the garage door. | |
| 1 flash | 2 flash | The garage door opener will not close and the light(s) will flash | Safety sensor wire shorted or reversed | Inspect for improper wiring or a pinched wire in the sensor wire. Check the wires leading to and from the transmitting sensor (an amber LED) if it is not lighted. Check the staples. Check the cable leading to the receiving sensor if the sending sensor LED is lit (green LED). If necessary, reconnect the connection or switch out the 22 gauge wire. Check the splices if the house is pre-wired. Use the door control or the remote to shut the garage door. | |
| 1 flash | 3 flash | Wall-mounted door control will not function | The wires for the door control are shorted or the door control is faulty | Check the door control wires for shorts (staple in the wire), and replace them with 22 gauge wire as necessary. If the door control still fails not work the garage door opener after adding fresh door control wires, replace the door control. | |
| 1 flash | 4 flash | The garage door opener will not close the door and the light(s) flash | Misaligned or obstructed safety sensors | Make sure the green LED is stable and not blinking to realign the receiving sensor (green LED). The safety sensor LED will flicker to indicate an alignment issue. Verify that nothing attached or hanging from the door will obstruct the sensor's closing path. Utilize the door control or the remote to shut the garage door. | |
| 1 flash | 5 flash | The garage door opener clicks but no movement | Bad logic board | Replace the logic board. | |
| The opener runs approximately 6-8” and stops and/or reverses | Communication error to travel module | Locate the trip module, cut off all power, and remove the lid. Check to see if the journey module's wires are connected; if they are, replace the trip module. | |||
| 1 flash | 6 flash | RPM was detected when the motor was turned off with the door open. | RPM detected after motor shut off at the open position. | Manual disconnect pulled: Reconnect the manual release. | |
| When the motor is shut off, the garage door descends and reaches the open position. | |||||
| 2 flash | 1 flash | The garage door opener doesn't function as expected. | Logic board component failure | If required, disconnect the backup battery and try to unplug and re-plug the garage door opener. If the trouble codes remain, replace the logic board. | |
| 2 flash | |||||
| 3 flash | |||||
| 4 flash | |||||
| 5 flash | |||||
| 3 flash | 2 flash | The garage door opener recently lost power. | Opener experienced a power outage and needs to locate the travel location. | Make sure there is power in the outlet. To erase the error code, open and close the opener repeatedly. | |
| 3 flash | 3 flash | The battery indicator light on the garage door opener flashes green constantly. | Logic board component failure. Battery over voltage is detected. | Logic board need to be replaced | |
| 3 flash | 5 flash | The garage door either moves and stays in the open position or starts to close and reverses to the closed limit. If installed, Wi-Fi RJOs will fully reverse before flashing the work light five times. | Cable Tension Monitor tripped or not detected. | Cable Tension Monitor is not installed: Install cable tension monitor. | |
| Roller on the wall side of cable: Place roller over cable. | |||||
| Broken cable tension monitor wire: Identify cut or broken wire, repair or replace the wire. | |||||
| Cable Tension Monitor detects slack in the cable: | |||||
| Reset open limit to allow more of the bottom door panel in the vertical track. Ensure there is enough room for the door to open enough for the car to the enter garage. | |||||
| Lift back hangs 1 to 2 holes. | |||||
| Install cable keepers. | |||||
| Install pusher springs. | |||||
| Replace the cable tension monitor. | |||||
| 4 flash | 1 flash | The garage door either stops and reverses before contacting the garage floor and returns to the open position, or the garage door reverses off the garage floor. | Unforeseen change in RPM or DC Motor current while traveling in the DOWN direction. | The down limit was too far set: Force modifications and reprogram journey. | |
| 2 flash | Belt slip? Put on the belt retaining cap. | ||||
| RJO Shaft Collar Slippage: Tighten Shaft Collar | |||||
| Unstable Travel Module Drive Gear: Remove the cover, look for the gear that rotates the travel module, and tighten the set screws. | |||||
| Uneven Garage Floor: Reprogram travel and make modifications, or fix the garage floor. | |||||
| Garage door obstruction: Clear the way and check that the door reinforcement is not harmed. | |||||
| Garage door isn't balanced (Too Heavy): Rebalance the garage door. | |||||
| Torsion spring that has broken: Replace broken torsion spring (s). | |||||
| Rollers With Wear: Lubricate, repair, or replace worn rollers. | |||||
| Worn or broken hinges: grease, fix, or replace (s). | |||||
| The garage door isn't straight. Align the garage door (Plumb). | |||||
| Worn Bearings in Bearing Plate(s): Lubricate or replace bearing plate (s). | |||||
| Drive Gear for Loose Travel Modules (RJO): Locate the gear that turns the travel module, remove the cover, and tighten set screws. | |||||
| Loose Travel Module Assembly: Verify mounting tabs and screws to make sure the module and motor or bracket are tightly fastened. | |||||
| Loose Travel Module Wire(s): Check connection points to ensure a snug fit. Wire Harness can be fixed or replaced. | |||||
| Grime or debris in the trip module: open the travel module and clean the wheel windows. | |||||
| 4 flash | 3 flash | The garage door stops and reverses before touching the garage floor and returns to the open position. | Loss of RPM during DOWN travel | Loose Travel Module Assembly: Check mounting tabs/screws to ensure a snug fit between module and motor/bracket. | |
| Loose Travel Module Wire(s): Check connection points to ensure a snug fit. Repair or replace Wire Harness. | |||||
| 4 flash | 4 flash | The garage door stops before reaching full open position. | Loss of RPM during UP travel | Loose Travel Module Assembly: Check mounting tabs/screws to ensure a snug fit between module and motor/bracket. | |
| Loose Travel Module Wire(s): Check connection points to ensure a snug fit. Repair or replace Wire Harness. | |||||
| RJO Emergency Release Engaged while traveling: Reconnect Emergency Release and open and close the door with the opener. | |||||
| 4 flash | 5 flash | The garage door begins to close then reverses to the open position or the garage door does not move and remains at the open position. | Unrecognized Travel Module | Confirm proper travel module is installed. Replace with correct travel module if necessary. |
Diagnostic codes for Residential Jackshaft Opener (RJO)
The following are diagnostic codes for model.
- 3800
- 8500
- RJO20
- RJO20C
Code |
Description |
Symptom |
Things to look for |
|---|---|---|---|
| 1 | Door will not close, lights flash Note: Any garage door opener or replacement logic board manufactured after February 3, 2022, will no longer have this feature. |
One or both of the indicator lights on the safety reversing sensors does not glow steady | Inspect the sensor wires for a short (staple in a wire), incorrect wiring polarity (black/white wires reversed), broken or disconnected wires; replace or reattach as needed |
| 2 | Door will not close, lights flash Note: Any garage door opener or replacement logic board manufactured after February 3, 2022, will no longer have this feature. |
One or both of the indicator lights on the safety reversing sensors does not glow steady | Inspect the sensor wires for a short (staple in a wire), incorrect wiring polarity (black/white wires reversed), broken or disconnected wires; replace or reattach as needed |
| 3 | Door control not working | No movement when door control is pressed | Check for broken or pinched wires leading to the control. Short wires at door control and logic board to test wires. |
| 4 | Safety sensors misaligned | Door reverses and lights flash Note: Any garage door opener or replacement logic board manufactured after February 3, 2022, will no longer have this feature. |
Check, sensors for proper alignment. |
| 5 | No RPM in the first second | No movement, grinding sound, 0-6″ of door travel | Bad motor gears, disconnected encoder harness, open armature, brush failure, bent motor bracket with chain disconnected *check to make sure the door is engaged to the opener* |
| 6 | RPM pulses detected after the motor was turned off | Door coasts down or up after limits have been reached | Check the door, does it coast down on it’s own or does it open on it’s own when disconnected from the opener? If the door isn’t extremely heavy or out of spec for the opener, replace motor |
| 7 | Motor short | No movement, no sound | Replace motor |
| 9 | Cable tension motor reversal | No movement, unable to set and retain the limits, door attempts to close and reverses | Check cable depth, check track radius, check the door for being hot |
| 10 | Force reversal, up direction | Door stops during the open cycle | Cycle the opener again and it should automatically ratchet up to the next force setting |
| 11 | Max force, down direction | Door stops and reverses during close cycle | Reset limits and forces, if unable to resolve look for a door issue |
| 12 | Force reversal, down direction | Door stops and reverses during close cycle | Cycle the opener again and it should automatically ratchet up to the next force setting |
| 13 | Max force, up direction | Door stops during the open cycle | Reset the limits and forces, if unable to resolve look for a door issue |
| 15 | Bad CRC | No movement, no sound | This is an error detecting code known as cycle redundancy check, basically this is a bad logic board |
Wi-Fi Residential and Light-Duty Commercial Jackshaft Operators:
The diagnostic chart in this article can be used for the following models:
- 8500W
- 8500WRGD
- 8500WLA
- LJ8900W
- LJ8950W
Diagnostic Code |
Symptom |
Solution |
|
|---|---|---|---|
| UP Arrow Flash(es) | Down Arrow Flash(es) | ||
| 1 | 1 | The door operator will not close. | Safety reversing sensors are not installed, connected or wires may be cut. Inspect sensor wires for a disconnected or cut wire. |
| 1 | 2 | The door operator will not close. | There is a short or reversed wire for the safety reversing sensors. Inspect sensor wire at all staple points and connection points and replace wire or correct as needed. |
| 1 | 3 | The door control will not function. | The wires for the door control are shorted or the door control is faulty. Inspect sensor wire at all staple points and connection points and replace wire or correct as needed. |
| 1 | 4 | The door operator will not close. | Safety reversing sensors are misaligned or were momentarily obstructed. Realign both sensors to ensure both LED’s are steady and not flickering. Make sure nothing is hanging or mounted on the door that would interrupt the sensor’s path while closing. |
| 1 | 5 | Door moves 6-8″ (15-20 cm) stops or reverses. | Manually open and close the door. Check for binding or obstructions, such as a broken spring or door lock, correct as needed. Check wiring connections at travel module and at the logic board. Replace travel module if necessary. |
| 1 | 5 | No movement, only a single click. | Manually open and close the door. Check for binding or obstructions, such as a broken spring or door lock, correct as needed. Replace logic board if necessary. |
| 1 | 5 | Door operator hums for 1-2 seconds no movement. | Manually open and close the door. Check for binding or obstructions, such as a broken spring or door lock, correct as needed. Replace motor if necessary. |
| 1 | 6 | Door coast after it has come to a complete stop. | Program travel to coasting position or have door balanced by a trained technician. |
| 2 | 1-5 | No movement or sound. | Replace logic board. |
| 3 | 1 | The door operator moves slightly, then stops | Activate the door operator again. If problem persists, replace logic board. |
| 3 | 3 | The battery status LED is constantly fl ashing green. | Battery backup charging circuit error, replace logic board. |
| 3 | 5 | The door operator will not close or door reverses during travel. | If two cable tension monitors were previously installed and one has been removed, unplug and plug in the operator three times to relearn the monitor to the operator. |
| 4 | 1-4 | Door is moving stops and or reverses. | Manually open and close the door. Check for binding or obstructions, such as a broken spring or door lock, correct as needed. If the door is binding or sticking contact a trained door systems technician. If door is not binding or sticking attempt to reprogram travel (refer to page 19). |
| 4 | 5 | Door operator runs approximately 6-8″ (15-20 cm), stops and reverses. | Communication error to travel module. Check travel module connections, replace module if necessary. |
| 4 | 6 | The door operator will not close. | Safety reversing sensors are misaligned or were momentarily obstructed. Realign both sensors to ensure both LED’s are steady and not flickering. Make sure nothing is hanging or mounted on the door that would interrupt the sensor’s path while closing. |
| 5 | 5 | The door will not close when using Timer-to-Close or MyQ Smartphone Control | MyQ Remote LED Light must be installed to use TTC or MyQ to control the door. Plug in the MyQ Remote LED Light and make sure it is programmed to the garage door opener. NOTE: Light-Duty models do NOT require the MyQ Remote LED to use this feature, if you encounter this error on those models, replace the logic board. |
You can verify the solution and all table data from source 1 and Source 2
Conclusion
Quick Overview
-
Common Codes and Solutions:
1 Flash – Up Arrow:
- Symptom: Garage door won’t close, light flashes.
- Cause: Safety sensors are disconnected, misaligned, or obstructed.
- Solution:
- Check the sensor wires for damage or loose connections.
- Clean the lens of the sensors.
- Realign the sensors so the LEDs are stable and not flashing.
- Remove any obstructions blocking the sensor’s path.
1 Flash – Down Arrow:
- Symptom: Garage door won’t close, light flashes rapidly.
- Cause: Sensor wire is pinched or stapled.
- Solution:
- Locate and repair the pinched or stapled wire.
- Replace the wire if necessary.
2 Flashes – Down Arrow:
- Symptom: Garage door won’t close, light flashes rapidly.
- Cause: Shorted or reversed safety sensor wires.
- Solution:
- Inspect the sensor wires for damage and ensure proper connections.
- Verify the wires are not reversed (black/white with white/black).
- Replace the wires if necessary.
4 Flashes – Down Arrow:
- Symptom: Garage door won’t close, light flashes slowly.
- Cause: Misaligned safety sensors.
- Solution:
- Ensure the LED on the sending sensor is steady (green).
- Adjust the receiving sensor until its LED is also steady (green).
- Tighten the wing nut securing the sensor.
5 Flashes:
- Symptom: Garage door won’t close, light flashes rapidly.
- Cause: Opener not detecting RPM (rotations per minute) during operation.
- Solution:
- Check for mechanical issues like a broken spring or unbalanced door.
- Cycle power to the opener by unplugging it for 5 seconds.
- If the problem persists, consult a qualified technician.
Less Common Codes:
- 6 Flashes: Motor circuit failure. Replace the logic board.
- 3 Flashes – Down Arrow: Wall-mounted door control not working. Check the door control wires for shorts.
- 3 Flashes – Up Arrow: Battery indicator light blinking green. Replace the logic board due to overvoltage.
- 3 Flashes – Up/Down Arrow: Door opens and won’t close. Check the cable tension monitor or replace the broken cable.
- 10 Flashes: Remote control not working. Check battery or replace the remote.
- 11 Flashes: Remote and logic board problems. Replace both components.
- 12 Flashes: Remote and motor problems. Replace both components.
Additional Resources:
- Liftmaster Diagnostic Codes: https://support.chamberlaingroup.com/s/article/Diagnostic-codes-for-garage-door-openers-1484145692749
- Troubleshooting Liftmaster Flashing Lights: https://www.youtube.com/watch?v=nm-X6PqFm_s
- Liftmaster Support: https://support.chamberlaingroup.com/s/contact-us
Why is my Garage Door not closing, Liftmaster light blinking 10 times?
To fix this issue,
- First, locate the two photo eyes attached to your garage door and clean the lens using a soft microfiber cloth.
- Loosen the wing nut holding up the photo eye and adjust them until both sensors are properly aligned. The photo eye with the amber light sends out the light, while the green sensor is the receiver.
- If aligned correctly, the green sensor will remain on and glow steadily.
Another way to explain: Method is the same as above stated
Your photo’s eyes are not in focus. One should always be on, and depending on how old the opener is, it will either be orange or green. The opposite one should be glowing steadily green. If it is not illuminated or is flickering, you should unscrew the screws and give them a little adjustment to realign them, and the Liftmaster light blinking 10 times issue will be resolved.
If your problem has not been fixed, the self-diagnoses LED light indicator on your opener can help you determine a possible problem and solution for your opener.
Why won’t my garage door light go off?
Check the “Light” button on the panel if your door control has various functions. The control panel for your garage door is normally mounted on the inner wall. The “Light” switch button is sometimes mistakenly engaged, causing the light to stay on. To turn it off, hit it again.
How do you trick garage door sensors?
All you need to do is hold the wall button down ( do not press and release). You must hold the wall button all the way down until the garage door hits the floor then release it. If you let go of the button before the door hits the ground the sensors will kick back into action and the door will reverse.
How to fix Liftmaster error code 4-6?
it indicates that inter sensors are misaligned, or something is obstructed between two sensors. This indicates that the garage door opener will not close and that light bulbs will flash.
To Fix:
- Check to see if your safety reversing sensors are properly placed, obstructed, or out of alignment.
- Reposition both sensors to ensure that both LEDs are stable and not flashing. Make sure there is nothing dangling or hanging on the door that might interfere with the sensor’s route when closing.
Other Fixes if the issue is still present:
- Check that the Amber LED (sending sensor) and Green LED (receiving sensor) are both flashing continuously.
- Align the sensors such that their lenses are pointed in the same direction.
- You might try raising the sensor slightly above the ground by adjusting the rail brackets.
- It may not detect any obstructing item beneath if you place it higher than 6 inches above the garage floor.
How to fix Liftmaster error codes 1-2?
Users will encounter Error Code 1-2 when the garage door opener detects that the safety sensor wires are shorted or reversed.
Symptoms of Error: The garage door opener will not close, and the opener’s lights will flash or click ten (10) times.
To Fix:
Ensure the safety sensors are correctly wired to the operator and that the bare copper is not touching.
Note: Some of the liftmaster error code list might not be fixed DIY, therefore a expert professional reccomended.
Why is my liftmaster blinking?
- Low battery: If your LiftMaster is low on battery, it will blink to let you know. Replace the batteries and the blinking should stop.
- Safety sensor issue: If the safety sensors are not properly aligned or obstructed, the LiftMaster will blink to warn you. Clean the sensors and make sure they are aligned properly.
- Firmware update: If there is a firmware update available for your LiftMaster, it will blink to let you know. You can update the firmware by following the instructions in the owner’s manual.
- Problem with the motor: If there is a problem with the motor, the LiftMaster may blink. In this case, you will need to contact a qualified technician for assistance.
How to fix liftmaster error codes 7 flashes?
You might want to see this:
- How to Program a Liftmaster Garage Door Opener
- How to Reprogram Liftmaster Garage Door Opener
- How To Reset Liftmaster Garage Door Opener
- The Simple Guide on How to Bypass a Garage Door Sensor
About The Author
Hassan Zaka
I am an expert in accounting and possess diverse experience in technical writing. I have written for various industries on topics such as finance, business, and technology. My writing style is clear and simple, and I utilize infographics and diagrams to make my writing more engaging. I can be a valuable asset to any organization in need of technical writing services.
Follow Us:LinkedinTwitter


