Overview of Nest Camera Troubleshooting
This article outlines troubleshooting steps for common Nest camera and thermostat issues, including cameras not showing in app, going offline at night, not working after power outages, zoom problems, and missing status lights. It explains app migrations to Google Home, power and Wi‑Fi checks, temperature effects, router upgrades, battery and wiring checks for Nest Thermostat, restart/reset procedures, and simple fixes like cleaning the lens or toggling the status light.
Quick Solutions to Questions related to Nest Video Doorbell:
-
Why is my Nest camera not showing in the app?
The original Nest app does not support new Nest cameras; use the Google Home app for new cameras, and keep the older Nest app for legacy cameras until Google fully merges features. -
What causes a Nest camera to go offline at night and how can I fix it?
Causes include power or Wi‑Fi issues, extreme temperatures, distance from the router, or bandwidth limits; fix by restarting the camera, checking power connections, updating the app, scanning device temperature, ensuring the router is powered and closer, upgrading the router, or increasing internet plan bandwidth. -
How do I get my Nest thermostat working again after a power outage?
Check Nest service status, verify battery voltage (must be at least 3.6 V), restart the thermostat, restart the Wi‑Fi router, and if needed reset all settings or inspect wiring and circuit breakers before seeking electrician help. -
Why is my Nest Cam zoom malfunctioning and how do I troubleshoot it?
Zoom issues often stem from a bad Wi‑Fi connection or a smudged/dusty lens; ensure the router is in range and wipe the lens with a microfiber cloth. -
What if my Nest camera status light is not visible?
If the camera streams normally but the light is off, check Camera settings in the Nest App under Lights and Sound and enable Status light; if the camera is off, ensure it is powered and the USB power cord and outlet work.
There are a few Nest camera issues and troubleshooting against them are in detail, however a separate topic on how to troubleshoot the nest video doorbell.
Here Are the List of Nest Camera Troubleshooting Against These Queries
- Nest Cam Not Showing In App
- Nest Camera Goes Offline At Night
- Nest Camera Not Working After Power Outage
- Nest Cam Trouble with Zoom
- Nest Camera No Light
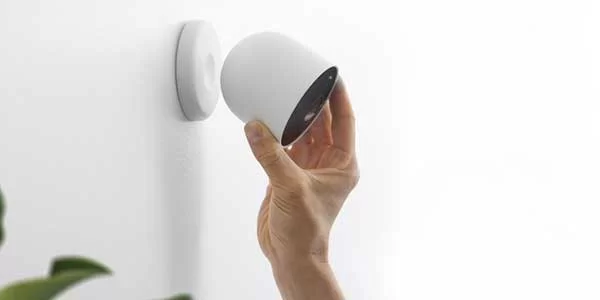
Nest Cam Not Showing In App
The original Nest app does not support Google’s new Nest cameras. It’s something Google hasn’t been shy about disclosing, yet it’s something I’ve seen countless buyers struggle to understand.
I’m just going to say it. The Google Home app works well in place of the Nest app. I don’t think its ideal, and I believe the original Nest app did a better job on a lot of these features. However, putting all of this smart home capability in one spot makes sense, and I’m on board with the idea.
What I don’t agree with is how long Google is taking to rectify the mess that current Nest owners are dealing with.
In the Google Home app, there are currently two completely separate Nest camera experiences. There are new cameras that allow you to navigate through history, download clips, alter settings, receive motion notifications, and, of course, see a live view. Then there are the earlier Nest cameras, which are found in millions of houses but are rendered worthless by this software.
You can watch a live view, but that’s the extent of your options. Everything else, from history to notifications, is handled by the older Nest app, which means you’ll need two applications on your phone to use, for example, a Nest Cam IQ and the new Nest Doorbell – and there’s no web app for the new ones either.
Google, to its credit, does plan to fix this. The company has said that it plans to bring the same feature set from new cameras in the Home app to old Nest cameras in the Home app, but three months in, and we haven’t seen any progress on that promise outside of a September blog post where Google said this will “take time” to get right.
Temporary Fix: If you have any old Nest hardware up and running, you’ll have to use two apps to manage the past Nests with the latest ones.
Nest Camera Goes Offline At Night
Here are tips on how you can fix a Nest camera that repeatedly goes offline:
- Restart the Nest camera network.
- Check your Nest camera’s power connections.
- Update your Nest app to the most current version.
- Scan your Nest camera to check its temperature.
- Ensure your Wi-Fi router is plugged in.
- Move your Wi-Fi router closer to the Nest camera.
- Purchase a more powerful Wi-Fi router.
- Review your household’s bandwidth usage.
Restart the Nest Camera Network
That’s because your Nest camera occasionally receives software updates that require a complete restart or reset.
To Reset Your Nest Camera:
- Press and hold the reset button located on the back of the camera.
- Keep the button pressed for five seconds and release it.
Your Nest camera will restart itself, hopefully solving your connectivity issue.
Check Your Nest Camera’s Power Connections
If your Nest camera isn’t securely plugged into a power source, you’ll likely find that it consistently powers off or disconnects from your home’s Wi-Fi signal.
Take a look at the device’s power cable and USB connection.
If the power cable plug isn’t flush with the outlet (or the USB connector is slightly detached from the camera), you may have found the culprit behind your Nest camera connectivity problems.
Scan Your Nest Camera to Check Its Temperature
Like many other electronic devices, a Nest camera can become inoperable when exposed to extreme temperatures.
If your Nest camera is near an HVAC vent, or if you’re utilizing a Nest Doorbell camera, it may go offline due to temperature changes that aren’t ideal.
A Google Nest camera can often work in temperatures ranging from 0°F to 100°F (-18°C to 38°C).
Even so, determining how hot or cold your device is sometimes be difficult.
A high up against a wall, facing the main entryway, is one of the most suggested spots to install a Nest camera.
Climbing a ladder to access your camera can be dangerous, but there is another way to check the temperature of your gadget. You may avoid awkward ladders and time-consuming temperature checks by using an infrared temperature scanner.
Ensure Your Wi-Fi Router Is Plugged In
If your Nest camera is fully updated, plugged in, and kept safe from extreme temperatures, then your camera may not be responsible for the wavering internet connection.
In this case, check your Wi-Fi router for power supply problems.
Fortunately, most homeowners will know right away when their home Wi-Fi router is experiencing problems or isn’t plugged in.
However, it’s still a good idea to ensure that your router is fully connected to a working outlet before attempting further solutions.
Move Your Wi-Fi Router Closer to the Nest Camera
Is your Wi-Fi router plugged in and working correctly?
If so, the issue behind your Nest camera connectivity issues might be distance.
Remember, Wi-Fi routers have a set broadcast distance, and devices far from a router can fail to receive its signal.
Placing your router closer to your Nest camera could help keep the device connected, preventing further offline notifications.
Still, this might not be possible, especially if your modem is restricted to a single connection line.
If you can’t move your router closer to your Nest camera, the next best option is to purchase a new and more powerful Wi-Fi router.
Upgrading your router to one that offers a greater range is an excellent way to boost internet connectivity throughout your whole home and keep your Nest devices online.
Purchase a More Powerful Wi-Fi Router
The average Wi-Fi router can last several years before beginning to degrade and break down, but that doesn’t mean you should wait to replace your current Wi-Fi router.
A few years ago, a router that could achieve speeds of about 2 Gbps was considered impressive.
But now, as Wi-Fi 6 is set to become the new norm, routers can potentially reach speeds of almost 10 Gbps!
If you can’t remember when you purchased your most recent router, or it’s been more than three years since you bought it, it’s likely time to replace it.
Review Your Household’s Bandwidth Usage
If your household is full of devices that remain connected to your Wi-Fi throughout the day, you may end up reaching your internet data cap far sooner than expected.
After this point, internet speeds may significantly decline, causing your Nest camera to go offline repeatedly.
You’ll likely need to upgrade your internet plan to one that offers a higher data cap to solve this issue.
Google Nest, Ecobee, Honeywell, and More: The 6 Best Smart Thermostats
Nest Camera Not Working After Power Outage
Check the Current Status of the Nest System
Before you do anything, be sure that the Nest services are up and running. This can be done by going to status.nest.com or clicking on this link.
You won’t be able to reconnect your Nest Thermostat if the Setup & Pairing or another related service is unavailable.
Of course, your local power loss had no effect on Nest services. It’s almost certainly a fluke.
It could also be a very rare event of a national power outage.
Check the Nest Thermostat’s Battery Voltage
Your Nest Thermostat includes a built-in battery, did you know? That’s correct. It’s clever in a variety of ways.
The reason for this is that your Nest Thermostat is reliant on the power supplied by your HVAC system via the C wire.
Even if you haven’t used your HVAC system in days, the battery allows it to keep powered on and connected.
Here’s how you check your Nest’s battery voltage:
- Open Settings.
- Tap on Technical Info.
- Tap on Power.
- Check the value under Battery voltage.
The voltage must be at least 3.6 V.
If the value is 3.5 V or lower, you can remove the Nest Thermostat from the wall and charge it using a Micro-USB cable.
An alternative would be to turn your HVAC on manually and allow the C wire to charge it. The voltage should go up in a couple of minutes.
The Nest Thermostat should be restarted.
The good old “turn it off and on again” method appears to work for all equipment.
This is the quickest option if the Nest services are up and the battery voltage is fine.
The Nest Thermostat can be restarted by doing the following steps:
- Open Settings.
- Go to Reset.
- Select Restart.
- Confirm by pressing OK.
Wait a minute for the Nest to restart and try to connect it now.
Restarting the device should’ve fixed any previously bugged services. It also should’ve re-established the connection to your home Wi-Fi.
Your Wi-Fi Router Should Be Restarted
While we’re on the subject of Wi-Fi, your router has also experienced a power loss.
While we’re on the subject, my Wi-Fi router was destroyed by a power outage a few years ago. The computer, on the other hand, was in perfect working order.
Hopefully, your router remains functional. It’s probably fine if you’re reading this on your phone on Wi-Fi.
Nonetheless, this does not imply that your Nest Thermostat has comprehensive Internet connection.
Restart The Computer Completely.
The key distinction between a restart and a reset is that a reset will wipe out all of your settings.
It will reset the Nest Thermostat to factory defaults.
That’s why I had you restart your computer first.
Here’s how to reset a Nest Thermostat without further ado:
- Open Settings.
- Go to Reset.
- Select All Settings.
This will delete your schedules and everything else the Nest Thermostat knows about you.
An alternative to this would be to select Network or Schedule instead.
It’ll keep some of your personal information, but it may not fix your issue.
Check the Wiring of the Nest Thermostat
You undoubtedly spent hours trying to figure out how to wire the Nest Thermostat.
Perhaps you had it professionally installed. I don’t blame you for being perplexed by wiring.
One of your wires leading to the Nest may have been damaged by the power loss.
You won’t be able to connect your smart home if the wiring is damaged.
Ensure that the power outage did not cause a circuit breaker to trigger before inspecting the wiring.
If that’s the case, turn it on. If it still doesn’t work, you’ll need to replace the blown fuse.
But, for the time being, we won’t go into too much detail about that.
You’ll need a tester to see if your Nest Thermostat is receiving power.
So, here’s how to check the wiring on your Nest Thermostat:
- Turn off your Nest Thermostat.
- Pull the Nest Thermostat off the wall.
- Check the Rc/Rh wires.
- Check the C wire.
The LED on your voltage tester will turn on if there’s power.
It may also beep. This is an indicator that energy is flowing through the wires.
The Rc and the Rh wires are the power wires.
You may not have both connected simultaneously, and this is normal.
The C wire is a supplemental power wire.
It may be missing too. A trick is to use the G wire from the fan as a C wire.
But only do this after you cut the main power in the breaker box.
If your hot wires aren’t as hot as they used to be, contact an electrician. If everything seems fine, try reconnecting your Nest Thermostat.
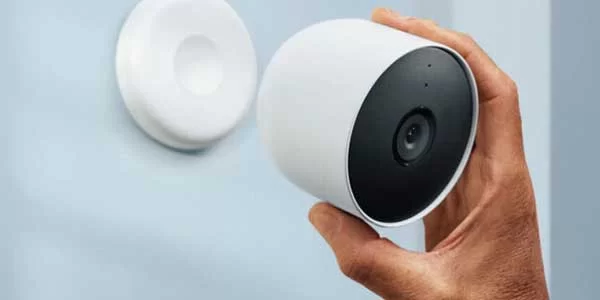
Nest Cam Trouble with Zoom
Nest Cam is zoomed in too far or will not respond or glitch while zooming.
Bad Connection
Ensure that your Wi-Fi router is within range and your Nest Cam is streaming continually and properly. Your connection may just be bad, especially if your mobile device is streaming or using the Nest Cam app as well. Use the ‘’’ bad connection ‘’’ section of this troubleshoot guide to determine whether or not this is the issue.
Smudged Lense
Sometimes the Nest Cam gets smudged or dusty. Wipe the lens of your Nest Cam with a microfiber cloth to make sure that the zoom trouble isn’t stemming from a dirty lens.
Nest Camera No Light
Nest Cam Is Not On
If the indicator light is neither visible nor blinking your Nest Cam may be off. With the Nest, App makes sure that your Nest Cam Camera is on under settings and is properly charged with the USB cord provided. Ensure your electric outlet is working and that the USB power cord is not faulty. Your Nest Cam may not be charged sufficiently. You need to leave Nest Cam plugged continually for surveillance purposes.
Status Light Not Visible
If your Nest Cam is streaming fine but the status light does not seem to be visible, your status light settings may just be set to off. You can turn the status light on or off in the Nest App under camera settings then under lights and sound choose status light.
Related:
About The Author
Hassan Zaka
I am an expert in accounting and possess diverse experience in technical writing. I have written for various industries on topics such as finance, business, and technology. My writing style is clear and simple, and I utilize infographics and diagrams to make my writing more engaging. I can be a valuable asset to any organization in need of technical writing services.
Follow Us:LinkedinTwitter


