Overview of Nest Doorbell Troubleshooting
This article lists common Nest Doorbell (wired and battery) chime and connectivity problems and step-by-step troubleshooting: check power, app chime settings, wiring, transformer compatibility, device temperature, battery charge, Wi-Fi connection, and resets (soft and factory). It covers post-power-outage recovery, restart procedures, distance to router, and notes about extremely hot weather and speaker/display chime devices.
Quick Solutions to Questions related to Nest Doorbell Troubleshooting:
-
How can I fix my Nest Doorbell chime not working?
Check power status, chime settings in the app, hard reset the doorbell, inspect chime and doorbell wiring, confirm transformer compatibility (16–24 V AC, ≥10 VA), and monitor device temperature. -
What should I do if my battery Nest Doorbell chime stops ringing?
Charge the battery, verify chime settings in the Google Home app (cancel Quiet Time), ensure the doorbell and chime device are online on Wi-Fi, and avoid extreme heat exposure. -
How do I restart or factory reset my Nest Doorbell?
Remove the doorbell from the backplate with the release tool, press the reset button (battery: press once; wired: hold ~10 seconds) to restart; hold longer for a factory reset following the article steps. -
Can a power outage cause my Nest Doorbell to stop working and how to recover it?
Yes; after confirming transformer voltage, disconnect the doorbell, bring it inside to warm and power via USB until it restarts, then reinstall outside. -
How do I fix my Nest Doorbell not connecting to the app?
Check camera distance to the router (move camera or router a few feet), restart the doorbell using the release tool, ensure home Wi-Fi works, and restart the router if needed.
There are certain difficulties with nest doorbell that are both wired and battery driven, therefore here is a list of the most common errors and how to solve them in this troubleshooting article.
So here the List of Nest Doorbell Troubleshooting
Why My Nest Doorbell Homekit chime not working?
Start by checking your App settings and making sure the chime is turned on to fix your Nest Hello not ringing chime. Reset the Nest Hello if this doesn’t work. Check the various connections, such as the chime wiring and the doorbell wiring, if neither works.
For Wired Doorbell
- Check the Nest Doorbell’s Power Status
- In the Nest App, look at the Chime Settings
- Hard reset your Nest Hello Doorbell
- Examine the Doorbell’s Wiring
- Check to see whether your doorbell transformer is compatible
- Check the Doorbell Wiring
- Keep an eye on the device’s temperature
For Battery Doorbell
- Check the battery charge
- Check chime settings in the app
- Check Wi-Fi connection
- Extremely hot weather
Related:
Nest Doorbell Troubleshooting For Wired Doorbell
How to fix it:
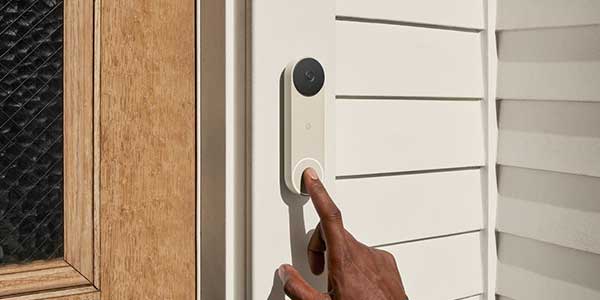
1. Check the Nest Doorbell’s Power Status
The Power Status is one of the first and most important reasons you’ll check the Hello device.
First, make sure it’s turned on and, if it isn’t, look for any loose connections.
An extra adapter over the power socket that is a more snug fit for the device connection can be used to solve loose connection concerns.
2. In the Nest App, look at the Chime Settings
After you’ve confirmed that the Hello device is powered and switched on, double-check that your settings are correct.
The duration of the chime and the type of chime (mechanical or electronic) are two items to consider while configuring.
I accidentally changed my Chime settings when setting up another device a few of times, and it stopped ringing.
Unfortunately, this is a rather common cause of the chime malfunctioning.
3. How to Hard reset your Nest Doorbell
You should perform a hard reset of the Nest Doorbell after confirming the power and settings and then try the following two steps again.
If a setting had changed while it was being used, a hard reset can correct the problem.
- Remove the doorbell its base with the release tool or a thumbtack by inserting it into the hole at the bottom of Hello and pull off the base
- Hold down the reset button on the back (insert the release tool or thumbtack into the hole at the top), and the big doorbell button on the front two buttons on your Hello for about 10-12 seconds:
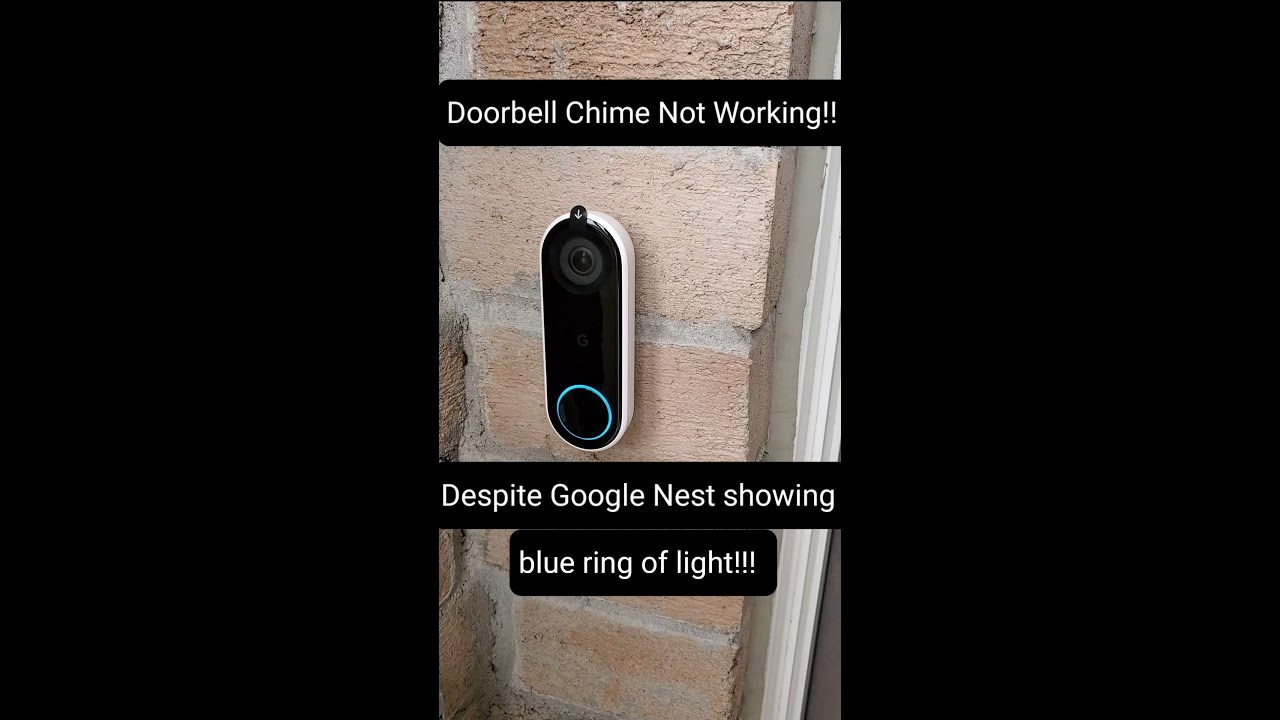
- The doorbell will chime and its light ring will start spinning blue, then flash yellow, and then all the lights will turn off. After that, release the two buttons.
- The factory reset is complete when your camera chimes and the light ring starts slowly pulsing blue.
- After the factory reset, Hello will appear as Offline in the Nest app and will stay this way until you remove it from the app.
4. Examine the Doorbell’s Wiring
It’s time to inspect the wiring now that you’ve completed the preliminary tasks. The chime wires could be the cause of the Chime’s failure.
This hasn’t happened to me too much, but given the troubleshooting process, it’s a useful check to perform before calling customer service or considering replacing the chime.
The procedure will differ depending on whether your chime is mechanical or electronic.
If your chime is mechanical, begin by removing the cover and pressing the ‘Hello’ button to see if it has begun to ring.
If it has, it is possible that the cover was pressing against the chime’s wires, preventing the chime from ringing.
If your Chime is electronic, ensure sure all of the cables are connected correctly according to the manufacturer’s instructions.
After that, inspect the interior to ensure no cables were broken during the installation.
Finally, check sure no wires come into contact with one another or with bare metal. If your chime has more than three wires, you should seek assistance from a local electrician.
5. Check to see whether your doorbell transformer is compatible
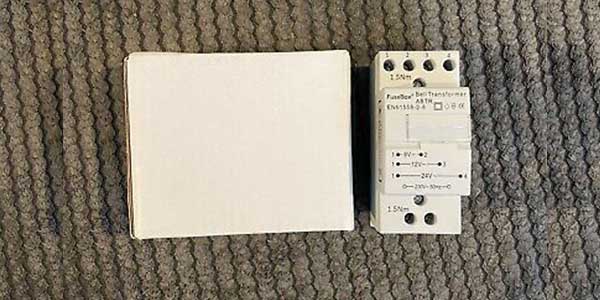
The Hello device requires a very particular rating of the power supply that requires a specific transformer.
The compatibility ratings of the Hello device are 16 – 24 V AC and at least 10 VA in North America.
Even if the transformer mentions the above rating, it might not be able to deliver. So try replacing the transformer or contacting the local electrician to check for any other power delivery failures.
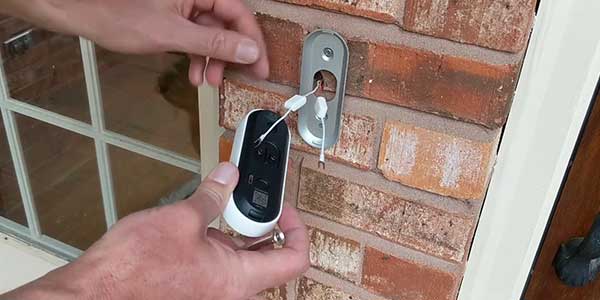
6. Check the Doorbell Wiring
It’s conceivable that a wire broke loose or that the wires aren’t tight enough when you placed Hello on the back plate.
So, first, double-check that the Hello’s cables are firmly connected.
To check, use the release tool included in the package to remove the Hello doorbell’s backplate.
Next, inspect the wires for damage and, if necessary, reconnect the plate while holding the wires off with a screwdriver.
7. Keep an eye on the device’s temperature
Assume the Chime is put in an environment where it will be exposed to the elements, such as direct sunshine or cold temperatures.
When the internal circuit reaches operational temperature, it may stop working and then start working again.
Even if the chime does not sound, you will still receive notifications on the linked devices.
Nest Doorbell Troubleshooting For Battery Doorbell
1. Check the battery charge
The app sends you frequent messages to alert you that the battery on your doorbell is low and that you need to charge it. Take it off the backplate and charge it with the provided USB-C cable if you didn’t have a chance to charge it before the battery died.
2. Check chime settings in the app
Your current settings may prevent the chime from ringing. For example, someone who shares access to your Nest home may have turned the chime off or changed the chime duration in the app.
Home app
- Open the Google Home app.
- Tap your doorbell.
- Tap More – Quiet Time, then tap Cancel if it’s active.
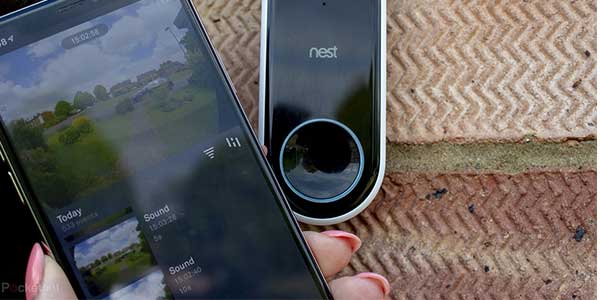
3. Check Wi-Fi connection
Check that your doorbell isn’t listed as offline in the app. If it is, use the articles linked below to troubleshoot.
- Get Nest doorbell visitor announcements on a speaker or display
- Troubleshoot Wi-Fi and connection issues
Wireless doorbell installations typically use a Google or a compatible speaker or display to sound the chime. Make sure that the device you use for the chime is connected to Wi-Fi and correctly set up in the app.
4. Extremely hot weather
See the details of point 7 in the wired doorbell section.
Why My Nest doorbell not working after power outage?
How to fix it:
After checking the transformer is working fine and delivering 16 to 24 volts, then the most common way to fix this is the below steps.
- Disconnected it, brought in the house.
- Let it warm up and then plugged it in via the USB and it came to life.
- Put it back outside and it’s working normally.
Why My Nest doorbell not connecting to app?
1. Check your doorbell camera’s distance to the router or access point
Your camera may be out of range or it may be too close to the router.
- Try re-connecting your camera to the app after moving it closer to your Wi-Fi router or access point.
- If you can’t simply relocate your camera because it’s already installed, consider moving your Wi-Fi router or access point closer to it instead.
- Important: Placing your camera too near to the router may result in connectivity issues. Make an attempt to move it a few feet away.
2. Restart your Nest Doorbell camera
- To restart your doorbell, disconnect it from the backplate with the tool that was included in the box. You can also use a thumbtack or paper clip.
- If it is hardwired, leave the doorbell connected to the wires.
- On the back of the doorbell, insert the release tool, thumbtack, or paper clip into the hole near the top.
- If you have a battery powered doorbell: Press the reset button once and wait for the doorbell to restart. You’ll hear a chime and the light on the front of the doorbell will turn white.
Note: Make sure you don’t hold down the reset button longer than 20 seconds or it will be reset to factory defaults.
- If you have a wired doorbell: Hold down until the light on the doorbell turns off (about 10 seconds) then release.
Note: Make sure you do not hold down the doorbell button on the front of Nest Doorbell (wired) or it will be reset to factory defaults.
After the camera restarts, there should be a solid green light on the front of your camera to show that it’s connected, and it should come back online in the app within a few minutes.
Note: In some rare cases, you may need to reset your doorbell and start app setup from the beginning, but complete all troubleshooting steps in this article first.
3. Make sure your home Wi-Fi is working
4. Restart your router
Why My Nest Doorbell Not Connecting To Wi-Fi?
A separate topic in detail of why Nest Doorbell Not Connecting to Wi-Fi and how to fix it.
About The Author
Hassan Zaka
I am an expert in accounting and possess diverse experience in technical writing. I have written for various industries on topics such as finance, business, and technology. My writing style is clear and simple, and I utilize infographics and diagrams to make my writing more engaging. I can be a valuable asset to any organization in need of technical writing services.
Follow Us:LinkedinTwitter


