Overview of Honeywell Pro Series Thermostat Troubleshooting
This article provides step-by-step troubleshooting for Honeywell Pro Series thermostats, covering blank displays, battery installation, mode setting, resets, lock/unlock, error codes, cooling/heating issues, and model-specific notes for T4/T6. It advises checking power, wiring, filters, and settings, and when to contact Honeywell support or an HVAC technician. Common error codes and user-resolvable codes for smart models are listed, plus helpline numbers and reset procedures.
Quick Solutions to Questions related to Honeywell Pro Series Thermostat Troubleshooting:
-
How do I fix a Honeywell thermostat with no display?
Check power at the breaker or fuse, replace batteries if used, reset the thermostat by cutting power briefly, inspect and repair wiring, and contact Honeywell support if unresolved. -
Can I use batteries in my Honeywell Pro thermostat and how often should I replace them?
Batteries provide backup if not wired to AC; replace when low-battery icon appears and change yearly or before long absences; use alkaline batteries. -
What should I do if heating or cooling does not respond?
Set correct Mode (Heat or Cool), ensure setpoint is beyond current temperature, check circuit breaker and power switch, confirm furnace door is closed, then wait about 5 minutes. -
How do I reset a Honeywell Pro series thermostat?
Open advanced menu via Menu, choose Advanced Reset then Factory and confirm; on T4/T6 press Menu and + together for 3–5 seconds to access ISU and perform reset steps. -
How do I unlock or lock a Honeywell Pro thermostat?
Press Menu, navigate to LOCK with + or -, press Select, choose OFF, PART, or ON, then press Select; to unlock enter password 1234 using +/-, Select for each digit. -
What do common Honeywell error codes like E1, E3, or 164 mean?
E1/E2 indicate temperature sensor issues, E3 indicates internal memory/programming error, and 164 (smart models) means heat pump requires servicing; some codes require technician service.
While dealing with Honeywell home pro series users frequently experience a lot of problems with their HVAC system, air handler, furnace and temperature setting. So, here is a list of most frequent issues encountered by customers with comprehensive guide, you can solve your issues by following instructions step by step.
So here are Honeywell Pro Series Thermostat Troubleshooting
Honeywell Thermostat Troubleshooting No Display
- In case, if your Honeywell thermostat is displaying a blank screen, you need to follow the instructions given below to solve this No display on screen problem.
- Check the power source: First of all, you must confirm that power supply to your thermostat is operating correctly. Verify this by checking the fuse box or circuit breaker, if the power supply to thermostat is switched off, turn it on and again make sure the thermostat if display is operating properly.
- Replace the batteries:if your thermostat is also operated by Batteries then thoroughly inspect the batteries carefully and if needed, replace them, as low battery can also result blank display.
- Reset the Thermostat: examine the settings of your thermostat and restore them to default settings. To achieve this, first of all you have to unplug the thermostat from the wall and temporarily cut off the power source for time being. Now, reconnect the thermostat power and check if the display is operational.
- Check the wiring: next step is to examine the wiring connection of Thermostat and HVAC system. Check if all the wires are connected properly and are damage free. In case of damaged wire make sure to repair them or replace them if needed.
- Contact customer support: if all the previously-mentioned guides did not help you to solve your blank screen troubleshooting, then you need to call for assistance. Thus, contact Honeywell customer support service to provide you a technician who can further investigate your problem and suggest you a solution.
By following these steps, you should be able to fix blank display issue on your Honeywell thermostat and take back control of your HVAC system.
How to Installed Batteries?
- Using Batteries is optional as they are used to provide backup power in case your thermostat is wired in a way to run on AC power. If your thermostat Honeywell was not wired to run on AC power, then batteries are required.
- Once the low battery icon appears, install new batteries as soon as possible as the low battery sign appears at least two months before the complete depletion of batteries.
- Make sure to replace your batteries once every year or in case you are leaving your home for duration of a month or more, even if the sign of low batteries does not appear.
- While installing batteries try to insert them within two minutes so that you will not have to reset the Time and Date as all the other settings are stored permanently in the memory and do not require battery power.
NOTE: if you are replacing your old batteries with a new one then alkaline batteries are the most recommended ones.
Learn More about each series with model Honeywell battery replacement:
Heating or cooling system does not respond
- Press Mode button to set system Heat (see below)
Make sure the desired temperatures for your programmable thermostat are set higher than the inside temperatures to ensure efficient operation of your furnace and air conditioner.
- Press Mode button to set system Cool (see below)
Make sure the desired cooling temperature is set lower than the inside temperature of the air conditioner.
-
- Inspect the circuit breaker and if necessary, reset it.
- Make sure the power switch for the heating & cooling system is on.
- Check and make sure if the door of furnace is closed completely.
- Now Wait for 5 minutes and check if the system is responding.
How to Press the Mode button To set the System’s temperature settings, reset, and power?
- On programmable touchscreen press the Mode button, to cycle the next available System mode.
- Go through all the modes until the desired system mode displays and now leave it to activate.
NOTE: Available System modes, including technician mode, vary by model and system settings.
System modes: ‒ Auto‒ Heat‒ Cool‒ Off‒ Heat
Honeywell T4, T6 Pro no programmable touchscreen option
Lack of Touchscreen Option
The T4 and T6 Pro models have gained a lot of popularity for their advanced features and remarkable performance. However, the lack of touchscreen option has disappointed the customers. T4 and T6 pro models do not offer touchscreen interface like all other models of the series which is a really big drawback for those users innovative and interactive experience.
Comparison Table
To better understand the implications of this limitation, let’s compare the features, pros, and cons of the T4 and T6 Pro models with and without a touchscreen option:
|
Features |
T4 and T6 Pro with Touchscreen |
T4 and T6 Pro without Touchscreen |
|
User Interface |
Interactive and intuitive touchscreen |
Traditional button interface |
|
Navigation |
Easy navigation through touch gestures |
Navigation through buttons and menus |
|
User Experience |
Enhanced user experience with direct interaction |
User experience relies on button presses |
|
Customization |
Personalize settings with ease on the touchscreen |
Limited customization options through buttons |
|
Accessibility |
Quick access to features with a tap or swipe |
Features accessed through menu navigation |
Honeywell T4, T6 Pro programmable touchscreen option
- Go to the home screen setting and press the MENU button.
- Then press “+” until “prog” is displayed on the screen.
- Then press SELECT to edit the program.
Then Check ISU Settings
- Press and hold the CENTER and + buttons for approximately 3 seconds to enter the advanced menu.
- Press Select to enter ISU.
- Go to menu setup option and press select to cycle.
- Press + or – to change values or select from available options.
- Press Select and confirm your settings or press Back to ignore changes and return to the ISU menu screen to continue editing another setup option.
- Press Home button and return to Home screen to finish the setup process and save your setting
Temperature settings do not change
- If the display says “unlock“.
- To cycle to the next available System mode setting Press the Mode button.
- Now cycle through all the modes until your required System mode is displayed, leave it to activate and function .
- If not, verify you are in the correct mode (heat, cool, em heat, or auto); (see up of how to Press the mode button to set the system)
- If the temperature sensor is in the correct mode, but you cannot set the heat from 40 °F to 90 °F (4.5 °C to 32 °C), or set the setting for cooling from50 °F to 99 °F (10 °C to 37 °C), you can also have range-stops to restrict your setting
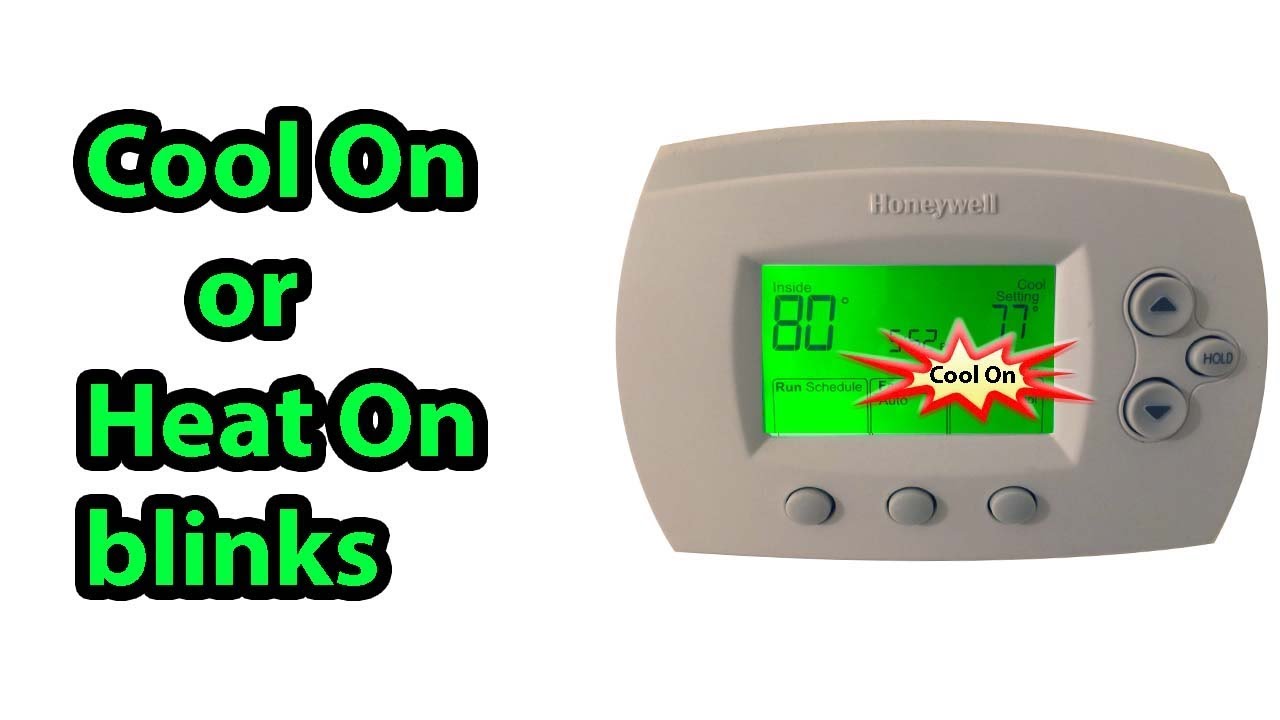
“Cool On” or “Heat On” is flashing
For your cooling system to completely reset and air conditioner to restart safely without having any damage to the coil or compressor the system will take at least 5 minutes.
Honeywell Pro series Thermostat Reset
- Press and hold the menu button until the advanced menu opens.
- Go to “Advanced Reset”using left and right arrows.
- Press on “Factory”
- Press on the tick iconto confirm the rest.
2nd Method of Honeywell Pro series Thermostat Reset (T4, T6)
- Press the Menu and + button simultaneously.
- Hold for 3 to 5 Seconds.

3. Until you see ISU pop-up display.
4. Next press the Select and then Home button.

Done.
In case you have other Honeywell pro series thermostat to reset then then there is a sub topic where you can find all series thermostat reset guide.
How to unlock/lock Honeywell Pro thermostat
The thermostat Honeywell has 3 settings for the screen lock: Unlocked, Partial Lock, and Full Lock
-Unlocked: All settings are adjustable
-Partial: Setpoint changes are allowed. All other settings are locked
-Full: No changes are allowed
When the air conditioning system is active, a cooling coil problem may arise. In this case, a “lock” icon will be displayed on the thermostat screen.
- Press Menu on the thermostat.
- Press + or – to go to LOCK. Press Select.
- Press + or – to go to OFF, PART, or ON, and then press Select.
- To unlock the keypad, press the CENTER button and then enter the password “1234”. To enter the password, press + or – to change the first digit of the number. Then press Select. Repeat this process to enter the second through fourth digits of the number. Once all four numbers have been entered, press Select again.
- This will unlock the keypad.
- If the code is incorrect, the screen will flash the lines “”–“”.
- Press Back to go back a step to enter the correct number and press Select.
If these above steps failed to resolve your problem with air cooling, then follow this guideline. Click here
Note: In addition to troubleshooting thermostat errors, a complete list of the best Honeywell pro series with features and which one you should select.
Before getting help with a cooling problem from an air conditioning manual or professional, take a quick overview of what you should do to fix the issue by following these steps.
For Programmable Honeywell Thermostat Troubleshooting
In case the display is blank:
- Replace batteries
- Check circuit breaker
- Ensure all panel doors of the indoor unit are closed
- Verify power connection to furnace or AC unit by checking switch near indoor unit
If the display is on but heating/cooling isn’t working:
- Verify date/time settings and temperature programming
- Check wires and jumper settings after removing cover (e.g., “HE” for electric furnace, “HG” for gas furnace)
- Test analog thermostat by adjusting temperature and waiting
- If above steps don’t work, contact HVAC repair company.
For Smart Thermostat Troubleshooting
Smart thermostats have a significant advantage in providing error codes for cooling issues.
The following error codes require service:
- 164: Heat pump requires servicing
- 168: Wi-Fi radio error
- 170: Internal memory error
- 173: Error with thermostat temperature sensor
- 177: Error with indoor temperature sensor
- 178: Error with outdoor temperature sensor
Error codes that can be resolved by the user include cooling.
- 171: Set date and time to schedule the thermostat
- 181/182: Replace air filter
- 183: Clean the humidifier tank and replace the filter
- 185: Replace the dehumidifier filter
- 388: Register online for remote access and exterior temperature
- 399: No internet connection
- 400: Weak Wi-Fi signal
- 508: Wi-Fi not connected
Decoding other Honeywell Thermostat Error Codes
Honeywell thermostats are reliable and efficient at controlling temperature. But sometimes they can have errors. Having knowledge about error codes can help you solve some general problems.
Here are some commonly faced Honeywell thermostat error codes and their explanation:
- “E1” or “E2”– these error codes are usually displayed due to some issue with the temperature sensor of thermostat. It can be a damaged sensor or may be some wiring issue. To solve this problem reset your thermostat by turning off the power supply and after few seconds turn it on again and in case issue still continues you will have to change your thermostat.
- “E3” – If this error code appears it indicates problem with the internal memory or programming of thermostat. To solve this problem reset your settings to default factory settings, to do so press restart button follow the instructions given on manual and if it does not work you need to call Honeywell customers support for help.
- “E4” – if this error code appears it means that there is a problem with communication between thermostat and HVAC system. So, confirm that cables connection of thermostat to HVAC is safe and fully operational. If wiring is working properly then you should consult to a technician who can examine the thermostat and identify the issue.
- “E5” – This error code describes an issue in the power supply of thermostat. To manage this problem, examine the power supply and check if thermostat is receiving fully supply and is properly connected with the power source. If there is no problem with the power supply then there can be a problem with some internal component and that will require the inspection of some expert technician for inspection or it may need replacement.
- “E6” – This error code describes an issue with the outdoor temperature sensor. Ensure that the sensor is properly installed and fully connected. If it is fully functional then you may need to change the outdoor temperature sensor.
It is crucial to remember that these error codes can vary based on the particular model.
There are common problems that you may encounter when troubleshooting Honeywell thermostat difficulties. Here are a few basic explanations to help you figure out the problem that you are facing.
Troubleshooting Honeywell Thermostat Errors
When troubleshooting Honeywell thermostat errors, there are several typical issues that you can run into. Here are some basic solutions for you to solve your problem.
- Check the power supply: First of all, verify that the power supply source is properly functional. Next, examine the circuit breaker or fuse switch to ensure that it hasn’t tripped. Try Replacing the batteries if your thermostat runs on batteries to confirm that batteries are working fine.
- Verify the thermostat settings: counter-check the thermostat settings to make sure that they are accurate and according the manual guide. Check again that the thermostat is in the proper mode (heat, cool, or auto) and that the temperature is set in the required range.
- Clean the thermostat: Rubble and dust can stop the thermostat from working efficiently. To clean the thermostat use a soft cloth and remove any dirt or dust that might be hindering the thermostat from its proper operation.
- Calibrate the thermostat: You might need to adjust your thermostat if the temperature readings on your thermostat display are not exact. To set this, follow the instructions on the user manual to know how to change it for the specific Honeywell thermostat model you own.
- Reset the thermostat: Resetting your thermostat off and on can resolve a lot of small problems. To do this, first press the reset button with some small tool and follow the directions in the user manual.
- Check the wiring: confirm that your thermostat’s wiring is installed appropriately by inspecting it. If there are any damaged or loose ends in the wiring then they need to be replaced or repaired immediately.
- Update the firmware: Look for available updates if your Honeywell thermostat is connected to Wi-Fi and is receiving firmware updates. Because updating the firmware can enhance overall efficiency and resolve compatibility problems.
In case you have attempted all the above-mentioned troubleshooting techniques and your Honeywell thermostat is still giving you problems You may need contact with a professional HVAC professional or get in touch with Honeywell customer care
Honeywell Thermostat not Cooling Why and How to fix it?
There could be a number of reasons why your Honeywell thermostat isn’t cooling. These are some actions you can take to identify the cooling issue and possibly resolve it.
Check the Thermostat Settings:
Ensure that the thermostat is set to “Cool” mode. Sometimes, it can mistakenly be set to “Heat” or “Off.”
Check the Temperature Setting:
Ensure that the temperature setting on the thermostat is set lower than the current room temperature. If it is set higher, the air conditioner might not turn on.
Check the Power:
Ensure that the thermostat has power and if it is batter powered try replacing the batteries to make sure that if there is a problem with batteries. In case it is wired to yourHVAC system, examine the circuit breaker or fuse box to confirm that power is connected the system.
Check the HVAC System:
Confirm that your air conditioner is functional. Check if the outside unit is functioning, and notice for any unfamiliar noises or vibrations and if it is not operating there might be a problem with electrical connections or compressor. In this case you need to contact HVAC professional technician for analysis.
Clean or Replace Air Filters:
Dirty or clogged air filters can restrict airflow, reducing the cooling efficiency of your HVAC system. verify and clean or replace the air filters if necessary. Dirty filters can lead the evaporator coil to freeze, leading to reduced cooling routine.
Check for Ice:
If you notice ice buildup on the indoor evaporator coil or refrigerant lines, turn off the AC and let it thaw completely. This may happen due to limited airflow or low refrigerant stages. If it remains to happen, it is best to call a professional technician to identify and repair the issue.
Inspect Air Vents and Registers:
Make sure that all the air vents and registers in home are open and unhindered as blocked vents can hinder the distribution of cool air.
Thermostat Location:
Make sure the thermostat is not exposed to direct sunlight, drafts, or heat sources, as this can affect its temperature readings and cooling control.
Check the Wiring:
Check the wiring connections of both the thermostat and HVAC system. Faulty wires can disturb communication of thermostat and cooling system.
Schedule Professional Maintenance:
If you’ve tried the above steps and your thermostat still isn’t cooling, it’s a good idea to schedule professional HVAC maintenance.
Honeywell Thermostat not Turning on
Checking power supply problems, such as dead batteries or tripped circuit breakers, is crucial if your Honeywell thermostat isn’t turning on. Additionally, confirm that the thermostat is adjusted to the appropriate temperature for your needs (heating or cooling). If the situation persists, get in touch with a professional to identify and resolve any underlying HVAC system problems.
Honeywell Thermostat Heat Not Working On Auto
The auto settings on your thermostat might not work if there are problems with the wiring. Fix bugs and glitches in the software to change auto settings. On the other hand, your thermostat’s battery could be dying, the sensor might not be working, or the feature might not be on. it is not possible to explain in detail here, therefore a complete researched topic on this particular issue for the user to benefit from it.
Honeywell Pro Series Thermostat Manual
- T4 Pro
- T6 Pro
- RTH5160 Non-Programmable Thermostat
- WiFi Touchscreen Thermostat Installation Manual
- WiFi Color Touchscreen Thermostat
- VisionPRO WiFi Thermostat
- How to Program Honeywell T4 and T6
Honeywell Thermostat Helpline for the United States
| Thermostats, Furnace Filters, and Whole House Humidifiers | 800-468-1502 |
| Wi-Fi Digital Thermostats | 855-733-5465 |
Honeywell Thermostat Helpline for International Customers:
International: 001 (480) 353-3020
Hours: 4:00 a.m. Monday through 11 a.m. Saturday (GMT)
If you need Honeywell thermostat help from their Support… Then Click Here or get help from outside service experts.
Frequently Asked Questions:
Is There A Reset Button On A Honeywell Thermostat?
The location and design of the reset button on a Honeywell thermostat can vary depending on the model you have. Some Honeywell thermostats have a small reset button located on the thermostat itself, often behind the thermostat’s cover. This button is usually labeled “Reset” or “System Reset.”
What Happens If I Push The Reset Button On My Thermostat?
Pushing the reset button on a thermostat will clear any current settings or programming and return the thermostat to its factory defaults. This may include thermostat temperature settings, schedule programming, and other preferences. It is typically used as a troubleshooting step when the thermostat is not working correctly or as a way to clear settings before reprogramming the thermostat.
What does a failed thermostat look like?
A failed thermostat can display several signs, including:
- Inaccurate temperature readings: The thermostat may display a temperature that is different from the actual room temperature.
- Inconsistent performance: The thermostat may turn on and off unexpectedly, or fail to turn on at all.
- No display: The thermostat may have no display or the display may be blank.
- Dead batteries: A battery-operated thermostat may display a low battery warning or not turn on at all if the batteries are dead.
- Thermostat Errors messages: Some thermostats may display error messages or flashing lights indicating a problem.
- Physical damage: In some cases, a thermostat can have physical damage such as broken wires or loose connections.
- Inability to change settings: Some thermostats may not allow you to change the temperature or settings, indicating a failure in the control system.
Why is my Honeywell Pro Series not Working?
You might want to see this:
About The Author
Hassan Zaka
I am an expert in accounting and possess diverse experience in technical writing. I have written for various industries on topics such as finance, business, and technology. My writing style is clear and simple, and I utilize infographics and diagrams to make my writing more engaging. I can be a valuable asset to any organization in need of technical writing services.
Follow Us:LinkedinTwitter